How to Record TikTok Live Streams: Complete Beginner’s Guide
Recording TikTok Live streams means capturing a live broadcast for later viewing using native screen recording or dedicated software. While TikTok allows creators to download their own replays for up to 30 days via the TikTok Studio dashboard, viewers and creators looking to archive content beyond this window must utilize external methods.
Whether you are a creator repurposing content or a viewer saving educational sessions, knowing how to record TikTok Live streams reliably is essential for long-term content strategy. Built-in mobile screen recorders provide a quick, manual solution for on-the-go capture, whereas desktop-based tools like OBS Studio or specialized cloud recording services offer professional-grade quality and automated workflows.
This guide covers the full spectrum of methods for 2026, including the necessary legal considerations and technical best practices to ensure your archives remain high-quality and compliant.
Why You Need This Guide
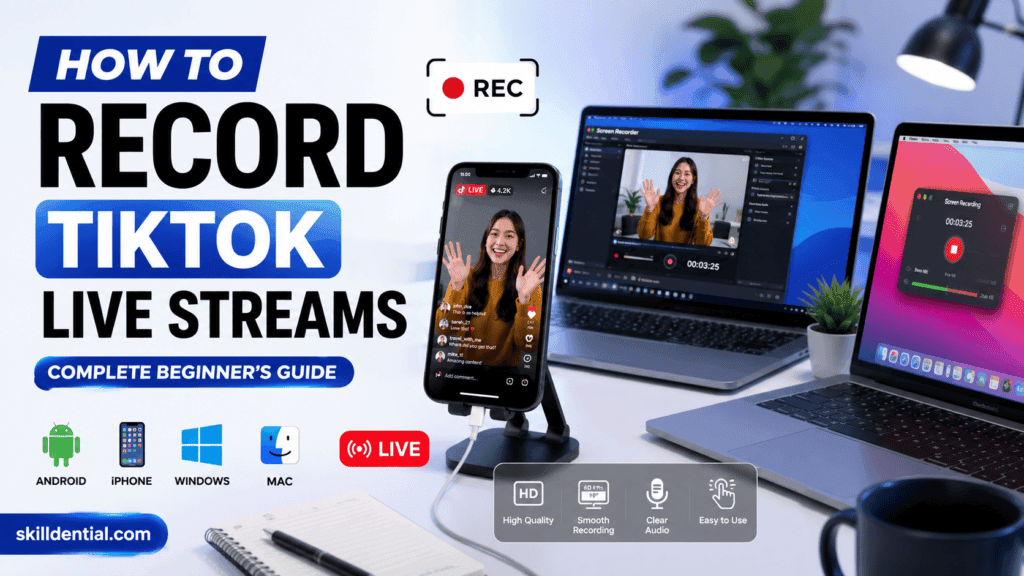
TikTok Live streams disappear the moment they end unless the creator explicitly saves a replay. If you have missed a valuable tutorial, performance, or strategic session, mastering how to record TikTok Live streams is the only reliable way to maintain a permanent archive.
This guide is designed for:
- Viewers: Those wanting to save educational content or entertaining sessions for offline viewing.
- Creators: Professionals needing to archive their own broadcasts for content repurposing, AI-driven analysis, or audience growth.
- Beginners: Users looking for simple, step-by-step instructions across mobile and desktop platforms.
You will learn the legal and ethical considerations of digital archiving, how to record on iPhone, Android, Windows, and Mac, how to select the right software for your specific needs, and how to optimize recording quality while avoiding common technical pitfalls.
A Note on Legal & Ethical Considerations
Before you begin, it is critical to understand that how to record TikTok Live streams involves navigating copyright and platform policies.
- Consent: Streams are the intellectual property of the creator. Recording content for personal, offline use is generally accepted, but redistributing or monetizing content you do not own can lead to DMCA takedowns or platform bans.
- Policy Compliance: TikTok’s Terms of Service discourage unauthorized redistribution. Always prioritize obtaining permission if you intend to repurpose a third party’s stream for public-facing content.
Is It Legal to Record TikTok Live Streams?
Understanding the legal landscape is essential when learning how to record TikTok Live streams. While the technical act of screen recording is simple, the legal implications depend entirely on your intent and how the recorded content is used.
The Core Principle: Ownership vs. Access
Creators retain the copyright to their live broadcasts the moment they are created. While TikTok’s platform architecture allows for viewing, it does not grant users a license to distribute or claim ownership of that content.
- Personal Use: Recording a stream for your own private, offline archive is generally considered low-risk. However, even for personal use, you are essentially creating a copy of someone else’s intellectual property.
- Public Redistribution: Posting recorded clips to other social media platforms (YouTube, Instagram, or re-uploading to TikTok) without the original creator’s explicit permission is a direct violation of copyright law and TikTok’s Community Guidelines. This can result in DMCA takedown requests, strikes against your account, or permanent bans.
- Commercial Intent: If you record a stream to monetize it (e.g., placing it behind a paywall, using it in a brand advertisement, or generating ad revenue from the clip), you are at high risk of legal action. Platforms have strict policies against “reproduced content” and unauthorized commercial use.
Key Considerations for Your Archive Strategy
To ensure your workflow remains compliant and ethical, follow these guidelines:
| Use Case | Legal Standing | Best Practice |
| Personal Archive | Generally permitted | Keep private; do not share or upload. |
| Educational/Review | Potential “Fair Use” | Keep clips short, provide commentary, and attribute. |
| Repurposing (Public) | Infringement | Always obtain written permission from the creator. |
| Your Own Lives | Fully Legal | Use TikTok’s native “Download” tool in Creator Tools. |
Risk Mitigation Checklist
- Prioritize Native Tools: As a creator, use TikTok’s built-in archive features. They are the only “officially sanctioned” way to save your own content.
- Seek Written Consent: If you are a creator planning to repurpose another person’s content, reach out via business email or DM. Keep a record of their permission.
- Understand Platform Policy: TikTok’s Reproduced Content policies explicitly prohibit the use of pre-recorded streams as “Live” content. Do not attempt to re-stream archived footage as if it were a new, live broadcast.
- When in Doubt, Don’t: If you cannot verify that you have the rights to the content, treat it as off-limits for any public-facing strategy.
Can You Record Someone Else’s TikTok Live?
Yes, technically, it is possible to capture any public TikTok Live using your device’s native screen recording features or desktop-based capture software. However, there are critical nuances regarding platform behavior and responsibility you must understand before attempting this.
Platform Behavior: What Actually Happens?
A common misconception is that the app will alert the creator if you begin recording. Based on current platform architecture:
- No Notifications: TikTok does not send alerts to the host or other viewers when you start a screen recording or take a screenshot. This applies to Lives, standard videos, profiles, and even DMs.
- Viewer Visibility: Your username remains visible in the “viewer list” as a standard participant. Recording the session does not hide your presence or activity.
- System Indicators: While TikTok won’t notify the host, your own device might. Features like the iOS status bar (which turns red during recording) or Android system-level banners are visible to you, but these are system processes, not TikTok alerts.
Critical Limitations
Understanding the functional gaps is vital for your workflow:
- The 30-Day Window: TikTok’s native replay feature is restricted to creators only. They can download their own broadcasts for up to 30 days via their Creator Tools. As a viewer, you have no official way to request or download a “replay” from the app.
- Quality Variance: Using mobile screen recorders often captures interface elements (the chat box, gift animations, and creator icons). If your goal is high-quality repurposing, mobile recording is rarely sufficient compared to desktop capture tools that allow for cleaner, window-specific recording.
- Ethical and Legal Responsibility: Just because you can record without detection does not mean you should distribute that content. As discussed previously, unauthorized recording for public redistribution or commercial use carries significant legal risk.
Summary Checklist for Viewers
| Feature | Reality |
| Creator Alert | No (TikTok does not notify) |
| Your Visibility | Yes (You remain in the viewer list) |
| App-Native Download | No (Viewer cannot download) |
| Legal Status | Personal-use only (Redistribution requires consent) |
How to Record TikTok Live on iPhone (iOS)
The built-in iOS Screen Recorder is the most efficient, no-fluff method to capture content. It is privacy-friendly, requires no third-party installations, and integrates directly with your Photos app.
Setup (One-Time Configuration)
Before you start, ensure the tool is accessible in your Control Center:
- Open Settings > Control Center.
- Scroll down to the More Controls section.
- Tap the green + icon next to Screen Recording. It will move to the “Included Controls” list.
How to Record
Follow these steps to initiate your capture:
- Prepare: Open the TikTok app and navigate to the Live stream you intend to record. Let the stream fully load to avoid initial buffering artifacts.
- Access Control Center: Swipe down from the top-right corner of your screen (or up from the bottom on devices with a Home button).
- Enable Audio (Crucial): Long-press (or 3D Touch) the grey Record button. This opens a sub-menu. Ensure the Microphone is toggled ON if you want to capture internal audio alongside the stream.
- Start: Tap Start Recording. A 3-second countdown will appear.
- Capture: Close the Control Center and focus on the Live stream.
Stopping and Saving
- To end the session, tap the red status bar at the top of your screen.
- Tap Stop in the confirmation prompt.
- Your recording will automatically save to your Photos app.
Pro-Tips for High-Quality Archives
To ensure your recording meets the standard for professional repurposing or long-term archiving, apply these high-leverage tactics:
- Eliminate Notifications: Always toggle Focus (Do Not Disturb) mode on before starting. A stray text or notification banner will permanently burn into your recording.
- Storage Management: High-definition screen recordings consume significant space. Ensure at least 5–10 GB of free storage before beginning. If the storage fills mid-stream, the recording will stop abruptly and may fail to save properly.
- Connection Stability: Use a stable Wi-Fi connection. If your mobile data fluctuates, the stream quality will drop, and your recording will capture those compression artifacts and buffering stutters.
- Clear the View: To get the cleanest shot, wait for a moment when the chat overlay or “Gift” animations are minimized, or tap a neutral area of the screen to hide non-essential UI elements if the creator allows it.
- Hardware Advantage: iPhone 11 and later models support high-bitrate, 1080p/60fps recording, providing the best source material for later editing or AI-driven analysis.
How to Record TikTok Live on Android
Most Android devices running Android 11 or later feature a robust, built-in screen recorder. Using this native utility is preferred over third-party apps to avoid intrusive ads, subscription paywalls, and potential security risks.
Setup (Quick Settings Configuration)
Before starting, ensure the recorder is easily accessible:
- Swipe down twice from the top of your screen to fully expand the Quick Settings panel.
- Look for the Screen Recorder tile. If it is missing, tap the Edit (pencil) icon to find it in the drawer and drag it into your active Quick Settings menu.
How to Record
- Open TikTok: Locate the Live stream you wish to capture and ensure it is playing clearly.
- Access Recorder: Swipe down to your Quick Settings and tap Screen Recorder.
- Configure Audio: A prompt will appear. Select “Media sounds” to capture the stream’s audio directly, or “Media sounds and mic” if you intend to add commentary.
- Initiate: Tap Start. A countdown will trigger (usually 3 seconds) before recording begins.
- Stop: When finished, tap the floating control bar (or the notification in your shade) to stop the recording. It will automatically save to your device’s Gallery or Google Photos.
Third-Party Alternatives
If your device lacks a native recorder or requires advanced settings (such as custom frame rates or overlays), use these industry-standard tools:
- AZ Screen Recorder: Excellent for high-resolution (1080p) captures without root access.
- XRecorder: Features a convenient floating bubble for quick start/stop control and basic post-recording trimming tools.
Pro-Tips for Android Users
- Audio Routing: The most common failure point on Android is capturing room noise via the microphone instead of the stream’s internal audio. Always verify your sound settings in the recorder’s pre-start prompt.
- System Interference: Enable “Do Not Disturb” or “Gaming Mode” to prevent incoming messages or system alerts from overlaying your capture.
- Power & Heat: Screen recording at 1080p is resource-intensive. Keep your device plugged in if you are recording a long session, and disable Auto-Brightness to keep the exposure consistent throughout the capture.
- Storage Economics: At 1080p, expect to use roughly 2–4 GB per hour. Clear your cache or move old files to the cloud before starting a long-duration record.
The video above provides a clear, step-by-step visual demonstration of the settings you need to configure to capture both high-quality video and clean internal audio on your mobile device.
How to Record TikTok Live on Windows PC
For high-fidelity, professional-grade recording on a Windows machine, OBS Studio is the industry standard. It offers precise control over audio routing, window selection, and encoding settings, which are essential when you need clean footage for repurposing.
Setup (Preparation)
- Download: Install the latest version from obsproject.com.
- Access TikTok: Open TikTok in a web browser (Chrome or Edge) or use an Android emulator like LDPlayer if you need the mobile interface experience.
- Optimize Settings:
- Open Settings > Output.
- Set Recording Format to
.mp4or.mkvfor maximum compatibility. - Set Video Bitrate between 6000–10000 Kbps for 1080p quality.
- Set Encoder to NVENC (NVIDIA) or AMF (AMD) to offload processing from your CPU.
Configuring the Source
- In OBS, locate the Sources dock.
- Click + and select Window Capture.
- Select your browser or emulator window.
- Use the Transform (Ctrl+F) tool to fit the capture to your canvas, ensuring you crop out non-essential browser UI elements.
Recording
- Click Start Recording in the OBS control panel before the action begins to ensure you don’t miss the start of the stream.
- Once finished, click Stop Recording. Your file will be saved to the destination folder defined in Settings > Output > Recording Path.
Alternative: Windows Game Bar
For quick, one-off captures where setting up OBS is overkill, Windows has a built-in utility:
- Access: Press
Win + G. - Capture: Click the Record button or use the shortcut
Win + Alt + R. - Limitations: This tool is less reliable for specific window capturing and may struggle to isolate browser audio from other system sounds.
Pro-Tips for PC Users
- System Audio Routing: If you find the audio capture is “thin” or includes mic noise, ensure you are capturing the application’s audio source directly in the Audio Mixer rather than relying on global “Desktop Audio.”
- Resource Management: Recording at 1080p will consume 3–7 GB per hour. Ensure your drive has sufficient headroom.
- Notifications: Disable Windows “Focus Assist” or “Do Not Disturb” to ensure pop-ups don’t appear mid-recording.
The video tutorial above provides a comprehensive walkthrough for configuring OBS Studio for vertical content, specifically for those looking to manage both streaming and recording workflows efficiently.
How to Record TikTok Live on Mac
Recording on macOS offers high-quality results, but it requires understanding the platform’s unique audio routing architecture, especially when capturing system sound.
Method 1: OBS Studio (Best Quality & Control)
OBS is the most robust solution for professional archiving.
- Install: Download the macOS version from obsproject.com.
- System Audio Setup (macOS 13+):
- In the Sources dock, click + and select macOS Audio Capture.
- Choose Desktop Audio Capture to ensure the stream’s audio is included.
- Note: For older macOS versions, you must use a virtual audio driver like BlackHole to route system audio into OBS.
- Configure Output: Go to Settings > Output, set the format to
.mp4or.mkv, and configure your bitrate (6000–10000 Kbps for 1080p). - Capture: Add a Window Capture source for your browser and initiate the recording.
Method 2: QuickTime Player (Simple & Native)
QuickTime is pre-installed and excellent for quick, low-friction captures, but it lacks native system audio support.
- Initiate: Open QuickTime Player > File > New Screen Recording.
- Settings: Click the arrow next to the record button. Select your Microphone if needed.
- Crucial Limitation: To record system audio with QuickTime, you must install a virtual driver (like BlackHole) to route your Mac’s internal sound into the recording.
- Record: Click the record button, select your recording area, and click Start Recording.
Pro-Tips for Mac Users
- Permissions: macOS requires Screen Recording permissions in System Settings > Privacy & Security. Ensure OBS or QuickTime is enabled here, or the recording will result in a black screen.
- Hardware Acceleration: If using a Mac with Apple Silicon (M1/M2/M3+), ensure you select an Apple-specific hardware encoder (e.g., Apple VT H264) in OBS settings to maximize performance and minimize CPU heat.
- Storage Management: High-resolution files grow rapidly. Use an external SSD (formatted as APFS) for long-duration recordings to avoid filling your primary drive.
- Avoid Overlays: Use “Window Capture” in OBS rather than “Display Capture” to ensure your desktop notifications or system bars are not recorded along with the stream.
Best Screen Recording Software for TikTok Live
When choosing a tool for your archives, the “best” option depends on whether you are a viewer or a creator.
Warning: Avoid “automated” cloud-based “stream recorder” services (e.g., StreamRecorder.io) that promise to capture other creators’ streams automatically. These services are frequently flagged by the community and platforms for unauthorized data scraping, potential copyright exploitation, and unethical surveillance practices. Stick to the trusted, localized tools below to ensure your workflows remain secure and compliant.
| Software | Platform | Best For | Key Features |
| OBS Studio | Win/Mac/Linux | Power Users | Pro-grade audio/video control, multi-source capture. |
| Built-in Recorder | iOS/Android | Casual/Mobile | No installation, native OS integration, secure. |
| QuickTime Player | macOS | Mac Beginners | Quick, no-install capture (requires audio driver). |
| AZ Screen Recorder | Android | Android Users | High-res (1080p), simple overlay controls. |
Why Trust These Tools Over Cloud-Scrapers?
- Privacy & Security: Native and established desktop tools like OBS store files locally on your hardware. You maintain full ownership and control, keeping your archives away from third-party servers.
- Ethical Compliance: Cloud “bot” services often operate by scraping and re-hosting content without consent, which violates platform terms and creator rights. Using local capture tools allows you to record responsibly for personal/educational use.
- Reliability: Cloud-based scrapers are often blocked by platform security updates or suffer from server-side instability (freezing, partial recordings, or watermarks). Local tools ensure you capture what you see without dependency on a third-party service’s server health.
Pro-Tips for Long-Term Content Archiving
- For Creators: If you are the one streaming, do not rely on third-party scrapers for your own content. Use TikTok’s native “Download” feature within your Creator Tools dashboard (available for 30 days post-broadcast). For professional archives, use OBS Studio to record your stream output locally on your desktop at the exact moment you go live.
- Storage Economics: High-fidelity recording is space-intensive. Always target a local SSD or an external drive when recording sessions longer than 30 minutes.
- Audio Routing: The most common failure in “beginner” setups is poor audio quality. On PC/Mac, ensure you are capturing the application’s audio stream directly (via OBS) rather than relying on a microphone to pick up your speakers.
How to Improve Recording Quality
To ensure your archives meet professional standards for repurposing, you must balance visual fidelity with system performance. The following technical settings provide the optimal “high-signal” configuration for 2026.
Video Fidelity Settings
- Resolution: Maintain a native 1920×1080 (1080p) canvas. If you are recording vertical content, ensure your OBS canvas is set to 1080×1920 (using the Aitum Vertical plugin or manual transformation) to avoid unnecessary letterboxing or pixelation.
- Frame Rate: Set to 30fps for tutorials or talking-head content to keep files manageable; use 60fps only for high-motion gameplay or live demonstrations.
- Rate Control: Utilize CQP (Constant Quantization Parameter) rather than CBR for local recordings. Set your CQ value between 18–21 for high-quality, professional-grade output.
- Encoder: Prioritize NVENC (NVIDIA) or AMF (AMD) hardware encoding. This offloads the heavy lifting from your CPU, reducing frame drops and system lag.
Audio Engineering
- Source Isolation: Avoid relying on “Desktop Audio” which captures all system sounds. Add a specific Application Audio Capture source in OBS to isolate the TikTok stream audio.
- Processing: Use the built-in OBS Noise Suppression and Compressor filters. A compressor is essential to even out volume spikes during high-energy moments in the stream.
- Bitrate: Maintain an audio bitrate of 160–192 Kbps (AAC) for a clear, balanced sound.
Workflow & File Management
- Recording Container: Always record in .mkv format. It is resistant to file corruption; if your system crashes mid-stream, your recording remains safe.
- The Remux Process: After your session, go to File > Remux Recordings in OBS. This instantly converts your .mkv file to a standard .mp4—the industry-standard format for all video editors—without re-encoding or losing quality.
- Compression: If you need to distribute or archive these files long-term, use HandBrake with an H.264 or H.265 (HEVC) preset. Adjust the Constant Rate Factor (RF) toward the right for higher quality or the left to reduce file size.
Pro-Tips for System Health
- Storage: High-quality 1080p recordings require sustained write speeds. Always save to an SSD; mechanical hard drives (HDDs) may struggle with high-bitrate recording and lead to dropped frames.
- System Priority: Set your OBS process priority to “Above Normal” in the Advanced Settings. This ensures your system resources are allocated to the recording task first, preventing stuttering during intense PC usage.
Common Problems and Fixes
Technical hurdles are inevitable when capturing live content. Below is a structured troubleshooting guide to ensure your recording sessions remain consistent and high-quality.
| Problem | Potential Cause | Immediate Solution |
| Black screen in OBS | Hardware acceleration | Disable “Hardware Acceleration” in browser settings or run OBS as Administrator. |
| No audio captured | Incorrect audio source | In OBS, manually select your specific output device rather than “Default.” |
| Notifications in video | Focus/DND disabled | Enable “Do Not Disturb” or “Focus Mode” on your device before starting. |
| Recording stops | Storage or power limits | Clear at least 10GB of storage; keep your device plugged into power. |
| Corrupted files | Sudden app/system crash | Use .mkv format in OBS; it prevents corruption if the recording is interrupted. |
| Laggy/Stuttering video | High bitrate / CPU overload | Reduce bitrate to 6000 Kbps; use hardware encoders (NVENC/AMF) instead of x264. |
Troubleshooting High-Level Issues
If you encounter persistent issues, follow these diagnostic steps to isolate the bottleneck:
- OBS Administrator Mode: Many black-screen issues are strictly permission-based. Right-click the OBS launcher and select “Run as Administrator” to grant the software the necessary system-level access.
- Source Re-initialization: If a source (like your browser window) is suddenly unresponsive, do not simply restart OBS. Right-click the source in the “Sources” list, deactivate it, and then reactivate it. This forces the software to re-request a fresh feed.
- Network Stability: If your stream is lagging or dropping frames, check your upload stability before blaming your hardware. High-quality recording on a PC requires a consistent network path; if you are seeing dropped frames in OBS, it is often a sign of packet loss or peak-hour network congestion rather than a weak GPU.
- Remuxing for Compatibility: Always record as
.mkvto protect your files, but remember to use the File > Remux Recordings feature in OBS to convert them to.mp4for your video editor. This process is nearly instantaneous and prevents quality loss.
The video above provides a concise, three-step method for resolving common black-screen capture issues and permission conflicts in OBS Studio.
Ethical and Copyright Best Practices
Navigating the legal and ethical landscape is a mandatory component of digital content strategy. Always prioritize creator rights and platform terms to protect your professional standing and avoid account sanctions.
The “Do’s” of Ethical Archiving
- Personal Use Only: Record streams exclusively for your own reference, offline study, or private archives.
- Obtain Written Permission: If you intend to repurpose any portion of a stream for public-facing content (e.g., social media clips, educational tutorials, or website integration), reach out to the creator directly to secure explicit, written consent.
- Attribute Correctly: If you have permission to use a clip, always provide clear attribution back to the original creator. This builds social capital and reduces the likelihood of copyright disputes.
- Transformative Use: If you are creating derivative content (e.g., commentary, reaction, or critical analysis), ensure your contribution is significant enough to qualify as “transformative,” which provides stronger grounds for fair use.
The “Don’ts” of Ethical Archiving
- No Unauthorized Monetization: Never monetize content you do not own. This includes placing clips behind a paywall, using them in paid advertisements, or running them on a channel with active ad-monetization without explicit permission.
- Avoid “Bot” Scrapers: Do not use automated cloud-based “stream recorder” services. These are frequently flagged for unauthorized data scraping, ethical violations, and platform policy breaches.
- Respect “Public” ≠ “Free”: Public access does not imply a public license. The fact that a stream is visible to everyone on TikTok does not grant you the right to copy or redistribute it.
For Creators: Managing Your Own Content
- Native Replays: Always ensure “Save LIVE Replay” is enabled in your TikTok Studio dashboard before you go live. This remains the only officially supported way to archive your work.
- The 30-Day Limit: TikTok only stores your replays for 30 days. Prioritize downloading your sessions to a secure local drive immediately after the stream ends.
- System Backups: For professional content, never rely solely on platform-native archives. Use OBS Studio to record a local, high-fidelity copy simultaneously while you stream.
- Organization: Adopt a standardized naming convention (e.g.,
YYYY-MM-DD_Topic_Live.mp4) to ensure your library remains searchable and scalable as your content grows.
The video above provides a step-by-step walkthrough for creators on how to locate and download their own live stream archives within the TikTok interface before they expire.
How to Record TikTok Live Streams FAQs
To ensure you are fully prepared to archive content while maintaining compliance with TikTok’s 2026 platform standards, review these frequently asked questions.
Does TikTok notify creators when I screen-record their Live?
No. As of July 2026, TikTok does not send notifications, alerts, or logs when a viewer screen-records or takes a screenshot of a Live stream. Your presence in the viewer list remains visible, but your recording activity is private.
How long do TikTok Live replays last?
Creators can download their own replays via the Creator Tools dashboard for up to 30 days after the broadcast. After this window, the platform-native archive is permanently removed. Viewers have no direct, app-native way to download these replays.
Can I record TikTok Live without the app or browser active?
No. Native mobile and desktop screen recorders require the application or browser window to be actively “playing” the stream on your screen. Be wary of third-party “cloud recording” services that promise to archive streams automatically while you are offline; these are often high-risk services that can compromise your data security and violate platform terms regarding unauthorized scraping.
What is the best tool for recording TikTok Live?
For Mobile: Use your device’s built-in iOS/Android screen recorder. It is the most secure, privacy-friendly method.
For Desktop: Use OBS Studio. It is the industry standard for high-quality, professional archives, offering superior control over audio routing, bitrate, and file containers (like .mkv) that prevent data loss.
Is it illegal to record TikTok Live streams for personal use?
Generally, recording for strictly private, personal reference is considered low-risk. However, redistributing, re-uploading, or monetizing recorded content without the original creator’s explicit, written permission is a violation of copyright law and TikTok’s Community Guidelines. Always operate under the principle of “Record for personal learning, share only with consent.”
In Conclusion
Mastering how to record TikTok Live streams is a valuable technical skill for creators and viewers alike, provided it is executed with precision and respect for platform integrity.
- Core Methods: For mobile, native screen recording is the most secure and reliable path. For desktop, OBS Studio remains the industry benchmark, providing the highest fidelity and the most control over audio and file formats.
- Legal & Ethical Boundaries: Unauthorized redistribution and monetization are significant legal risks. Always prioritize personal archiving, educational use, and—most importantly—obtaining explicit consent before repurposing content you do not own.
- Safety Warning: Avoid third-party “automated” cloud recording services like StreamRecorder.io. These platforms are frequently criticized for scraping content without creator consent, hosting material behind unethical paywalls, and potentially compromising data security. Relying on your own local, hardware-based capture tools is the only way to ensure your archive library remains private, secure, and compliant.
Final Strategy: Choose Your Tool
| Intent | Recommended Approach |
| Casual Viewing | Use your device’s built-in OS recorder (iOS/Android). |
| Professional Repurposing | Use OBS Studio (Win/Mac) to capture clean, high-bitrate .mkv files. |
| Creator Archiving | Use TikTok’s native Creator Tools (within 30 days) + local OBS backup. |
To maintain the high-signal, professional standards required for Skilldential, adopt a “Local-First” policy. By storing your recordings locally on encrypted hardware, you maintain total ownership of your assets, eliminate dependency on third-party scrapers, and ensure your workflow is entirely compliant with platform policies.