A slow WordPress website frustrates visitors, kills engagement, and quietly drains your revenue. When pages take seconds too long to render, potential customers bounce before ever seeing your offer or reading your content.
Fortunately, speeding up WordPress site performance doesn’t require advanced coding or expensive developers. Most critical bottlenecks—from bloated plugins and uncompressed images to sluggish hosting and missing cache layers—can be fixed directly from your dashboard.
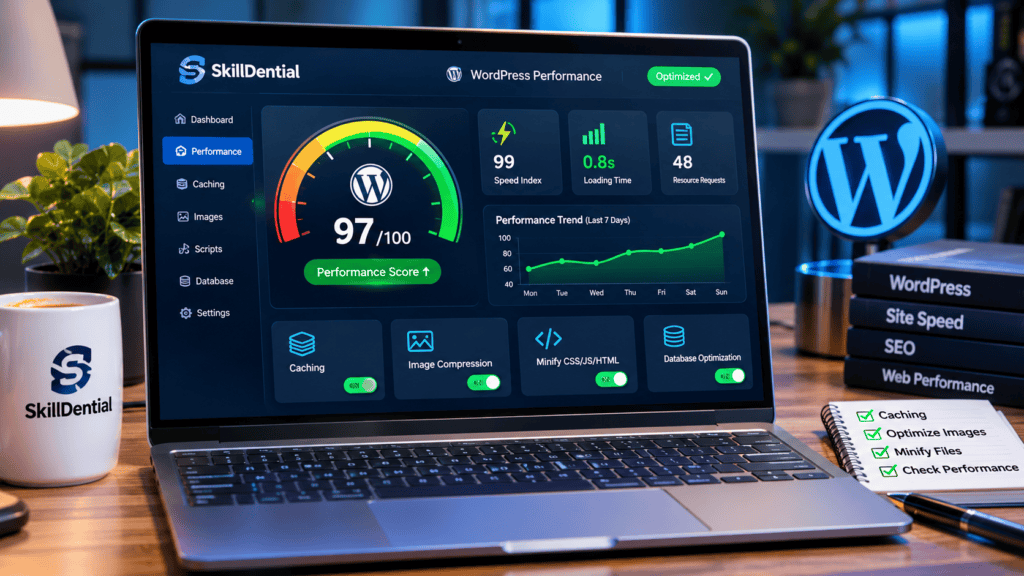
Whether you run a content-driven blog, an e-commerce storefront, or a client site, speed is a core pillar of user experience and technical SEO. Search engines reward seamless performance through Core Web Vitals, prioritizing metrics like loading speed, visual stability, and interactivity.
This guide breaks down 12 actionable, beginner-friendly strategies for speeding up WordPress site speed, helping you deliver a lightning-fast experience that keeps visitors engaged and converting.
Why Is Your WordPress Website Slow?
Before speeding up WordPress site performance, you must diagnose the root cause. Throwing plugins at a performance issue without understanding the bottleneck only adds to the bloat.
A slow WordPress site typically suffers from one or more of these common performance killers:
- Slow Web Hosting: Your server takes too long to process requests and deliver content, resulting in a high Time to First Byte (TTFB).
- Uncompressed Images: Heavy media files inflate page weight, forcing browsers to download megabytes of unnecessary data.
- Excessive Plugins: Poorly coded or unoptimized plugins inject heavy scripts, stylesheets, and unnecessary database queries globally.
- Missing Caching Layers: Without caching, WordPress must dynamically generate pages from scratch for every single visitor, wasting server resources.
- Bloated Themes: Monolithic themes packed with heavy animations, custom sliders, and rigid frameworks delay browser rendering.
- Render-Blocking CSS & JavaScript: Large scripts force browsers to halt HTML parsing until external files are fully executed.
- Database Overhead: Post revisions, orphaned metadata, transients, and spam comments accumulate over time, slowing down SQL query execution.
- Geographical Latency: Physical distance between your hosting server and your audience introduces network delays that require a Content Delivery Network (CDN) to resolve.
Pinpointing the precise underlying bottleneck is critical, primarily because attempting to solve a performance issue by simply installing more plugins—a common pitfall among beginners—often backfires, compounding the exact software bloat and database overhead that caused the sluggishness in the first place.
12 Practical Ways to Speed Up Your WordPress Site
The following strategies are structured logically to guide you from foundational performance baselines to advanced optimization. By tackling straightforward adjustments first—such as image compression and caching—you can secure immediate wins before moving on to deeper infrastructural and code-level refinements.
Test Your WordPress Website Speed
Before speeding up WordPress site performance, you must establish an objective performance baseline. Without testing your current metrics first, you risk wasting time tweaking settings that have little to no impact on your actual loading speed.
Several free diagnostic tools make it easy to evaluate your site:
- Google PageSpeed Insights: Evaluates mobile and desktop performance scores, highlighting critical diagnostic metrics and optimization opportunities.
- GTmetrix: Provides a granular breakdown of total page size, total HTTP requests, and waterfall loading indicators.
- WebPageTest: Allows you to test your site under simulated connection speeds and geographic locations.
How to Test Your Site
- Open Google PageSpeed Insights: Prerequisite.
- Navigate to the official PageSpeed Insights website.
- Verification: The analysis input bar and “Analyze” button are fully visible on your screen.
- Enter Your Website URL: 1 min.
- Paste your homepage URL into the search field.
- Verification: The URL is correctly entered with your proper domain name and
https://protocol.
- Run the Analysis: 30 sec.
- Click Analyze and wait for the tool to scan both mobile and desktop views.
- Verification: The performance scores and diagnostic tabs finish loading.
- Record Your Baseline Metrics: 2 min.
- Document your initial scores, total page weight, and Core Web Vitals data before making any configuration changes.
- Verification: Your baseline metrics are safely saved in a document or spreadsheet for future comparison.
Core Web Vitals Benchmarks
When speeding up WordPress site speed, pay close attention to Google’s three core performance metrics:
| Metric | What it measures | Good target |
| LCP (Largest Contentful Paint) | How quickly the main content element loads | ≤ 2.5 seconds |
| INP (Interaction to Next Paint) | How quickly the page responds to user interactions | ≤ 200 ms |
| CLS (Cumulative Layout Shift) | How stable the page layout remains while loading | ≤ 0.1 |
Practical Tip:
Do not just test your homepage. Always run performance audits on at least one high-traffic article or key landing page, as different templates often suffer from unique performance bottlenecks.
Choose a Reliable WordPress Hosting Provider
Your hosting provider serves as the foundational infrastructure for speeding up WordPress site performance. WordPress relies heavily on server resources to process backend requests, query databases, and deliver pages to visitors.
If your hosting environment is sluggish or frequently oversubscribed, installing optimization plugins will not solve the underlying bottleneck.
When evaluating a hosting provider for a WordPress website, look for these critical performance indicators:
- Server Response Time: Look for hosts boasting low Time to First Byte (TTFB).
- CPU & Memory Resources: Ensure adequate RAM and dedicated vCPUs to handle traffic spikes.
- Storage Performance: Enterprise-grade NVMe SSD storage drastically accelerates database read/write speeds.
- Supported PHP Versions: The server must run modern PHP versions (PHP 8.2 or higher) for optimal execution speed.
- Server Caching Capabilities: Built-in server-level caching (such as LiteSpeed Cache, Redis, or Memcached) reduces database load.
- Backup & Security Features: Automated daily backups and active web application firewalls (WAF).
- Technical Support: 24/7 expert WordPress support to help troubleshoot server-side issues.
- Server Location & CDN Compatibility: Proximity to your core audience combined with free or easy Content Delivery Network integration.
What Type of Hosting Should You Choose?
| Hosting type | Suitable for | Performance & Resource Profile |
| Shared hosting | New websites and small blogs | Budget-friendly, but resources are pooled with other sites, which can lead to slowdowns during traffic spikes. |
| Managed WordPress hosting | Users who want WordPress-specific management | Optimized specifically for WordPress with built-in caching, automatic updates, and expert support. |
| VPS hosting | Websites needing greater control and resources | Virtual Private Server providing dedicated resource allocations and full root access. |
| Cloud hosting | Websites requiring flexible infrastructure | Highly scalable architecture across multiple clustered servers to handle unpredictable traffic. |
You do not need an enterprise-grade hosting plan when launching a new site. However, if speeding up WordPress site efforts stall because of persistent server delays, upgrade your hosting before investing in premium optimization plugins.
Practical Tip:
Contact your hosting provider’s support team today and ask three specific questions: (1) Is my site running on a LiteSpeed, Apache, or Nginx server? (2) What native server-side caching options are enabled? (3) Does my current plan have active CPU or RAM resource limitations?
Install and Configure a Caching Plugin
Caching is one of the most powerful techniques for speeding up WordPress site performance.
By default, WordPress builds pages dynamically on every single visit. This requires executing PHP scripts and querying the database for every user. A caching plugin bypasses this heavy lifting by storing a static, ready-to-serve HTML version of your pages, delivering content almost instantly while drastically reducing server load.
Popular beginner-friendly caching solutions include:
- LiteSpeed Cache: An all-in-one optimization plugin that integrates server-level caching (specifically for LiteSpeed servers) with image optimization and minification.
- WP Rocket: A premium, plug-and-play caching plugin designed for effortless setup and immediate performance gains.
- W3 Total Cache: A robust free plugin offering deep, granular configuration options for advanced users.
- WP Super Cache: A reliable, lightweight option maintained by Automattic that generates static HTML files.
How to Enable Caching with LiteSpeed Cache
- Log In and Navigate to Plugins: 1 min.
- Log in to your WordPress dashboard, navigate to Plugins, and click Add New Plugin.
- Verification: The plugin search directory screen is fully loaded on your screen.
- Install LiteSpeed Cache: 1 min.
- Search for
LiteSpeed Cache, then click Install Now and Activate. - Verification: LiteSpeed Cache appears in your WordPress admin sidebar menu.
- Search for
- Access Cache Settings: 30 sec.
- Click on LiteSpeed Cache in your dashboard menu, select Cache, and go to the Cache Settings tab.
- Verification: The cache configuration panel and toggles are visible.
- Enable the Cache: 30 sec.
- Locate the primary Cache toggle and switch it to Enabled.
- Verification: The toggle status changes to “On” or “Enabled”.
- Save Your Changes: 30 sec.
- Click the Save Changes button at the top or bottom of the screen.
- Verification: A success notification confirms your settings have been updated.
- Purge Cache and Test: 1 min.
- Click the LiteSpeed rocket icon in your top admin bar and select Purge All to clear old files, then test your live site.
- Verification: Your site loads normally without layout errors or missing styles.
Important Warning:
Never run multiple full-page caching plugins (such as WP Rocket and LiteSpeed Cache) simultaneously. Conflicting caching mechanisms will crash layouts, serve broken styles, and trigger erratic website behavior.
Optimize Images Before Uploading Them
Large, unoptimized images are one of the primary culprits behind sluggish load times when speeding up WordPress site performance. Uploading a raw 5 MB photograph directly from a camera or smartphone forces visitors to download massive files, severely degrading Largest Contentful Paint (LCP) scores.
Image optimization reduces file sizes drastically while preserving visual clarity.
Practical Ways to Optimize Images
- Resize to Fit: Scale image dimensions down to fit their exact container width on your page before uploading (e.g., standard blog content widths rarely exceed 1200px).
- Compress Files: Run images through compression tools to strip unnecessary metadata and reduce file size.
- Adopt Modern Formats: Serve images in next-generation formats like WebP or AVIF, which offer superior compression compared to legacy JPEGs and PNGs.
- Audit Your Media Library: Periodically delete unused images and attachments to prevent unnecessary server bloat.
- Utilize Responsive Delivery: Ensure your theme automatically serves appropriately sized images based on the visitor’s screen resolution.
Recommended Image Optimization Tools
| Tool | Main Purpose |
| ShortPixel | Automated image compression, resizing, and WebP/AVIF format conversion. |
| Imagify | Streamlined WordPress image optimization with bulk-compression features. |
| TinyPNG | Quick drag-and-drop web compression for individual or batch files before upload. |
| LiteSpeed Cache | Built-in image optimization tools that process images directly through cloud services. |
If you are already running LiteSpeed Cache, you can leverage its native image optimization suite. However, never run multiple image optimization plugins (such as ShortPixel and Imagify simultaneously) trying to process the same media. Overlapping optimization tasks will conflict, causing server errors and failed image processing jobs.
Practical Tip:
Make it a strict habit to compress all featured images, hero banners, and high-resolution screenshots before uploading them to your WordPress media library.
Enable Lazy Loading for Images and Videos
Lazy loading is a powerful optimization technique that defers the loading of below-the-fold images and embedded videos until the user actually scrolls down the page and brings them into view.
Instead of forcing the browser to download all 15 screenshots in a long tutorial the moment the page opens, lazy loading prioritizes only the media visible on initial screen load. This drastically reduces initial page weight, accelerates loading speeds, and improves overall speeding up WordPress site performance.
How to Implement Lazy Loading
- Check Native WordPress Support: 1 min.
- Verify that your images load with
loading="lazy"attributes, which modern WordPress versions handle automatically for standard post images. - Verification: Right-click an image on your live site, select Inspect, and look for the
loading="lazy"attribute in the HTML<img>tag.
- Verify that your images load with
- Review Theme and Plugin Settings: 1 min.
- Check your caching or optimization plugin settings (such as LiteSpeed Cache or WP Rocket) to confirm media optimization and lazy-loading features are turned on.
- Verification: The “Lazy Load Images” toggle is set to Enabled in your plugin configuration dashboard.
- Test Across Devices: 1 min.
- Load your website on both mobile and desktop devices to ensure images pop into view smoothly as you scroll down.
- Verification: Images load seamlessly without broken layouts or noticeable delays when scrolling.
Choose a Lightweight WordPress Theme
Your WordPress theme dictates the foundational frontend architecture and visual layout of your site.
While heavily stylized themes packed with built-in page builders, complex sliders, and flashy animations look visually appealing, they often inject massive CSS and JavaScript payloads that bog down page rendering. If your theme requires dozens of external requests before rendering content, speeding up WordPress site performance becomes an uphill battle.
What to Look for in a Performance-Focused Theme
- Clean, Minimal Code: Built with lightweight efficiency rather than bloated, multi-purpose frameworks.
- Low Asset Count: Generates minimal HTTP requests and avoids loading unused global scripts.
- Block Editor Compatibility: Optimized for the native WordPress Block Editor (Gutenberg) to avoid relying on heavy third-party page builders.
- Full Responsiveness: Scales smoothly across all mobile, tablet, and desktop viewports.
- Active Support & Updates: Regularly maintained for security, performance enhancements, and core WordPress compatibility.
Popular Lightweight WordPress Themes
- Astra: A fast, highly customizable theme designed to integrate seamlessly with lightweight page builders and block setups.
- GeneratePress: Known for its minimalist codebase, exceptional speed, and rock-solid stability.
- Kadence: Offers powerful header and layout customization options without sacrificing lightweight loading performance.
- Blocksy: A modern, lightning-fast theme built specifically to harness the full potential of the Gutenberg block editor.
Practical Tip:
Never switch themes purely based on marketing hype. Before overhauling your site, benchmark your current theme’s performance, test potential lightweight alternatives in a staging environment, and compare results under identical conditions.
Remove Unnecessary WordPress Plugins
WordPress plugins make it effortless to add powerful features without writing code. However, installing plugins without auditing their performance impact introduces hidden penalties: extra HTTP requests, redundant database queries, heavy JavaScript assets, and resource-heavy background processes.
It is a common myth that a high plugin count automatically ruins a site. A single poorly coded plugin can drag down performance more than ten lightweight, well-optimized plugins combined. When speeding up WordPress site performance, the priority is auditing functionality, eliminating bloat, and removing plugins that pull your site down.
How to Clean Up Your Plugins
- Access Installed Plugins: 1 min.
- Log in to your WordPress dashboard, navigate to Plugins, and click Installed Plugins.
- Verification: The complete list of active and inactive plugins appears on your screen.
- Audit Active and Inactive Plugins: 2 min.
- Review every plugin. Identify tools you no longer use, duplicate plugins, or features you no longer need.
- Verification: You have marked unnecessary plugins for removal.
- Deactivate Unnecessary Plugins: 30 sec.
- Click Deactivate under the plugins you wish to remove.
- Verification: The status changes to inactive.
- Test Your Live Website: 1 min.
- Browse your frontend and key templates to confirm your theme and other features do not depend on the deactivated plugins.
- Verification: Your site loads normally without broken widgets or missing styles.
- Delete Unused Plugins: 30 sec.
- Click Delete to permanently remove the inactive plugins from your server files and database.
- Verification: The deleted plugins disappear entirely from your installed list.
Important Warning:
Never run multiple plugins that perform identical functions—such as multiple caching tools, overlapping SEO suites, or competing security plugins. Overlapping plugins create direct system conflicts, duplicate background processes, and severe performance bottlenecks.
Minify CSS, JavaScript, and HTML Files
CSS, JavaScript, and HTML form the technical foundation of your WordPress website. However, standard code files contain formatting characters—such as indentation, line breaks, comments, and long variable names—that add unnecessary file weight.
Minification reduces file sizes by stripping out these extraneous characters without altering how the code executes. For speeding up WordPress site performance, smaller files mean faster download times and reduced browser parsing overhead.
How to Approach Minification Safely
Because poorly handled code optimization can break site layouts, minification should always be approached incrementally.
- Open Your Optimization Plugin: 1 min.
- Log in to your WordPress dashboard and open your caching or performance plugin (such as LiteSpeed Cache or WP Rocket).
- Verification: The performance plugin’s settings menu is fully loaded on your screen.
- Locate Asset Optimization Settings: 1 min.
- Navigate to the CSS and JavaScript optimization or file tuning tab.
- Verification: Toggles for CSS and JS minification are visible on your screen.
- Enable One File Type at a Time: 30 sec.
- Turn on minification for CSS files only first. Avoid enabling CSS combination, JS combining, or aggressive deferral settings all at once.
- Verification: Only the CSS minification toggle is active.
- Save Your Changes: 30 sec.
- Click the Save Changes button.
- Verification: A confirmation notice verifies that your settings have been saved.
- Clear Cache and Test: 1 min.
- Purge your site cache, open an incognito browser window, and test critical pages (like your homepage and checkout/contact forms).
- Verification: Styles load correctly and navigation menus function as expected without visual glitches.
- Proceed with JavaScript: 1 min.
- If your CSS minification works without issue, return to the settings and enable JS minification, then clear cache and re-test.
- Verification: Interactive elements (sliders, mobile menus) continue operating normally.
Use a Content Delivery Network (CDN)
A Content Delivery Network (CDN) is a globally distributed network of edge servers designed to accelerate speeding up WordPress site performance by delivering assets from locations physically closer to your visitors.
If your WordPress hosting server is located in the United States, but a user accesses your site from Lagos, London, or Tokyo, every static file must travel across oceans and international fiber-optic cables, introducing severe network latency. A CDN caches static assets—such as images, stylesheets, and JavaScript files—on edge servers worldwide, slashing response times for international traffic.
Popular and reliable CDN services include:
- Cloudflare: Offers a robust free tier, enterprise-grade security features, and edge caching.
- QUIC.cloud: Specifically built to integrate natively with LiteSpeed server architectures.
- Bunny CDN: A high-performance, cost-effective CDN known for its blazing-fast global network.
- Amazon CloudFront: An enterprise infrastructure solution built on AWS.
How to Get Started with a CDN
- Select and Register with a CDN Provider: 5 min.
- Choose a CDN provider (such as Cloudflare) and create a free account.
- Verification: Your account dashboard is active and accessible.
- Add Your Website Domain: 3 min.
- Enter your website domain name into the CDN platform to initiate setup.
- Verification: The CDN recognizes your domain and scans your existing DNS records.
- Update Your Nameservers: 5 min.
- Log in to your domain registrar (where you bought your domain) and update your nameservers to point to your CDN provider.
- Verification: The CDN dashboard confirms that your domain is active and routing through their network.
- Configure WordPress Integration: 2 min.
- Install your CDN provider’s official WordPress plugin (or configure it via your optimization plugin like LiteSpeed Cache) to handle automatic cache purging.
- Verification: The plugin successfully connects to your CDN account API or zone tokens.
- Test Your Live Site: 2 min.
- Clear your cache and run a performance audit to confirm that assets are loading via the CDN edge network.
- Verification: Using browser developer tools (F12 > Network tab), inspect an image URL to verify it serves from the CDN domain.
Important Reality Check:
A CDN is a powerful network booster, but it is not a magic fix for core structural flaws. A CDN cannot compensate for an overloaded hosting server, an unoptimized database, or excessively heavy, bloated page code.
Clean and Optimize Your WordPress Database
Your WordPress database acts as the central repository for all site data, including posts, pages, comments, settings, user accounts, and plugin configurations. Over time, active websites accumulate significant digital clutter—such as endless post revisions, expired transient records, spam comments, trashed items, and leftover data from uninstalled plugins.
While database hygiene is a core component of speeding up WordPress site maintenance and reducing server resource strain, keep in mind a realistic technical expectation: database cleanup is not a silver bullet for frontend speed issues. The actual performance benefit depends heavily on your database’s current bloat level and how aggressively your site queries it.
How to Safely Clean Your Database
- Back Up Your Website and Database: Critical Prerequisite.
- Never run database optimization queries without first creating a complete, verifiable backup of your website files and SQL database.
- Verification: A fresh backup archive is downloaded and stored safely off-server.
- Install a Trusted Optimization Tool: 2 min.
- Install a specialized database management and optimization plugin, such as WP-Optimize or WP-Sweep.
- Verification: The database optimization menu is visible and accessible in your WordPress dashboard.
- Review Cleanup Parameters: 2 min.
- Inspect the available cleanup options, such as post revisions, auto-drafts, spam comments, trashed posts, and expired transients.
- Verification: You have explicitly verified which items are selected for deletion.
- Execute Optimization: 1 min.
- Run the optimization tool to purge redundant data rows and optimize table structures.
- Verification: The plugin displays a success log detailing the rows removed and storage space reclaimed.
- Test Your Frontend: 2 min.
- Open your live website in an incognito window and check critical pages and forms.
- Verification: All content renders correctly without SQL errors or broken components.
Keep WordPress, Themes, and Plugins Updated
Keeping your WordPress core software, themes, and plugins updated is essential for security, compatibility, and overall performance.
WordPress, theme developers, and plugin authors frequently release updates that include critical bug fixes, security patches, and performance optimizations. However, updating blindly without a structured approach can introduce unexpected script conflicts or layout breaks.
Recommended Update Procedure
- Create a Complete Website Backup: Critical Prerequisite.
- Before installing any updates, generate and download a fresh, complete backup of your website files and database.
- Verification: A new backup archive is safely saved in off-site storage or your hosting backup vault.
- Review Available Updates: 1 min.
- Navigate to Dashboard > Updates in your WordPress admin panel to inspect pending updates for core, plugins, and themes.
- Verification: The update notification list is fully loaded and visible.
- Check Changelogs and Compatibility: 2 min.
- Review update release notes, especially for major theme or plugin updates, to check for breaking changes or PHP version requirements.
- Verification: You have confirmed that the pending updates are compatible with your current PHP version.
- Update in a Controlled Sequence: 3 min.
- Update items sequentially—start with plugins, followed by themes, and finally the WordPress core installation.
- Verification: Each update finishes processing without throwing critical error notices.
- Test Your Live Website: 2 min.
- Open your website in an incognito browser window and test critical interactive elements (such as contact forms, dropdown menus, and checkout flows).
- Verification: All site components function correctly without broken layouts or JavaScript errors.
Important PHP Compatibility Note:
Always verify that your hosting server runs a modern, compatible PHP version (such as PHP 8.2 or higher) before applying major software updates. Never upgrade your PHP version blindly without an active backup and compatibility check.
Monitor Website Performance Regularly
Speeding up WordPress site performance is not a one-time project; it is an ongoing maintenance routine. As you publish new articles, upload images, install plugins, and introduce fresh features over time, your site’s performance profile will naturally shift.
Regular monitoring allows you to catch performance regression early before it harms your user experience or search engine rankings.
Useful Performance Monitoring Tools
| Tool | What it helps you monitor |
| Google PageSpeed Insights | Page performance scores and actionable optimization recommendations. |
| Google Search Console | Real-world Core Web Vitals field data (via the Experience report) and affected URLs. |
| GTmetrix | Detailed page loading behavior, resource waterfalls, and performance reports. |
| WebPageTest | Deep-dive performance testing under simulated connection speeds and geographic locations. |
Google Search Console is particularly valuable because its Core Web Vitals report provides field data collected from real-world Chrome users visiting your site, revealing how your pages perform under actual user conditions.
Suggested Performance Monitoring Routine
To maintain a fast, reliable website, establish a consistent review schedule:
- Monthly Audits: Test your homepage, high-traffic landing pages, and key conversion paths once a month.
- Mobile-First Checks: Routinely verify mobile performance scores and layout responsiveness.
- Core Web Vitals Review: Check Google Search Console regularly to ensure no new URLs have slipped into “Needs Improvement” or “Poor” performance brackets.
- Post-Update Testing: Always re-test your site immediately after major plugin, theme, or core WordPress updates.
- Hosting Resource Tracking: Monitor your server’s CPU, RAM, and bandwidth usage through your hosting dashboard.
The Ultimate Goal:
Do not obsess over chasing a vanity score of 100/100 on synthetic testing tools. The true objective is to maintain a lean, responsive website that loads efficiently and delivers a seamless experience for every visitor.
A Practical WordPress Speed Optimization Checklist
When speeding up WordPress site performance, you do not need to implement all 12 improvements at once. Avoid the temptation to change dozens of settings simultaneously; instead, follow a structured, phased approach.
Use the interactive checklist below to track your progress step-by-step:
WordPress Speed Optimization Checklist
1. Measure First
2. Foundation
3. Quick Wins
4. Advanced Improvements
5. Maintenance
6. Measure Again
Following this repeatable framework ensures you isolate performance bottlenecks, protect your site’s functionality, and achieve steady, measurable gains in loading speed.
Common WordPress Speed Optimization Mistakes to Avoid
When speeding up WordPress site performance, it is just as important to know what not to do. Avoiding these common beginner pitfalls will save you hours of troubleshooting and prevent accidental site crashes:
- Installing Too Many Optimization Plugins: Stacking multiple caching, minification, or image compression plugins creates severe software bloat and system conflicts. Stick to a unified optimization suite (like LiteSpeed Cache or WP Rocket).
- Enabling Every Optimization Setting Blindly: Turning on aggressive CSS and JS aggregation or combining scripts all at once will frequently break menus, interactive forms, and visual layouts. Always test adjustments one by one.
- Lazy-Loading Your LCP Image: Applying lazy loading to your above-the-fold hero image or featured banner delays rendering, directly damaging your Largest Contentful Paint (LCP) and Core Web Vitals score.
- Ignoring Core Hosting Limitations: Frontend tweaks cannot compensate for an oversubscribed, underpowered server. If your Time to First Byte (TTFB) remains sluggish, no amount of plugin optimization will fix the root problem.
- Chasing a Vanity PageSpeed Score of 100: Obsessing over a perfect 100/100 synthetic score often leads to over-engineering. Focus instead on real-world visitor experience, smooth interactivity, and steady conversions.
- Optimizing Without Creating Backups: Running database purges, plugin cleanups, or advanced script tweaks without a fresh backup invites disaster. Always secure a complete backup before making structural changes.
How can I speed up my WordPress site without coding?
You can improve WordPress performance without touching any code by installing a compatible caching plugin, compressing and resizing your images, auditing and removing unneeded plugins, switching to a lightweight theme, and routing static assets through a CDN. Always run a baseline performance test first to identify your site’s specific bottlenecks.
What is the best plugin for speeding up a WordPress site?
There is no single “best” plugin for every site. LiteSpeed Cache is exceptional if your server runs on a compatible LiteSpeed environment, while WP Rocket offers an effortless, premium plug-and-play experience. Your choice should be guided by your hosting infrastructure and technical requirements.
Does website hosting affect WordPress speed?
Yes, your host is the foundation of your site’s performance. Hosting dictates server response times (TTFB), available CPU and RAM resources, database processing speed, and file delivery. If your server is sluggish, no amount of frontend plugin optimization will solve the underlying bottleneck.
Does website speed affect SEO?
Yes. Page speed directly impacts user experience and aligns with Google’s page experience systems. Google uses Core Web Vitals to measure loading performance, responsiveness, and visual stability.
While passing Core Web Vitals does not guarantee top search rankings on its own, poor performance creates friction that hurts both user engagement and conversions.
How often should I optimize my WordPress website?
Performance optimization is an ongoing maintenance routine rather than a one-time fix. Review your metrics monthly, and always re-test your pages immediately after installing new plugins, changing themes, tweaking optimization settings, or publishing heavy media content.
Can too many WordPress plugins slow down a website?
Yes, but plugin count is less important than plugin quality. While excessive plugins can inject heavy scripts, external requests, and bloated database queries, a single poorly coded plugin can drag down performance more than ten lightweight, well-optimized plugins combined. Audit your plugins regularly and remove anything you no longer use.
What is a good WordPress website loading speed?
Instead of chasing a subjective loading-time number, focus on Google’s official Core Web Vitals thresholds evaluated at the 75th percentile:
LCP (Largest Contentful Paint): ≤ 2.5 seconds
INP (Interaction to Next Paint): ≤ 200 milliseconds
CLS (Cumulative Layout Shift): ≤ 0.1
In Conclusion
Speeding up WordPress site performance does not have to be an overwhelming or overly technical challenge. As you’ve seen throughout this guide, massive performance gains are entirely achievable through practical, disciplined actions: choosing reliable hosting, enabling robust caching layers, compressing and resizing your images, auditing plugins, and monitoring Core Web Vitals.
The golden rule of optimization is understanding your specific bottlenecks before making structural changes. Blindly installing plugins or flipping optimization switches without a baseline will only compound software bloat.
To recap your roadmap:
- Measure First: Run an initial audit using Google PageSpeed Insights to establish your loading baseline.
- Fix the Foundation: Secure reliable hosting and enable a compatible caching plugin.
- Capture Quick Wins: Compress heavy media, enable lazy loading, and eliminate unneeded plugins.
- Maintain Consistently: Track your performance monthly and re-test after every major update.
You do not need to become a senior web developer to maintain a lightning-fast WordPress site. By following a structured approach and utilizing the checklist and tools outlined in this guide, you can eliminate drag, improve search visibility, and deliver an exceptional experience for your visitors.
Your Next Step:
Open Google PageSpeed Insights today, test your WordPress website, record your mobile and desktop scores, and tackle the top three bottlenecks holding your site back.