You don’t need to be an IT professional to take complete control of your PC. Learning essential Windows commands and settings allows you to troubleshoot issues, optimize performance, and unlock high-leverage system tools directly built into your operating system.
Windows commands and settings are built-in tools, text instructions, shortcuts, and configuration interfaces designed to help you manage, monitor, and repair a Windows computer.
Whether you need to diagnose a failing internet connection, identify why a laptop is running slowly, repair corrupted system files, manage startup applications, or free up storage, knowing which utility to deploy is half the battle.
Understanding the right Windows commands and settings matters because different problems require distinct tools:
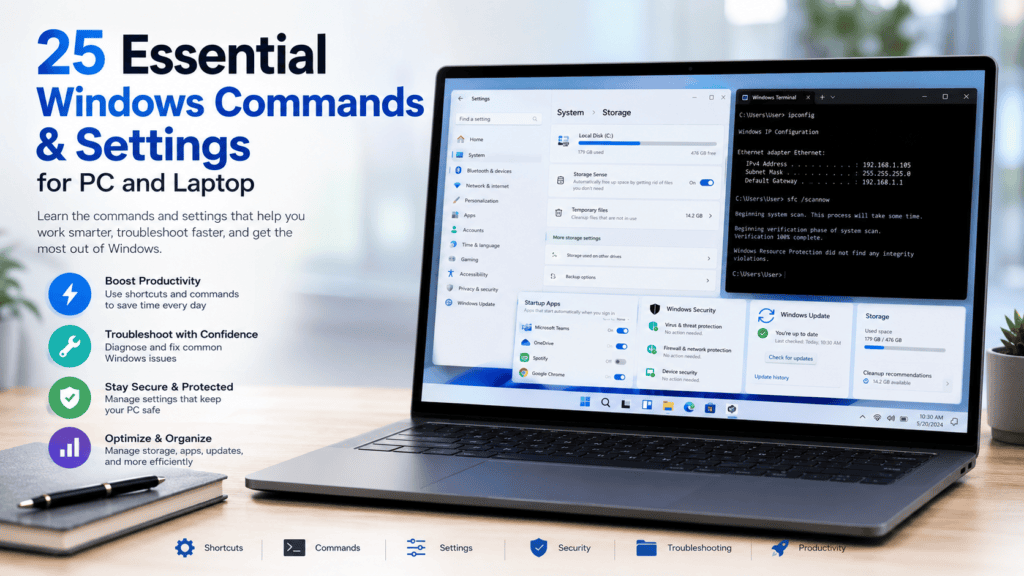
- Graphical Settings: Ideal for user-friendly configurations, managing privacy, or clearing disk space via Storage Sense.
- Startup Controls: Crucial for identifying background apps slowing down your boot sequence.
- Command-Line Utilities: Essential command-line tools like
ipconfig,ping, orsfc /scannowoffer deep network diagnostics and system file repair.
This SkillDential guide brings 25 essential Windows commands and settings together in one practical framework. For every entry, we break down:
- What it does → Why it’s useful → How to use it → Practical use case → Important precautions
Note: This guide focuses primarily on Windows 11 following Microsoft’s end of standard support for Windows 10 in October 2025. While most featured Windows commands and settings remain backward-compatible with Windows 10, exact menu paths may differ.
What Is the Difference Between Windows Commands, Run Commands, Shortcuts, and Settings?
The fundamental difference between these tools lies in how you interact with the operating system and the level of administrative control each interface provides.
Before exploring the 25 essential Windows commands and settings, understanding this hierarchy will help you select the fastest, most effective tool for any technical task.
| Tool Type | Example | Interface / Access Method | Primary Technical Purpose |
| Keyboard Shortcut | Win + V | Keyboard input | Rapidly triggers UI features (e.g., Clipboard History). |
| Run Command | msinfo32 | Run dialog (Win + R) | Instantly launches deep system configuration and diagnostic tools. |
| Command-Line Command | ipconfig | Command Prompt / PowerShell / Terminal | Queries system stats or executes low-level network operations. |
| Windows Setting | Storage Sense | Graphical User Interface (Settings app) | Manages system preferences, security parameters, and OS features. |
| Administrative Command | sfc /scannow | Elevated Terminal (Run as Administrator) | Scans, modifies, or repairs protected system files. |
Keyboard Shortcuts
Keyboard shortcuts bypass traditional menu navigation by triggering native OS features instantly through physical key combinations.
- Example: Pressing
Win+Zopens the Snap Layouts menu in Windows 11, allowing you to instantly tile open application windows. (Note: Layout options scale dynamically depending on monitor resolution and screen size).
Run Commands
The Run dialog box serves as a direct execution line to launch executable files, system management consoles, and Control Panel tools without searching through the Start Menu.
- Execution: Press
Win+R, type the designated alias (e.g.,msinfo32for System Information orcleanmgrfor Disk Cleanup), and hitEnter.
Command-Line Commands
Command-line tools execute text-based instructions directly within Command Prompt (CMD), Windows PowerShell, or Windows Terminal. These interfaces range from harmless diagnostic queries (ipconfig, ping) to powerful execution commands that modify network states or registry flags.
- Important Precaution: Not all command-line operations are benign. Commands that modify disk structures or system integrity require explicit system permission and should never be run without understanding their syntax.
Administrative Commands (Elevated Mode)
Certain command-line utilities require elevated system permissions to execute successfully. If run in a standard terminal, they will fail with access-denied errors.
- Example: Running
sfc /scannow(System File Checker) inspects all protected operating system files and replaces corrupted binaries with cached copies. Because this action modifies core OS files, Microsoft requires the terminal to be launched with Administrator privileges.
Windows Settings (GUI)
The Windows Settings app provides a structured graphical interface for general system configuration, device management, and user privacy toggles.
- Navigation: Accessed via
Win+Ior navigating through categories such asSettings→SystemorSettings→Privacy & security. - Scope: While convenient for managing hardware access (e.g., camera and location permissions), graphical settings do not always govern legacy Win32 desktop applications, which may require policy edits or registry changes.
Why Strategic Tool Selection Matters
Deploying the correct Windows commands and settings depends entirely on the specific problem you are solving:
- Performance Bottlenecks: If your PC boots slowly, auditing startup impact via
Task ManagerorSettings→Apps→Startupis far more effective than blindly executing repair scripts. - Network Troubleshooting: If web pages fail to load, running command-line diagnostics like
pingoripconfig /flushdnsprovides immediate network feedback that graphical menus cannot display. - Multitasking Efficiency: If you simply need to arrange multiple open documents side-by-side,
Win+Zsolves the issue in milliseconds without launching any system menus.
Mastering Windows commands and settings isn’t about memorizing text strings—it’s about selecting the right level of system access for the task at hand.
Are These Windows Commands and Settings Safe for Beginners?
Yes—the vast majority of Windows commands and settings covered in this guide are completely safe for everyday users when executed as directed. However, system tools operate at different levels of authority, and their potential impact on your system varies significantly depending on the interface you use.
Executing basic actions—such as launching Task Manager, inspecting hardware specs, tweaking notification preferences, or running network queries—carries zero risk of data loss or system instability. Conversely, advanced command-line tools that interact with disk partitions, boot configurations, or core registry files require greater caution.
To ensure safety, this guide categorizes Windows commands and settings by their execution risk:
- Read-Only / Information Tools: Safe, non-destructive utilities designed to report data or adjust basic user preferences.
- Diagnostic & Administrative Commands: High-authority tools that require elevated administrative privileges to repair, modify, or reconfigure core operating system files.
Whenever an entry requires an Elevated Command Prompt (Administrator Mode) or carries system-wide impact, it will be clearly flagged with explicit execution warnings.
⚠️ The Cardinal Rule for Command Line Safety
Never copy and paste an unfamiliar command into Command Prompt, PowerShell, or Windows Terminal simply because a website, video, or AI prompt instructs you to do so. Always verify what the specific syntax and flags do before pressing
Enter—especially when prompted for Administrator privileges by User Account Control (UAC).
Which Windows Version Is This Guide Designed For?
This guide uses Windows 11 as its baseline architecture.
Because Microsoft officially ended standard support for Windows 10 on October 14, 2025, establishing Windows 11 as the core standard ensures this guide remains evergreen for modern hardware and updated software environments.
Windows 10 Backward Compatibility
While optimized for Windows 11, the majority of the featured Windows commands and settings retain strong backward compatibility with Windows 10:
- Command-Line & Run Tools: Terminal utilities (such as
ipconfig,ping, andsfc /scannow) and Run aliases (msinfo32,cleanmgr) function identically across both operating systems. - Graphical Interface Differences: Menu paths, settings categories, and utility interfaces (e.g., Snap Layouts vs. Snap Assist, or modern Settings app layouts) may vary slightly on Windows 10 machines.
Extended Support & Migration Context
Devices running Windows 10 do not cease functioning post-support, but standard non-enrolled systems no longer receive free monthly security patches or technical assistance from Microsoft.
This guide explicitly includes legacy navigation notes for users who are:
- Running Windows 10 under Microsoft’s Extended Security Updates (ESU) program.
- Operating on managed corporate or educational networks with deferred migration schedules.
- Temporarily utilizing Windows 10 while preparing hardware upgrades for Windows 11 compliance.
Which 25 Windows Commands and Settings Should You Learn First?
You do not need to memorize all 25 utilities at once. The most efficient approach is to master the specific Windows commands and settings that solve the immediate performance, diagnostic, or productivity problems you encounter regularly.
Task-Based Quick Reference Matrix
| If your objective is to… | Start with this tool | Primary Interface |
| Speed up a slow startup sequence | Startup Apps / Task Manager | Settings / Task Manager |
| Automatically clear unnecessary system files | Storage Sense | Windows Settings |
| Audit complete hardware and OS specifications | msinfo32 | Run Dialog (Win + R) |
| Inspect IP configurations and network subnets | ipconfig | Command Prompt / Terminal |
| Diagnose network latency and connectivity | ping | Command Prompt / Terminal |
| Scan and repair corrupted Windows system files | sfc /scannow | Elevated Terminal (Admin) |
| Capture targeted screenshots instantly | Win + Shift + S | Keyboard Shortcut |
| Access historical clipboard data | Win + V | Keyboard Shortcut |
| Tile multiple windows across displays | Win + Z / Snap Layouts | Keyboard Shortcut / GUI |
| Silence notifications and reduce distractions | Focus / Do Not Disturb | Windows Settings |
| Audit camera, microphone, or location access | App Permissions | Windows Settings |
| Backup settings and app configurations | Windows Backup | Windows Settings |
| Locate a missing or stolen laptop | Find My Device | Windows Settings |
| Wirelessly share files with nearby PCs | Nearby Sharing | Settings / Action Center |
| Manage patch deployment and security updates | Windows Update | Windows Settings |
Key Technical Qualifications & Operational Limits
Before relying on these features, it is vital to understand their operational parameters and technical constraints:
- Storage Sense: Operating primarily on the system drive (
C:), Storage Sense automatically clears temporary files and empties the Recycle Bin. By default, it does not delete items in your personalDownloadsfolder or manage offline cloud content unless you explicitly configure those thresholds.
- Find My Device: This security feature requires proactive setup before a device is misplaced. It requires an active personal Microsoft Account with location services enabled; it is generally unsupported on managed domain accounts (such as corporate or school credentials).
- Windows Backup: Syncs user configurations, app preferences, Wi-Fi profiles, and selected folders via Microsoft OneDrive. Its scope is tethered directly to your available cloud storage quota and Microsoft account integration.
- Nearby Sharing: Facilitates local wireless file transfers over Bluetooth or Wi-Fi. Transfer speed and feature availability depend on network profiles, local security policies, and hardware compatibility.
Understanding these underlying mechanisms ensures you deploy the right Windows commands and settings safely and effectively.
25 Essential Windows Commands & Settings for PC and Laptop
This guide begins with #1–#10, covering five essential Windows productivity shortcuts and five built-in Run commands and system utilities. Each tip includes practical steps and use cases to help you navigate Windows, access important settings, troubleshoot common issues, and work more efficiently.
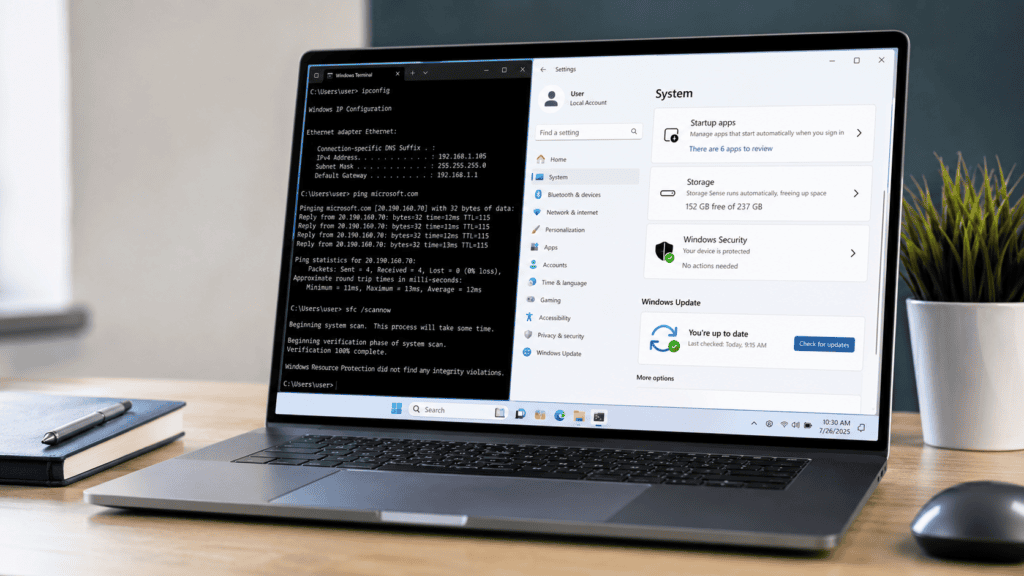
The instructions are based primarily on current Microsoft documentation for Windows 11, with Windows 10 compatibility noted where applicable.
Win + R — Open the Windows Run Dialog
The Win + R key combination launches the Run dialog box—the fastest execution line for opening built-in system utilities, administrative panels, folders, and executable programs without navigating complex menu paths.
Access Method: Keyboard Shortcut (Win + R)
Permission Level: Standard User (Inherits logged-in user context)
Target OS: Windows 11 & Windows 10
What It Does
The Run dialog provides an execution prompt that interprets system aliases, environment variables, and file paths. Entering a supported executable name or Control Panel alias (.cpl file) launches the target interface directly, bypassing the standard Start Menu search indexing.
Execution Flow:
- Press
Win+Rto open the prompt. - Type the designated alias (e.g.,
msinfo32). - Press
Enter(or click OK).
Why It Is Useful
Win + R serves as a core productivity hub when you know the exact system alias for the utility you need. It reduces a multi-click navigation process into a split-second execution.
| Key Run Command | Output / Targeted Utility | Primary Use Case |
msinfo32 | System Information | Comprehensive hardware, component, and OS environment audit. |
dxdiag | DirectX Diagnostic Tool | Graphics card driver details, display specs, and sound hardware status. |
appwiz.cpl | Programs and Features | Legacy uninstallation interface for traditional desktop apps. |
cleanmgr | Disk Cleanup | Utility for identifying and removing legacy system temporary files. |
msconfig | System Configuration | Advanced boot parameter management and legacy service auditing. |
Practical Use Case
Scenario: A technical support specialist asks for your exact motherboard model, BIOS version, and installed RAM before troubleshooting a performance bottleneck.
Instead of searching through multiple pages in the Settings app:
- Hit
Win+R. - Type
msinfo32and pressEnter. - Instantly export or read out your granular hardware specifications from the System Summary page.
Important Precautions & Limitations
- Run vs. Command-Line: The Run box is an executable launcher, not a terminal emulator. While typing a GUI alias like
msinfo32works seamlessly, entering raw command-line utilities (e.g.,ipconfigorping) without parameters will open a Command Prompt window that immediately executes and closes before you can read the output. - Privilege Scope: Running a command via
Win+Rinherits standard user privileges. To launch a utility with administrative rights, holdCtrl+Shift+Enterinstead of pressingEnteralone.
SkillDential Tip: Master
Win+Rfirst. Learning 5-10 core Run aliases will fundamentally change how fast you navigate Windows commands and settings, saving minutes of menu navigation every day.
Win + V — Open and Enable Clipboard History
The Win + V key combination opens Windows Clipboard History, transforming the native operating system clipboard from a single-item memory buffer into a multi-item session log.
Access Method: Keyboard Shortcut (Win + V)
Permission Level: Standard User
Target OS: Windows 11 & Windows 10
What It Does
Standard Windows copy-and-paste shortcuts (Ctrl + C and Ctrl + V) store only the single most recently copied item, overwriting previous content instantly.
Pressing Win + V launches a pop-up overlay that retains a chronological buffer of text strings, code snippets, links, and HTML-formatted data copied during your active session. Clicking any item in the overlay pastes it directly into your active cursor position.
How to Enable Clipboard History
By default, Windows does not activate this feature out of privacy considerations.
- Fast Method: Press
Win+V. If prompted with a message stating Clipboard History is turned off, click Turn on. - Settings Method: Navigate to
Settings→System→Clipboardand toggle Clipboard history to On.
Why It Is Useful
Clipboard History eliminates repetitive tab-switching when pulling reference data, snippets, or contact information from multiple sources.
- Item Pinning: Hover over any frequently used item in the clipboard stack, click the three-dot menu, and select Pin. Pinned items remain saved in the history buffer even after you reboot or shut down your PC.
- Rich Content: Captures plain text, formatted rich text, and smaller image clips captured via standard copy operations.
Practical Use Case
Scenario: A content strategist, researcher, or developer is writing a technical document requiring frequent insertion of four distinct assets: a project title, a target URL, an executive summary, and a specific system path.
Rather than switching back and forth between source files four separate times:
- Copy all four text blocks sequentially using
Ctrl+C. - Switch to the primary editor.
- Hit
Win+Vto call up the history pop-up and select each item as needed.
Important Privacy & Security Precautions
- Sensitive Data Exposure: Plaintext passwords, API keys, personal identification numbers, and payment details copied to the clipboard remain visible in the
Win+Vstack to anyone with physical access to your unlocked screen. - Cross-Device Sync Risks: Under
Settings→System→Clipboard, Windows provides an option to sync your clipboard across logged-in Microsoft devices via cloud services. Exercise caution when enabling this feature on shared or unmanaged devices. - Clearing History: You can purge unpinned items instantly by opening
Win+Vand selecting Clear all, or via the main Clipboard settings page.
SkillDential Tip:
Win+Vis one of the single highest-ROI Windows commands and settings for writers, researchers, and technical professionals. Pair it with pinned snippets to create a lightweight, native text-expander right on your desktop.
Ctrl + Shift + Esc — Open Task Manager
The Ctrl + Shift + Esc key combination bypasses intermediary menus and launches Task Manager directly. It serves as your primary real-time system monitor for auditing hardware utilization, identifying background bottlenecks, and managing active processes.
Access Method: Keyboard Shortcut (Ctrl + Shift + Esc)
Permission Level: Standard User / Elevated (Functionality scales with privileges)
Target OS: Windows 11 & Windows 10
Code language: JavaScript (javascript)
What It Does
While standard users often rely on Ctrl + Alt + Delete (which opens an execution interrupt screen requiring an extra click), Ctrl + Shift + Esc sends an immediate hardware signal to launch the Task Manager interface.
Task Manager provides real-time telemetry across key operational layers:
- Processes: Live resource breakdown (CPU, RAM, Disk, Network, GPU) broken down by active apps and background services.
- Performance: Hardware utilization graphs, clock speeds, active CPU cores, memory allocation, and GPU temperature.
- App History: Cumulative resource usage over time for Universal Windows Platform (UWP) apps.
- Startup Apps: Startup impact ratings and toggle controls for software launching on boot.
- Services: Low-level Windows background services state (Running/Stopped).
How to Use It for System Diagnostics
- Press
Ctrl+Shift+Escto open Task Manager. - Select Performance from the left navigation bar (or top tab in older builds) to audit hardware stress levels.
- If memory or CPU usage is near 100%, switch to the Processes tab.
- Click on the CPU or Memory column header to sort processes in descending order of consumption.
Practical Use Case
Scenario: Your laptop suddenly slows down, the cooling fans ramp up, and mouse inputs begin lagging while running several browser tabs and design tools.
Rather than restarting the PC blindly:
- Hit
Ctrl+Shift+Esc. - Check the Performance tab to confirm whether the bottleneck is system RAM or high CPU utilization.
- Switch to Processes, identify an unresponsive background process or web tab consuming excessive memory, select it, and click End Task.
Advanced Diagnostic Application
Microsoft technical guidance highlights Task Manager as a key isolation tool for visual hardware diagnostics.
For instance, when troubleshooting a flickering screen issue:
- Open Task Manager (
Ctrl+Shift+Esc). - If Task Manager flickers along with the rest of the display, the root cause is likely an outdated or corrupted display driver.
- If everything flickers except the Task Manager window, the issue is caused by an incompatible third-party application.
Important Caution
⚠️ Do not indiscriminately terminate unfamiliar processes. Many system components (such as
svchost.exe,lsass.exe, orexplorer.exe) run under generic names. Terminating critical operating system processes or security services can crash Windows, cause unsaved data loss, or force an unexpected system reboot.
SkillDential Tip: Treat Task Manager primarily as a diagnostic telemetry dashboard, not just a force-close button. Use its metrics to pinpoint root causes before changing any system settings or running administrative commands.
Win + Shift + S — Capture Part of Your Screen
The Win + Shift + S key combination triggers the native Snipping Tool overlay, letting you select, crop, and capture a targeted section of your screen instantly without third-party software.
Access Method: Keyboard Shortcut (Win + Shift + S)
Permission Level: Standard User
Target OS: Windows 11 & Windows 10
What It Does
When you press Win + Shift + S, the display dims, and a floating toolbar appears at the top of the screen with four distinct capture modes:
- Rectangular Snip (Default): Drag a selection box around any specific region.
- Free-form Snip: Draw an arbitrary shape around any object.
- Window Snip: Click on a specific application window or dialog box to capture only that frame.
- Full-screen Snip: Instantly grab the entire display canvas.
Once selected, the image is automatically copied to your clipboard, and a thumbnail notification appears in the lower-right corner of your screen.
How to Use It Efficiently
- Press
Win+Shift+S. - Select your desired capture mode from the top toolbar.
- Click and drag over the target region.
- Paste the image directly into an email, document, or messaging app using.
Ctrl+V. - (Optional) Click the Snipping Tool notification pop-up to open the editor for markup, highlighting, cropping, or saving to a specific folder (
.png/.jpg).
Practical Use Case
Scenario: A web application displays a cryptic error code, or an online portal fails to load. You need to report this issue to an IT department, client, or support desk.
Instead of capturing your entire desktop—which clutters the image and requires manual cropping later:
- Hit
Win+Shift+S. - Draw a precise rectangular frame around only the error code dialog.
- Hit
Ctrl+Vinside your support ticket or email draft to send an immediate, high-signal diagnostic graphic.
Privacy & Security Precautions
- Unintentional Information Leaks: Full-screen snips or wide crops often reveal open browser tabs, taskbar application icons, personal email addresses, active chat handles, or confidential file directories.
- Review Before Sending: Always inspect your cropped capture before dispatching it to external recipients, especially when working in shared or corporate environments.
Feature Nuance: Snipping Tool Evolution
While Win + Shift + S handles rapid image capture, Microsoft’s Snipping Tool now includes screen recording (Win + Shift + R in modern builds) and OCR text extraction (Text Actions).
Certain advanced AI features (like Auto Super Resolution or background removal) require specific Copilot+ PC hardware, but the core. Win + Shift + S screenshot functionality remains universally available across all modern Windows installations.
SkillDential Tip: Combine
Win+Shift+SwithWin+V(Clipboard History) to capture multiple screen regions sequentially, then paste them into your documentation one by one without stopping to save individual files.
Win + Z — Open Snap Layouts
The Win + Z key combination launches Snap Layouts, a native window-management interface in Windows 11 designed to tile multiple open applications cleanly across your display without manual window resizing.
Access Method: Keyboard Shortcut (Win + Z)
Permission Level: Standard User
Target OS: Windows 11 (Enhanced Snap functionality)
What Are Snap Layouts?
Snap Layouts replace manual drag-and-drop window resizing with precision desktop grid arrangements.
Instead of dragging window borders to manually divide your screen, pressing Win + Z brings up a pop-up grid over the active application’s maximize/restore button. Selecting a zone automatically snaps the active window into position and triggers Snap Assist, which prompts you to select open applications to fill the remaining screen real estate.
Typical arrangement models include:
- 50/50 Split: Two equal vertical columns (ideal for standard laptop screens).
- 80/20 Focus: One dominant main window paired with a narrower side panel.
- Three-Column Grid: Equal or weighted vertical thirds (optimized for ultrawide displays).
- Four-Quadrant Grid: 2×2 tiling across four equal corners.
How to Execute Win + Z
- Open the applications you need for your active workflow.
- Click on the primary window you want to position.
- Press
Win+Z(or hover your mouse over the window’s Maximize icon in the top right corner). - Type the number corresponding to your preferred grid layout, or click the specific quadrant/column.
- Use Snap Assist to click on open application thumbnails for the remaining vacant zones.
Why It Is Useful
Constantly switching between maximized application windows using Alt + Tab disrupts focus and slows down multi-source workflows. Snap Layouts maintain continuous visual context across parallel tasks.
- Research & Synthesis: Keep primary reference material continuously visible while drafting reports, code, or documentation.
- Cross-Referencing: Compare two spreadsheets, PDFs, or design revisions side-by-side without overlapping borders.
- Snap Groups: Once a layout is populated, Windows groups those apps together on your taskbar. Hovering over the app icon allows you to minimize or restore the entire cluster in a single click.
Practical Use Case
Scenario: A content strategist or market analyst is synthesizing technical survey data into a report.
Instead of toggling back and forth between a web browser, an Excel sheet, and a Word document:
- Focus on the main document editor and press
Win+Z. - Select a three-pane layout (Left half: Word document; Top right: Excel data; Bottom right: Web browser).
- Populate the remaining two slots using Snap Assist.
- Execute the entire research-and-writing session without minimizing a single window.
Ergonomic & Display Considerations
- Screen Real Estate vs. Grid Density: Layout density should match monitor size and resolution. On a standard 13-inch or 15-inch laptop display (1080p), attempting a 4-quadrant split reduces text size and forces horizontal scrolling. Two-window splits (
Win+Left/Right Arrow) work best on laptops, whereas 3-pane or 4-pane layouts shine on 27-inch+ or ultrawide monitors. - Windows 10 Alternative: While Windows 10 supports basic window snapping (dragging windows to screen edges or using
Win+Arrow Keys), the visualWin+Zpop-up menu and multi-app Snap Groups are exclusive to Windows 11.
SkillDential Tip: Memorize number shortcuts after pressing
Win+Z. Windows 11 assigns numbers to each layout box—pressingWin+Zfollowed by1then2snaps your active app into position in less than a second without touching the mouse.
msinfo32 — View Detailed System Information
Executing msinfo32 opens Microsoft System Information—a comprehensive built-in diagnostic console that exposes deep technical specifications across your PC’s operating system, hardware resources, peripheral components, and active software environment.
Access Method: Run Dialog (Win + R -> msinfo32) or Terminal
Permission Level: Standard User (Read-Only access)
Target OS: Windows 11 & Windows 10
How to Open System Information
- Press
Win+Rto open the Run dialog. - Type
msinfo32and hitEnter. - The System Information GUI window will open instantly.
What msinfo32 Discloses
Unlike basic high-level summaries found in the modern Settings app (Settings → System → About), msinfo32 provides granular hardware and firm-level data broken down into four core categories:
- System Summary: OS name, exact build number, system manufacturer, precise motherboard model (BaseBoard Product), processor specifications, hardware abstraction layer (HAL), installed Physical Memory (RAM), BIOS version/date, SMBIOS version, and Secure Boot / UEFI state.
- Hardware Resources: Direct Memory Access (DMA) channels, IRQs, I/O ports, and Memory addresses (critical for resolving legacy hardware driver conflicts).
- Components: Technical attributes of audio codecs, display adapters (GPU driver versions, resolution, VRAM), network interface controllers, storage controllers, and optical drives.
- Software Environment: Active running tasks, loaded drivers, print jobs, startup programs, and environment variables.
Why It Is Useful
msinfo32 serves as the authoritative source of truth when assessing hardware compatibility or verifying firmware states before applying system updates or installing demanding software.
- Software Requirement Audits: Verify whether your CPU, RAM, and GPU meet high-performance rendering, virtualization, or gaming requirements.
- Firmware & Security Audits: Check whether your system is booted in UEFI mode versus legacy BIOS, and verify if Secure Boot or Virtualization-based Security (VBS) is active.
- BIOS Update Verification: Determine your exact motherboard model and current BIOS version to download correct updates from the hardware manufacturer.
Practical Use Case
Scenario: You are preparing to install a specialized software suite, modern game, or local AI framework that requires explicit system features (such as TPM 2.0, Virtualization enabled, a 64-bit OS build, and UEFI boot mode).
Instead of opening multiple vendor utilities or guessing based on external stickers:
- Hit
Win+R, typemsinfo32, and pressEnter. - Review the System Summary main panel.
- Instantly locate lines for BIOS Mode, Secure Boot State, Processor, and Installed Physical Memory (RAM) to confirm compatibility in seconds.
Advanced Diagnostic Feature: Generating System Reports
For remote troubleshooting, msinfo32 allows you to export complete system diagnostics to a portable file format using command-line switches:
- Export via CLI: Open Command Prompt and run
msinfo32 /report C:\sysreport.txtcompiles a complete text file detailing your hardware setup. - Export via GUI: In the System Information window, click
File→Export...to save a.txtlog, orFile→Save...to generate a native.nfosnapshot file readable on other Windows devices.
Privacy & Security Precautions
- Sensitive Identifiers: Exported
.nfoor.txtreports contain full system configurations, domain/user names, network details, and loaded software services. - Redact Before Sharing: Never upload a full, unredacted
msinfo32report onto public support forums, GitHub repositories, or open social platforms.
SkillDential Tip: When an IT engineer or software vendor asks, “What are the exact hardware specs and BIOS build of this machine?”—don’t waste time hunting through settings menus or vendor bloatware. Launch
msinfo32for an immediate, standardized diagnostic readout.
dxdiag — Open the DirectX Diagnostic Tool
Executing dxdiag launches the DirectX Diagnostic Tool, an essential utility for inspecting hardware drivers, DirectX API capabilities, display adapters, and audio output interfaces.
Access Method: Run Dialog (Win + R -> dxdiag) / Terminal
Permission Level: Standard User
Target OS: Windows 11 & Windows 10
How to Open dxdiag
- Press
Win+Rto open the Run dialog box. - Type
dxdiagand pressEnter. - (First-time launch note) If prompted to check if your drivers are digitally signed by Microsoft, select Yes.
What dxdiag Does & Why It Is Useful
While general system information tools give a broad overview of your computer, dxdiag specializes in multimedia, graphics acceleration layers, and audio pipeline diagnostics.
The interface is divided into key functional tabs:
- System Tab: Reports the precise DirectX version installed (e.g., DirectX 12 Agility SDK support), system BIOS/UEFI version, processor architecture, and page file usage.
- Display Tab(s): Outlines your active Graphics Processing Unit (GPU), dedicated Video RAM (VRAM), shared memory, exact driver version string, driver release date, and active Feature Levels. (Systems with hybrid GPUs, such as laptops with integrated Intel/AMD graphics plus a discrete NVIDIA GPU, will show separate Display tabs).
- Sound Tab(s): Identifies audio hardware devices, digital audio interfaces (HDMI/DisplayPort audio drivers), and active output drivers.
- Input Tab: Audits connected Human Interface Devices (HIDs) like mice, keyboards, game controllers, and diagnostic input polling.
Practical Use Case
Scenario: A high-end video editor, 3D rendering package, or modern game fails to launch or exhibits visual artifacting. The software vendor’s technical support requires your exact GPU driver version and DirectX feature tier to verify hardware compliance.
Rather than searching through third-party control panels:
- Hit
Win+R, typedxdiag, and pressEnter. - Click on the Display 1 (or Display 2) tab.
- Review the Drivers box on the right side to extract the exact Version number and Date, or click Save All Information… at the bottom to output a complete text report (
dxdiag.txt).
Common Misconception vs. Technical Reality
⚠️
dxdiagis NOT a Performance Benchmark. A common misconception among PC users is thatdxdiagmeasures system speed or benchmarks graphics performance. It does not run stress tests, render frames, or score your GPU. It is purely a static diagnostic and system profile auditor. To benchmark rendering speeds or stress-test hardware stability, dedicated benchmarking software is required.
SkillDential Tip: Remember the core distinction: Use
msinfo32for broad hardware, memory, and OS configuration checks, but reach fordxdiagwhenever the problem specifically involves display resolution issues, GPU driver bugs, audio output failures, or game launching errors.
appwiz.cpl — Open Programs and Features
Executing appwiz.cpl opens the legacy Programs and Features management panel within the Control Panel interface. It serves as a direct management hub for traditional Win32 desktop applications, runtime packages, and system components.
Access Method: Run Dialog (Win + R -> appwiz.cpl) / Terminal
Permission Level: Standard User (Uninstallation requires Administrator rights)
Target OS: Windows 11 & Windows 10
How to Open appwiz.cpl
- Press
Win+Rto open the Run dialog box. - Type
appwiz.cpland pressEnter. - Windows directly launches the Control Panel’s Programs and Features page.
Why appwiz.cpl Is Useful
While modern versions of Windows handle modern application management inside Settings → Apps → Installed apps, appwiz.cpl remains a vital tool for technical users and IT administrators.
- Legacy App Installers: Many traditional enterprise desktop applications, installer frameworks, and developer suites expose deeper repair, modification, and custom feature options through the classic Control Panel installer interface that modern Settings pages sometimes abstract.
- Direct Component Repair: Selecting an item in
appwiz.cplfrequently exposes native Change or Repair buttons provided by the application’s original executable package, allowing you to fix corrupted installations without performing a complete reinstallation. - Optional Windows Features: The side navigation bar includes a direct link to “Turn Windows features on or off”, where you can manage low-level OS options like Hyper-V virtualization, Internet Information Services (IIS), SMB protocol settings, and the Windows Subsystem for Linux (WSL) base components.
Practical Use Case
Scenario: A heavy desktop application (such as an older database tool, IDE, or design package) becomes unstable or experiences missing dynamic-link library (.dll) errors after an update.
Instead of hunting through complex installer menus:
- Hit
Win+R, typeappwiz.cpl, and hitEnter. - Locate the problematic application in the alphabetical list.
- Select it and click Repair or Change at the top of the column to trigger the native installation maintenance wizard.
Important Precautions & Legacy Context
- Do Not Delete Unrecognized Libraries: Your installed programs list inevitably includes background dependencies, such as Microsoft Visual C++ Redistributables, .NET Runtimes, audio processing libraries, or chipset drivers. Uninstalling these components because you don’t actively launch them will break dependent applications or system features.
- Modern vs. Legacy Apps: Modern Universal Windows Platform (UWP) apps, progressive web apps (PWAs), and Microsoft Store applications do not appear in
appwiz.cpl. They must be managed exclusively through Settings → Apps → Installed apps.
SkillDential Tip: Never assume an unfamiliar software entry is “bloatware.” Always search the exact package name before hitting uninstall. If a package is named
Microsoft Visual C++ 2015-2022 Redistributable, leave it intact—multiple installed applications rely on it to execute code.
cleanmgr — Open Disk Cleanup
Executing cleanmgr launches Disk Cleanup, the built-in Windows utility designed to calculate, audit, and remove unnecessary system-level files, temporary cache blocks, and residual installation packages.
Access Method: Run Dialog (Win + R -> cleanmgr) / Terminal
Permission Level: Standard User (Elevated mode required for system-wide cleanup)
Target OS: Windows 11 & Windows 10
How to Open and Use Disk Cleanup
- Press
Win+Rto open the Run dialog. - Type
cleanmgrand pressEnter. - Select the target drive letter (typically
C:) and click OK. - Disk Cleanup scans the volume and presents a checklist of removable file categories alongside the space they consume.
- (Optional for deep cleanup) Click Clean up system files (requires Administrator rights) to trigger a second scan that includes Windows Update backups and legacy OS installation files.
- Check the desired categories, click OK, and confirm with Delete Files.
Core File Categories Cleaned by cleanmgr
| Category | Description | Safety Profile |
| Temporary Internet / Cache Files | Cached web pages and assets from browsers and local apps. | 100% Safe — Regenerates automatically as needed. |
| Windows Update Cleanup | Legacy update installer packages retained after feature updates. | Safe — Note: Deleting these prevents rolling back to a previous Windows build. |
| Recycle Bin | Deleted files sitting in temporary stage on the local volume. | Use Caution — Inspect contents first; once purged viacleanmgr, recovery is difficult. |
| Delivery Optimization Files | Local network update cache files used to share patches between PCs. | 100% Safe — Can be cleared anytime to recover disk space. |
| Setup Log / Crash Dump Files | System error logs created during crashes or failed installations. | Safe — Useful only if an IT specialist is actively diagnosing a crash. |
Practical Use Case
Scenario: Your primary SSD drive (C:) displays a low-disk-space warning following a major bi-annual Windows feature update, leaving insufficient room to install required software or download large working files.
Rather than manually hunting down system directories or risking the deletion of vital personal files:
- Hit
Win+R, typecleanmgr, and pressEnter. - Click Clean up system files and select
C:. - Select Windows Update Cleanup and Temporary Windows installation files (which often consume between 10 GB and 30 GB post-update).
- Run the cleanup routine to reclaim tens of gigabytes safely within minutes.
Technical Realities & Misconceptions
⚠️ Disk Space vs. Processing Speed
Freeing up storage space via
cleanmgrprevents “disk full” errors and prevents Windows swap file bottlenecking, but it is not a universal PC performance booster. Deleting temporary files will not fix a computer throttled by inadequate RAM, background startup bloat, high CPU usage, thermal throttling, or mechanical hard drive latency.
SkillDential Tip: While modern Windows 11 configurations emphasize automated storage maintenance via Storage Sense (covered later in this guide), legacy
cleanmgrremains the fastest, most granular manual execution method for instantly clearing specific system-level cache blocks without navigating the Settings app.
msconfig — Open System Configuration
Executing msconfig launches the System Configuration utility—an advanced administrative tool engineered for diagnosing system boot failures, creating isolated environment tests, and resolving service conflicts.
Access Method: Run Dialog (Win + R -> msconfig) / Terminal
Permission Level: Administrator Privileges Required
Target OS: Windows 11 & Windows 10
How to Open System Configuration
- Press
Win+Rto open the Run dialog. - Type
msconfigand pressEnter. - (User Account Control prompt) Click Yes to launch with administrative authority.
Core Diagnostic Tabs in msconfig
- General: Configures system startup states:
- Normal startup: Loads all device drivers and background services.
- Diagnostic startup: Loads basic services and drivers only (similar to Safe Mode).
- Selective startup: Allows targeted isolation of system services and startup items.
- Boot: Controls advanced startup parameters, Safe Boot diagnostic modes, boot logging, and multi-OS boot menus.
- Services: Lists all background system services. Includes a critical checkbox to Hide all Microsoft services to isolate third-party software interference.
- Startup: Links directly to Task Manager in modern OS builds to manage startup impact.
- Tools: Provides direct launch shortcuts to core diagnostic applications like Event Viewer, System Information, and Registry Editor.
Practical Diagnostic Use Case: Performing a “Clean Boot”
Scenario: Windows experiences erratic crashes or application errors immediately after logging in, and standard Task Manager troubleshooting fails to isolate the cause.
Technical specialists deploy msconfig to execute a Clean Boot—a technique that starts Windows with a minimal set of drivers and startup programs to isolate software conflicts:
- Launch
msconfigand navigate to the Services tab. - Check Hide all Microsoft services (crucial step to prevent disabling core OS components).
- Click Disable all to turn off remaining third-party services.
- Open the Startup tab, click Open Task Manager, and disable startup applications.
- Restart your PC. If the issue disappears, re-enable services in smaller batches via
msconfigto identify the conflicting application.
Debunking Myths & Crucial Precautions
⚠️ The “Number of Processors” Optimization Myth A viral misconception claims that navigating to
msconfig→Boot→Advanced optionsand locking the Number of processors drop-down “unlocks” hidden CPU cores to increase gaming speeds.This is false. By default, Windows automatically detects and utilizes all available physical cores and logical processors. Manually setting this value caps or restricts your CPU resources. Leaving it unchecked allows Windows to manage hardware dynamically.
SkillDential Tip: Treat
msconfigstrictly as an administrative diagnostic lab—never as a performance booster. For routine startup application management, always rely on Windows commands and settings interfaces likeTask Manager(Ctrl+Shift+Esc) orSettings→Apps→Startup.
Quick Comparison: Windows Commands and Settings #1–#10
Before moving on to network diagnostics and administrative command-line utilities, here is a quick-reference summary of the first ten Windows commands and settings covered so far.
| # | Command / Shortcut | Primary Purpose | Skill Level | Execution Risk Profile |
| 1 | Win + R | Launch the Windows Run dialog prompt instantly | Beginner | Very Low — Inherits user privileges; safe launcher interface. |
| 2 | Win + V | Open and enable session-based Clipboard History | Beginner | Low — Minor privacy risk if sensitive data is copied on shared screens. |
| 3 | Ctrl + Shift + Esc | Launch Task Manager directly for system telemetry | Beginner | Low — Safe for monitoring; risk increases if ending critical OS processes. |
| 4 | Win + Shift + S | Trigger Snipping Tool for targeted screen capture | Beginner | Very Low — Safe tool; inspect captures to avoid leaking private data. |
| 5 | Win + Z | Open Snap Layouts to tile application windows | Beginner | Very Low — Completely reversible UI arrangement layout tool. |
| 6 | msinfo32 | Open System Information for deep hardware/OS audit | Beginner | Very Low — Safe, read-only system report utility. |
| 7 | dxdiag | Run DirectX Diagnostic Tool for GPU and audio checks | Beginner | Very Low — Safe, read-only diagnostic auditor. |
| 8 | appwiz.cpl | Launch legacy Programs and Features uninstaller | Beginner–Inter. | Moderate — Uninstalling essential software or runtimes can disrupt apps. |
| 9 | cleanmgr | Run Disk Cleanup to clear temporary system files | Beginner | Low — Safe when categories are reviewed before confirming deletion. |
| 10 | msconfig | Launch System Configuration for boot/service isolation | Intermediate | High — Improperly modifying services or boot options can prevent boot. |
What Should Beginners Learn First?
If you are completely new to navigating built-in Windows commands and settings, do not try to memorize everything at once. Focus first on these high-ROI, risk-free tools:
- Everyday Shortcuts:
Win+R(Run Dialog),Win+V(Clipboard History),Win+Shift+S(Snipping Tool), andWin+Z(Snap Layouts). - Core Diagnostics:
Ctrl+Shift+Esc(Task Manager) andmsinfo32(System Information).
These core entries deliver immediate productivity gains and essential system visibility without risking system stability.
Advanced configuration tools like msconfig or low-level command-line scripts are critical to know about, but they should be used deliberately for specific troubleshooting—not modified casually.
Ultimately, mastering Windows commands and settings isn’t about collecting complex terminal commands. It is about developing the technical discipline to match the right utility to the problem at hand—and knowing when leaving a setting untouched is the smartest decision.
Essential Windows Command-Line Commands (#11–#15)
This section moves beyond Windows shortcuts and graphical utilities to five essential Windows command-line commands. These tools can help you troubleshoot network problems, view detailed system information, check Windows system files for corruption, and diagnose or repair disk-related issues.
Before using them, it is important to understand that not all commands have the same level of impact. Some are primarily read-only diagnostic commands that display information without changing your system, while others can repair files, modify settings, or make changes to your PC.
Commands that alter the system should be used carefully and, in some cases, require Command Prompt, Windows Terminal, or PowerShell with administrator privileges.
ipconfig — View Your Windows Network Configuration
Executing ipconfig within Command Prompt or Windows Terminal displays your computer’s active TCP/IP network interfaces, local IP assignments, subnet masks, and network gateway addresses.
Access Method: Command Prompt / PowerShell / Windows Terminal
Permission Level: Standard User (No elevated rights needed for basic queries)
Target OS: Windows 11 & Windows 10
How to Run ipconfig
- Open the Start Menu (or press.
Win+S). - Search for Terminal or Command Prompt and press.
Enter. - Type
ipconfigand pressEnter.
Windows will print the networking details for all active and inactive adapters, including Wi-Fi, Ethernet, VPN tunnels, and virtual machine adapters.
Core Command Variants & Flags
| Command Variant | Functional Output | Primary Use Case |
ipconfig | Basic IPv4/IPv6 addresses, subnet mask, and Default Gateway. | Quick checks of local IP addresses and default router connectivity. |
ipconfig /all | Detailed audit: MAC address, DHCP lease timestamps, DNS servers. | Hardware-level network troubleshooting and DNS server verification. |
ipconfig /flushdns | Purges and resets the local Windows DNS resolver cache. | Resolving domain name errors or outdated site redirect loops. |
ipconfig /release | Drops the current DHCP-assigned IP configuration. | Forcing the network adapter to abandon its current local IP address. |
ipconfig /renew | Requests a fresh IP address assignment from the local router. | Fixes IP address conflicts or DHCP configuration delays. |
Practical Use Case
Scenario: You are setting up a local network share, printer, or remote desktop connection, and need to know your machine’s exact internal network address.
- Open Command Prompt or Windows Terminal.
- Type
ipconfigand hitEnter. - Locate your active adapter (e.g., Wireless LAN adapter Wi-Fi).
- Read the IPv4 Address string (typically formatted like
192.168.1.Xor10.0.0.X).
Technical Nuances & The “Flush DNS” Myth
⚠️ Local IP vs. Public IP
Running
ipconfigdisplays your private/local IP address assigned by your router’s DHCP server. It does not display your public, internet-facing IP address assigned by your ISP. To find your public IP address, query an external web service or search “What is my IP” in a browser.
⚠️ The
ipconfig /flushdnsMisconceptionA common online claim suggests running
ipconfig /flushdnsto “speed up slow internet speeds.” This is incorrect. Flushing the DNS cache simply forces Windows to clear cached domain mappings so it requests fresh IP lookups from your DNS server. It has zero impact on your actual download or upload bandwidth.
SkillDential Tip: When troubleshooting local connectivity or network setups, master these three Windows commands and settings in sequence: use
ipconfigto confirm your local IP,ipconfig /allto verify your DNS addresses, andipconfig /flushdnsif websites fail to resolve after a network configuration change.
ping — Test Network Connectivity
Executing ping sends Internet Control Message Protocol (ICMP) Echo Request packets to a target IP address or hostname to verify network reachability, measure round-trip latency, and detect packet loss.
Access Method: Command Prompt / PowerShell / Windows Terminal
Permission Level: Standard User
Target OS: Windows 11 & Windows 10
How to Run ping
- Open Command Prompt or Windows Terminal.
- Type
pingfollowed by a domain name or IP address:- Domain ping:
ping google.com - IP ping:
ping 8.8.8.8(Google’s public DNS server) - Local gateway ping:
ping 192.168.1.1(Targeting your local router)
- Domain ping:
- Press
Enter. Windows will send four test packets by default and return the diagnostic telemetry.
Reading ping Diagnostic Results
A standard successful output provides three critical data points:
Plaintext
Pinging google.com [142.250.190.46] with 32 bytes of data:
Reply from 142.250.190.46: bytes=32 time=14ms TTL=117Code language: JavaScript (javascript)- Reply from [IP Address]: Confirms basic IP-level routing is functional.
- Time (Latency): Measures the round-trip delay in milliseconds (
ms). Lower values indicate lower latency. - Packet Loss Summary: Reports how many sent packets failed to return. Anything above 0% loss points to Wi-Fi interference, hardware degradation, or network congestion.
Advanced Diagnostic: Isolate DNS vs. Network Failures
Comparing hostnames against IP addresses is one of the most effective troubleshooting techniques in network administration:
| Test Executed | Result | Diagnostic Conclusion |
ping 8.8.8.8 | Success | Physical network connection, router gateway, and internet routing are working. |
ping google.com | Fails / Times Out | Internet connection is fine, but your DNS server is failing to resolve hostnames into IP addresses. |
Practical Use Case
Scenario: Your web browser displays a “No Internet Connection” error page.
Rather than repeatedly refreshing the browser or rebooting your router blindly:
- Open Terminal or Command Prompt.
- Run
ping 192.168.1.1to confirm your laptop can talk to your local Wi-Fi router. - If successful, run
ping 8.8.8.8to test reachability outside your local network. - If that succeeds, run
ping google.com. If step 3 works but step 4 fails, runipconfig /flushdnsor update your DNS settings.
Technical Nuances & Limitations
⚠️ A Failed Ping Does Not Always Mean a Device Is Offline
Many web servers, corporate firewalls, and home routers are specifically configured to drop ICMP Echo Requests for security and anti-DDoS reasons. Receiving a Request timed out message does not automatically mean a server or site is down.
⚠️ Ping vs. Bandwidth Speed Tests
Ping measures latency and connection responsiveness, not network throughput. A 10 Mbps connection can have an exceptional ping time of 10ms, while a 1 Gbps fiber line under heavy load might exhibit high ping times (bufferbloat). Ping is not a replacement for a true download/upload speed test.
SkillDential Tip: Use
ipconfigto identify your Default Gateway address, then immediatelypingthat gateway address. It is the fastest way to determine whether a connection drop is happening inside your local building or out at your Internet Service Provider (ISP).
systeminfo — Display Detailed System Information in the Command Line
Executing systeminfo queries the Windows Management Instrumentation (WMI) engine and returns a comprehensive, text-based manifest of your operating system configuration, hardware environment, patch history, and network properties.
Access Method: Command Prompt / PowerShell / Windows Terminal
Permission Level: Standard User (Elevated mode retrieves deeper security & hypervisor data)
Target OS: Windows 11 & Windows 10
How to Run systeminfo
- Open Command Prompt or Windows Terminal.
- Type
systeminfoand pressEnter. - Allow 2–5 seconds for the system query to populate the console window.
Key Information Retrievable via systeminfo
The command gathers dozens of critical system fields, including:
- OS Infrastructure: OS Name, exact Build Number (
10.0.22631), Installation Date, and OS Hotfix/Update history. - Hardware Profile: Original System Manufacturer (e.g., Dell, Lenovo, HP), specific Motherboard Model, System Type (x64-based PC), and Total Physical Memory (RAM).
- Firmware & Processor Details: Active BIOS/UEFI version, processor architecture, and core counts.
- Virtualization & Hypervisor Status: Hyper-V requirements and virtualization-based security (VBS) state.
- Network Adapter Profiles: MAC addresses, active connection states, and IP configurations across all network cards.
Comparing System Information Interfaces
While modern Windows commands and settings offer multiple ways to view system specs, choosing the right interface depends on your immediate workflow:
| Utility / Command | Primary Interface | Best Suited For… | Output Format |
Settings → System → About | Graphical GUI | Quick, basic checks (Processor name, total RAM, Windows edition). | Visual UI |
msinfo32 | Graphical GUI | Interactive, visual navigation of complex hardware assets and driver details. | Filterable UI Window |
systeminfo | Command Line | Fast text queries, remote management, script automation, and plain-text logging. | Standard Text Stream |
Practical Use Case: Exporting a System Audit File
Scenario: An IT specialist, system administrator, or remote support engineer requests a full system profile before deploying custom software or troubleshooting an OS configuration issue.
Instead of taking multiple desktop screenshots or manually typing out hardware specs:
- Open Command Prompt or Terminal.
- Run the command with an output redirection flag: DOS
systeminfo > PC_Audit_Report.txt - Windows will compile the full audit report and instantly save it as a structured text file (
PC_Audit_Report.txt) in your current working directory.
Important Security & Privacy Precautions
⚠️ Do Not Post Unredacted
systeminfoOutputs PubliclyA complete
systeminfodump contains detailed configuration parameters—including your exact OS build, computer network name, domain environment, installed hotfixes, and network hardware IDs (MAC addresses). Never post unredacted logs on public tech forums, social media, or open repositories, as malicious actors can use missing hotfix numbers to identify unpatched security vulnerabilities.
SkillDential Tip: Master output redirection with command-line Windows commands and settings. Appending
> filename.txtto commands likesysteminfooripconfig /alllets you build detailed system logs in seconds without third-party audit software.
sfc /scannow — Check and Repair Protected Windows System Files
Executing sfc /scannow invokes the System File Checker (SFC), a low-level administrative utility that scans all protected Windows system binaries for corruption, missing components, or file hash mismatches, replacing damaged files with healthy cached copies.
Access Method: Command Prompt / PowerShell / Terminal (Elevated)
Permission Level: Administrator Privileges Required
Target OS: Windows 11 & Windows 10
How to Run System File Checker
Because sfc /scannow inspects and modifies protected operating system binaries, it will fail with an access-denied error if executed in a standard terminal.
- Press
Win+Sand search for Terminal or Command Prompt. - Right-click the application icon and select Run as administrator (or press.
Ctrl+Shift+Enter). - Click Yes on the User Account Control (UAC) prompt.
- Type
sfc /scannowand pressEnter. - Keep the terminal window open until the verification phase reaches 100% completion (typically takes 5–15 minutes).
Understanding SFC Scan Results
Once the process reaches 100%, System File Checker will display one of four standard output messages:
| Terminal Output Message | Technical Meaning | Recommended Action |
| “Windows Resource Protection did not find any integrity violations.” | All protected OS files are intact; no corruption exists. | No further system repair needed. Root cause lies elsewhere (e.g., drivers, app bugs). |
| “Windows Resource Protection found corrupt files and successfully repaired them.” | Damaged files were detected and replaced using cached copies from the Windows component store. | Reboot your PC to finalize file updates. Problem resolved. |
| “Windows Resource Protection found corrupt files but was unable to fix some of them.” | Corruption exists, but local cached repair sources were missing or damaged. | Execute DISM (Entry #15) to repair the local component store, then rerun sfc. |
| “Windows Resource Protection could not perform the requested operation.” | The scan failed to run (often due to pending reboots or locked directories). | Run the scan in Windows Safe Mode or check the PendingDeletes registry key. |
When to Use System File Checker
sfc /scannow is an administrative repair tool, not a maintenance routine. Deploy it under specific operational scenarios:
- Post-Crash Behavior: System blue screens (BSODs) or erratic Windows Explorer crashes following a power loss or failed update.
- Corrupted OS Features: Native features (like the Start Menu, Settings app, or Windows Security) refusing to launch or throwing missing
.dllerrors. - Recommended Troubleshooting: When following official Microsoft technical support procedures to resolve verified system bugs.
Practical Technical Workflow: SFC + DISM Pairing
When system files are corrupted beyond local repair capabilities, technical professionals pair System File Checker with DISM (Deployment Image Servicing and Management).
If sfc /scannow reports that it found corrupted files but could not fix them, execute this two-step recovery sequence in an elevated terminal:
DOS
:: Step 1: Repair the local Windows component store image from online servers
DISM.exe /Online /Cleanup-Image /RestoreHealth

:: Step 2: Rerun System File Checker using the freshly restored component store
sfc /scannow
Code language: JavaScript (javascript)
Debunking Myths & Operational Limits
⚠️ SFC Is NOT a Performance Optimizer
Running
sfc /scannowwill not increase framerates in games, clear RAM, reduce CPU usage, or speed up an old computer. It checks binary integrity—it does not alter system configuration, manage startup apps, or clean temporary files.
⚠️ Personal Files Are Untouched
The
/scannowparameter checks only protected system files (located inside directories likeC:\Windows\System32). It does not inspect, modify, or delete your personal documents, photos, downloads, or third-party desktop applications.
SkillDential Tip: Never run elevated repair commands blindly because of social media “speed up your PC” posts. Reserve
sfc /scannowfor genuine OS stability issues, component corruption, or post-update recovery.
chkdsk — Check a Drive for File-System Errors
Executing chkdsk (Check Disk) launches the native Windows disk inspection utility, designed to examine the logical file-system structure, volume metadata, and storage surface integrity of connected drives.
Access Method: Command Prompt / PowerShell / Terminal (Elevated)
Permission Level: Administrator Privileges Required for Repairs
Target OS: Windows 11 & Windows 10
How to Run chkdsk
Basic read-only queries can be executed on non-system volumes without repair flags. However, repairing file-system errors requires an Elevated Command Prompt (Run as administrator).
- Press
Win+S, type Terminal or Command Prompt, and select Run as administrator. - Type the appropriate target command (e.g.,
chkdsk C:) and pressEnter. - If checking the active OS drive (
C:),chkdskcannot lock the volume while Windows is running. You will be prompted:Chkdsk cannot run because the volume is in use by another process. Would you like to schedule this volume to be checked the next time the system restarts? (Y/N) - Type
Yand pressEnter, then restart your computer to allowchkdskto scan before Windows boots.
Comparing Common chkdsk Parameters
| Command Variant | Operational Behavior | Execution Time | Recommended Use Case |
chkdsk C: | Read-Only Mode. Scans file-system metadata and reports status without modifying data. | Fast (1–3 mins) | Initial diagnostic query to check for volume corruption. |
chkdsk C: /f | Fix Mode. Locks the volume to repair logical file-system errors and index mismatches. | Moderate (5–20 mins) | When Windows reports file-system corruption or drive errors. |
chkdsk C: /r | Deep Recovery Mode. Includes /f actions, scans physical storage for bad sectors, and attempts readable data recovery. | Long (30 mins – several hours) | Diagnosing drives exhibiting read/write errors or bad sectors. |
Practical Use Case
Scenario: An external drive or secondary internal volume (D:) suddenly displays disk error notifications, or specific files become unreadable/corrupted after an improper drive disconnection.
Rather than formatting the drive and losing data:
- Open an elevated terminal window.
- Run
chkdsk D:to inspect the file-system health. - If the utility flags integrity errors, execute
chkdsk D: /fto repair the allocation tables and clear logical corruption.
Critical Technical Precautions & Operational Limits
- Never Interrupt an Active Repair: Microsoft strongly advises against forced power-downs or closing the terminal while
chkdskis performing repair operations (/for/r). Interrupting the utility mid-write can lead to severe volume corruption. - Software Tools Cannot Fix Damaged Hardware:
chkdskresolves logical file-system structures and marks damaged sectors. It cannot repair physically failing storage components. If a drive exhibits SMART status warnings, unreadable blocks, or mechanical clicking noises, immediately back up critical files and replace the drive. - The SSD Misconception: A common online myth claims that running
chkdskon Solid State Drives (SSDs) will instantly destroy them. This is false. Windows safely executes file-system checks on SSDs. However, because SSDs lack physical spinning platters, routinely running heavy surface scans (/r) adds unnecessary write cycles to flash memory and should only be used when troubleshooting genuine read errors.
SkillDential Tip: Maintain a clear distinction between disk repair tools: use
sfc /scannowto check protected Windows OS binaries, and usechkdskwhen checking local drive volumes (C:,D:) for file-system corruption.
Quick Comparison: Windows Commands and Settings #11–#15
Before transitioning into graphical settings, user preferences, and system maintenance utilities in Part 3, here is a quick-reference summary of the network diagnostic and system repair commands covered in Part 2.
| # | Windows Command | Primary Purpose | Modifies System by Default? | Administrator Privileges Required? | Risk & Skill Profile |
| 11 | ipconfig | Inspect active network adapters, IP addresses, and gateways | No (Read-only) | No (Except /flushdns or /renew on restricted networks) | Low — Safe diagnostic query tool for all users. |
| 12 | ping | Test ICMP network reachability, packet loss, and latency | No (Read-only) | No | Low — Safe reachability test; zero impact on system files. |
| 13 | systeminfo | Output a complete text-based OS, hardware, and build audit | No (Read-only) | Usually No (Required for full security/hypervisor metrics) | Low — Redact logs before sharing on public forums. |
| 14 | sfc /scannow | Verify protected OS files and replace corrupted binaries | Yes (If integrity errors exist) | Yes (Elevated Terminal required) | Moderate — Safe repair tool; do not treat as a “speed hack.” |
| 15 | chkdsk | Scan volume allocation tables and file-system metadata | No (Unless /f or /r flags are added) | Yes (For repair operations and locking volumes) | Mod–High — Never interrupt active repairs; cannot fix dead hardware. |
Which of These Command-Line Tools Should Beginners Learn First?
When starting with command-line utilities, prioritize these three read-only diagnostic tools first:
ipconfig— Deploy it to inspect active network interfaces, find local IP assignments, and identify your router’s Default Gateway.ping— Deploy it to test physical reachability, diagnose packet loss, and isolate whether connectivity issues stem from your local network or external DNS.systeminfo— Deploy it when you need a fast, text-based manifest of your OS build, hardware architecture, and installed hotfixes.
The Operational Distinction: Diagnostics vs. Administrative Repairs
Understanding the operational boundaries between diagnostic queries and low-level administrative commands is essential for maintaining system stability:
[Diagnostic Queries]   ---> Read-only metrics (ipconfig, ping, systeminfo) ---> Zero System Risk
[System Repairs]       ---> Modifies OS binaries (sfc /scannow, chkdsk /f) ---> Elevated Rights & Purpose-Driven Execution
Administrative tools like sfc /scannow and chkdsk /f serve critical recovery roles, but they are designed to resolve verified system file corruption or file-system allocation errors. They should be executed intentionally to address specific issues—never as automated, routine “cleaning scripts.”
Core Principle: A tool’s value depends on how accurately it matches the specific problem you are trying to solve. Executing high-authority repair commands without a clear diagnostic goal increases system complexity without providing any performance benefit.
How Do You Know Whether to Use ipconfig, ping, sfc, or chkdsk?
Selecting the right utility requires matching the specific symptom to the interface built for that task.
Before executing terminal scripts or changing system parameters, use this decision framework to identify the optimal Windows commands and settings for your situation:
| Observed Symptom / Objective | Primary Tool | Primary Operational Purpose |
| Need local IP address or default gateway | ipconfig | Inspects active local network adapter configurations. |
| Cannot reach a website or local device | ping | Tests ICMP reachability, network latency, and packet loss. |
| Need text-based OS build & spec details | systeminfo | Outputs a comprehensive manifest of OS binaries and hardware details. |
| System crashes / Suspect corrupted OS files | sfc /scannow | Scans and repairs protected Windows system files (System32). |
| Drive error alerts / File read failures | chkdsk | Verifies volume allocation tables and repairs logical file-system metadata. |
| PC is running slowly overall | Diagnose First | Audit resource usage via Task Manager (Ctrl + Shift + Esc) first. |
| Internet connection feels sluggish | Diagnose Connection | ping measures latency, but a browser-based speed test verifies bandwidth. |
| SSD / Hard Drive exhibiting hardware failure | Backup & Replace | chkdsk Repairs logical software errors; it cannot fix dying hardware. |
Shift Your Troubleshooting Mindset
The single most effective shift in mastering Windows commands and settings is moving away from generic quick fixes:
❌ Incorrect Approach:  "Which command-line script will instantly make my PC faster?"
` Standard Approach:   "What precise hardware, network, or OS symptom am I trying to isolate?"
Code language: PHP (php)
Targeted diagnostics eliminate guesswork, prevent accidental file corruption, and deliver consistent, reliable system optimization.
Essential Windows Settings (#16–#25)
The final 10 entries focus on essential Windows settings that can improve your PC’s performance, security, privacy, productivity, and everyday usability. These settings cover key areas such as startup apps, storage management, Windows Security, privacy permissions, backup and recovery, multitasking, file sharing, and Windows Update.
Unlike command-line tools such as sfc /scannow and chkdsk, most of these options can be safely managed through the Windows Settings app and are suitable for routine use by beginner and intermediate users. Understanding and configuring these settings can help you keep your Windows PC or laptop organized, secure, up to date, and running efficiently.
Manage Startup Apps — Control What Launches When You Sign In
Managing your Startup Apps allows you to audit and configure which third-party applications and software services automatically launch during the user sign-in process. Trimming non-essential startup items is one of the highest-yield Windows commands and settings for shortening boot times and reducing initial memory consumption.
Access Method: Settings -> Apps -> Startup OR Task Manager (Ctrl + Shift + Esc -> Startup apps)
Permission Level: Standard User (Applies to active user profile)
Target OS: Windows 11 & Windows 10
What Startup App Management Does
When applications install, many register automatic background tasks that run immediately upon desktop authentication. Common examples include:
- Cloud storage sync clients (OneDrive, Dropbox, Google Drive)
- Gaming launchers (Steam, Epic Games, EA App)
- Collaboration & messaging tools (Slack, Teams, Discord, Zoom)
- Media management applications (Spotify, iTunes)
- Peripheral background suites (Razer Synapse, Logitech G HUB)
While some background tools are essential, running too many simultaneously forces your CPU and drive storage to process dozens of initialization threads at boot, delaying your PC from reaching an idle, responsive state.
How to Access and Configure Startup Apps
You can manage startup entries through either the modern Settings GUI or Task Manager:
Method A: The Windows Settings GUI
- Open
Settings(Win+I). - Navigate to
Apps→Startup. - Toggle individual application switches to
Offto block them from running at boot.
Method B: Task Manager (Recommended for Telemetry)
- Press
Ctrl+Shift+Escto launch Task Manager. - Select
Startup appsfrom the left navigation rail. - Review the
Startup impactcolumn, which rates each app’s performance load asHigh,Medium,Low, orNone. - Right-click an application and select
Disable.
Practical Optimization Strategy: What to Keep vs. What to Turn Off
| Category | Recommended State | Strategic Rationale |
| Messaging & Game Launchers | Disabled | Apps like Discord, Steam, or Spotify can easily be launched manually when needed. |
| Cloud Sync Tools | Enabled (Conditional) | Keep enabled only if you rely on immediate background file updates (e.g., OneDrive). |
| Security & Antivirus | Enabled | Never disable Windows Security, real-time protection tools, or trusted security agents. |
| Audio & Graphics Control Panels | Enabled | Hardware utilities (Realtek Audio Console, NVIDIA Display Container) govern device profiles. |
Important Caution & Operational Limits
- Disabling Does Not Uninstall: Toggling an app to
Offsimply stops its startup trigger—it does not remove the program or delete user data. You can launch the application manually at any time. - Identify Before Disabling: Do not blindly disable unfamiliar items listed under generic publisher names. If an entry lists an unknown executable, right-click it in Task Manager and select
Open file locationorPropertiesto inspect its installation folder before taking action.
SkillDential Tip: When optimizing boot performance, sort Task Manager’s Startup tab by
Startup impact. Disabling two or threeHighimpact items yields a noticeable speed improvement compared to toggling dozens ofLowimpact entries.
Enable and Configure Storage Sense — Automatically Free Up Space
Storage Sense is a native Windows background service designed to audit, manage, and automatically delete temporary system files, expired Recycle Bin items, and cached application data to maintain optimal free storage on your primary drive.
Access Method: Settings -> System -> Storage -> Storage Sense
Permission Level: Standard User (Applies to logged-in profile)
Target OS: Windows 11 & Windows 10
What Storage Sense Does
Unlike legacy manual utilities like Disk Cleanup (cleanmgr), Storage Sense functions as an automated storage policy engine.
Operating primarily on your system volume (C:), it monitors free space in real time and automatically purges unneeded system artifacts when disk space drops below defined thresholds.
Key automated capabilities include:
- Temporary File Purging: Deletes application caches, temporary installation files, and error logs no longer required by Windows.
- Recycle Bin Management: Automatically clears items that have remained in the Recycle Bin past a chosen threshold (e.g., 1, 14, 30, or 60 days).
- Cloud Content Hydration (OneDrive): Automatically converts locally stored cloud files back to “Online-only” status if they haven’t been opened within a specified timeframe.
- Downloads Folder Cleanup (Optional): Clears files in your personal
Downloadsfolder based on age if explicitly enabled.
How to Access and Configure Storage Sense
- Open
Settings(Win+I). - Navigate to
System→Storage. - Toggle
Storage SensetoOn. - Click on
Storage Sense(or Configure Storage Sense or run it now) to access granular execution policies:- Run Storage Sense: Set frequency to Every day, Every week, Every month, or During low free disk space (Default).
- Recycle Bin: Set automated deletion intervals for trashed items.
- Run now: Click
Run Storage Sense nowto trigger an immediate manual purge.
Recommended Configuration Strategy
| Setting Field | Recommended Configuration | Operational Rationale |
| Execution Trigger | During low free disk space | Keeps cleanup passive, running only when drive space becomes constrained. |
| Recycle Bin Cleanup | 30 days | Gives a safety window to recover accidentally deleted files before permanent removal. |
| Delete Downloads | Never | Crucial: Prevents automated deletion of important downloaded assets or install files. |
| OneDrive Dehydration | 30 days | Saves local SSD space by returning untouched files to cloud-only stubs. |
Critical Caution: The Downloads Folder Trap
⚠️ Avoid Automated Downloads Folder Deletion
A common configuration mistake is setting the Delete files in my Downloads folder if they haven’t been opened for… option to aggressive intervals (like 14 or 30 days).
Many users treat their
Downloadsdirectory as semi-permanent storage for software installers, PDFs, and tax documents. Enabling automated cleanup on this specific directory can permanently erase critical personal files. Keep this setting set toNeverunless you maintain a strict habit of sorting downloaded files immediately.
SkillDential Tip: Combine modern Storage Sense automated policies for routine background cleaning with occasional
cleanmgr(Disk Cleanup) elevated runs when you specifically need to reclaim tens of gigabytes after major bi-annual Windows feature updates.
Review Windows Security — Check Your PC’s Built-In Protection
Windows Security serves as the central management dashboard for monitoring your operating system’s real-time malware protection, network firewalls, account integration, hardware security, and application safeguards.
Access Method: Settings -> Privacy & security -> Windows Security OR Start Search ("Windows Security")
Permission Level: Standard User (Viewing) / Administrator (Modifying settings)
Target OS: Windows 11 & Windows 10
Code language: JavaScript (javascript)
What Windows Security Does
Windows Security consolidates native cybersecurity mechanisms into a single telemetry dashboard. It oversees Microsoft Defender Antivirus, which provides real-time signatures, cloud-delivered malware analysis, and ransomware remediation.
When a compatible third-party antivirus suite (such as Bitdefender, Malwarebytes, or Norton) is installed, Microsoft Defender automatically steps into passive mode to prevent software conflicts. If that third-party application is uninstalled or its license expires, Defender automatically reactivates to maintain continuous protection.
Key Security Modules Covered by the Dashboard
| Security Module | Operational Function | Health Status Indicators |
| Virus & Threat Protection | Real-time signature scanning, quick/full/custom scans, ransomware remediation. | Green Check: System secure. |
| Firewall & Network Protection | Audits domain, private, and public network filtering policies. | Yellow Warning: Action recommended (e.g., outdated definitions). |
| App & Browser Control | SmartScreen reputation filtering for unknown web downloads and apps. | Red Alert: Immediate attention required (e.g., active threat detected). |
| Device Security | Audits deep hardware-level virtualization, isolated execution, and firmware locks. | |
| Account Protection | Governs Windows Hello biometrics, PIN authentication, and Microsoft Account sync. |
Critical Hardware Safeguards: Device Security
Navigating to Windows Security → Device Security reveals whether your hardware leverages foundational protection modules:
- TPM 2.0 (Trusted Platform Module): A dedicated hardware crypto-processor that secures encryption keys, device authentication, and credential storage.
- Secure Boot: A firmware-level security standard that prevents unauthorized bootloaders, rootkits, and unverified operating systems from executing at boot.
- Core Isolation & Memory Integrity (HVCI): Uses hardware virtualization to isolate critical OS memory pools from injected malware code.
Practical Use Case
Scenario: A system tray alert pops up warning that your device security state has degraded.
Instead of ignoring the pop-up or running random diagnostic commands:
- Open the Start menu, type
Windows Security, and pressEnter. - Scan the main dashboard for modules marked with a yellow or red indicator.
- Click the flagged module (e.g., Virus & threat protection) to read the specific recommendation—such as updating protection definitions or enabling cloud-delivered protection—and apply the resolution in a single click.
Important Caution: Avoid Security Trade-Offs for “Performance gains”
⚠️ Never Disable Security Features for “PC Optimization”
Viral “gaming optimization” guides frequently instruct users to disable Microsoft Defender, turn off Memory Integrity (HVCI), or deactivate SmartScreen filtering to gain theoretical FPS improvements.
Disabling these safeguards leaves your machine vulnerable to zero-day exploits, fileless malware, and drive-by browser downloads. The negligible performance difference is almost never worth the security risk.
SkillDential Tip: Audit Windows Security monthly. Treat it as a read-only security dashboard to verify green status checks, rather than a menu to toggle off active protections.
Manage App Permissions — Control Access to Camera, Microphone, and Location
Managing your App Permissions gives you granular authority over which software applications can access physical hardware components and protected system resources—including your web camera, microphone array, geographic location, and file system.
Access Method: Settings -> Privacy & security -> App permissions
Permission Level: Standard User (Applies to active user profile)
Target OS: Windows 11 & Windows 10
Why App Permissions Matter
Modern software frequently requests elevated access to hardware and private user data upon installation. While many access requests are completely legitimate—such as video conferencing tools accessing your webcam or mapping software requesting your GPS coordinates—unnecessary permissions create background security and privacy vulnerabilities.
Auditing your Windows commands and settings for privacy involves evaluating a simple principle: Does this specific application require this permission to perform the core function I use it for?
How to Review and Audit App Permissions
- Open
Settings(Win+I). - Select
Privacy & securityfrom the left navigation pane. - Scroll down to the
App permissionssection. - Select high-sensitivity hardware categories:
- Location:
Settings→Privacy & security→Location - Camera:
Settings→Privacy & security→Camera - Microphone:
Settings→Privacy & security→Microphone
- Location:
- Review the list of installed applications and toggle access switches to
Offfor software that doesn’t require background access.
Practical Use Case
Scenario: You previously installed a third-party media converter or utility app that requested microphone and location permissions during setup. You no longer use the application regularly, but it remains installed on your machine.
Instead of leaving hardware routes open:
- Navigate to
Settings→Privacy & security→Microphone. - Locate the application in the list and inspect its
Recent activitylog (which shows exact timestamps of when the app last requested hardware access). - Toggle the permission switch to
Offto revoke microphone access instantly without breaking the application’s basic offline functions.
Technical Limitations: UWP Store Apps vs. Win32 Desktop Apps
Understanding how Windows handles different application architectures is critical for managing privacy:
| Application Architecture | Permission Model | Windows Settings Control |
| Universal Windows Platform (UWP / Store Apps) | Strictly sandboxed via modern Windows APIs. | Full Control — Can toggle permissions per-app via Settings. |
Traditional Win32 Desktop Apps (.exe / .msi) | Direct hardware access via legacy Win32 APIs. | Partial Control — Windows can toggle global access switches, but individual desktop apps bypass fine-grained UI controls. |
⚠️ The Win32 Privacy Limitation:
Microsoft explicitly notes that legacy Win32 desktop applications (like older desktop suites, standalone tools, or legacy utility software) do not always route hardware requests through the Windows Store API sandbox. Turning off a setting in the App Permissions menu may block UWP apps, but legacy programs running with standard user rights can still access hardware directly.
Operational Balance: Functionality vs. Security
Avoid Indiscriminate Toggling: Completely disabling global microphone or camera access to maximize privacy will cause video conferencing suites (Zoom, Teams, Google Meet) to throw hardware execution errors during online calls. Always evaluate software functionality before revoking access.
SkillDential Tip: Audit your
Recent activitydrop-downs inside the Camera and Microphone settings pages once a month. It provides a real-time audit log showing exactly which applications accessed your physical hardware in the last 7 days.
Enable Find My Device — Prepare for a Lost or Stolen Laptop
Find My Device is a native security feature that helps track the geographical location of a misplaced or stolen Windows PC and allows you to lock it down remotely to prevent unauthorized access.
Access Method: Settings -> Privacy & security -> Find my device
Permission Level: Administrator Privileges Required (Personal Microsoft Account)
Target OS: Windows 11 & Windows 10
How Find My Device Works
When enabled, Windows periodically updates your computer’s geographic coordinates using available location telemetry—such as local Wi-Fi networks, IP address mapping, Bluetooth beacons, or hardware GPS modules (where available).
If your laptop goes missing, you can log into your account dashboard from another web browser ([account.microsoft.com/devices](https://account.microsoft.com/devices)) to view a map of its last known location and initiate a remote system lock.
Pre-Requisites & How to Enable It
Because Find My Device is a proactive security tool, it must be configured before your laptop disappears:
- Log into Windows using a personal Microsoft Account (Must have local Administrator rights).
- Open
Settings(Win+I). - Navigate to
Privacy & security→Find my device. - Toggle
Find my devicetoOn. - Ensure global location services are activated under
Settings→Privacy & security→Location.
Enterprise & Account Restrictions
| Account Architecture | Support Status | Operational Notes |
Personal Microsoft Account (@outlook, @hotmail) | Fully Supported | Standard setup via the Settings app and consumer Microsoft account dashboard. |
| Work or School Account (Entra ID / Active Directory) | Unsupported via Settings | Enterprise devices use organizational Mobile Device Management (MDM) suites like Microsoft Intune. |
Strategic Trade-offs: Privacy vs. Physical Security
- Location Telemetry: Enabling Find My Device requires keeping global location services active, allowing Windows and authorized applications to access position data.
- Network Dependence: Remote location tracking and device locking require the lost laptop to be powered on and connected to an active Wi-Fi or cellular network. If a thief wipes the storage drive offline, cloud location updates will cease.
Practical Action Plan: If Your Laptop Is Stolen
- Access
[account.microsoft.com/devices](https://account.microsoft.com/devices)on any smartphone or browser. - Select your missing PC from the device list and click Find my device.
- View the map for the last recorded location stamp.
- Click Lock to remotely sign out any active user, disable local guest access, and lock down system permissions while displaying a custom phone number or message on screen.
SkillDential Tip: Find My Device is strictly preventative. Turning it on after your laptop has already disappeared provides zero utility. If you travel with a personal laptop, pair Find My Device with BitLocker drive encryption to protect both the physical hardware and the raw data on your drive.
Configure Windows Backup — Protect Important Files and Settings
Windows Backup provides a built-in framework to sync user folders, operating system settings, saved Wi-Fi credentials, and application preferences directly to the cloud via your Microsoft Account and OneDrive.
Access Method: Start Search ("Windows Backup") OR Settings -> Accounts -> Windows backup
Permission Level: Standard User (Personal Microsoft Account)
Target OS: Windows 11 & Windows 10
Code language: JavaScript (javascript)
What Windows Backup Syncs
Windows Backup creates a cloud-stored profile that simplifies restoring your workspace after a hard drive replacement, system reset, or new laptop setup.
The service synchronizes several operational layers:
- User Folders: Cloud backup for core user directories (Desktop, Documents, Pictures, Videos, and Music).
- System Credentials: Saved Wi-Fi network profiles, passwords, and security configurations.
- Windows Preferences: Desktop themes, wallpaper, custom taskbar arrangements, language preferences, and accessibility settings.
- App Inventory: Maintains an index of installed Microsoft Store apps and desktop applications to streamline one-click reinstalls during new system setups.
How to Access and Configure Windows Backup
- Press the Start key, type
Windows Backup, and pressEnter. - Alternatively, navigate to
Settings→Accounts→Windows backup. - Click Remember my preferences to select which system settings, passwords, and app details to sync.
- Click Manage sync settings under OneDrive folder syncing to select which local user folders auto-sync to the cloud.
Architectural Nuance: Cloud Profile Sync vs. Full Disk Imaging
Understanding the difference between cloud profile backup and bare-metal disk recovery is critical for data safety:
| Feature / Capability | Native Windows Backup (OneDrive Sync) | Complete System Image Backup |
| Data Scope | User folders, OS settings, credentials, app list. | Sector-by-sector copy of the entire drive (C:). |
| Storage Destination | Microsoft OneDrive (Cloud storage). | External USB hard drive or local Network Attached Storage (NAS). |
| Recovery Use Case | Moving to a new PC or recovering user files post-reset. | Restoring a bricked OS to an exact prior state after total drive failure. |
| Execution Time | Continuous, low-overhead background sync. | Manual or scheduled batch processing. |
Storage Capacity Constraints & The 3-2-1 Rule
⚠️ Watch Your OneDrive Cloud Quota:
Native folder backup relies entirely on available OneDrive cloud storage. If your free allocation (typically 5 GB) or paid tier is full, Windows Backup will stall, leaving new files in designated folders unprotected.
SkillDential Tip: Implement the 3-2-1 Backup Strategy
Never rely exclusively on a single cloud service for critical data. For irreplaceable files, follow the industry-standard 3-2-1 Backup Rule: keep 3 copies of your data across 2 different storage media types (e.g., local SSD + external drive), with 1 copy stored offsite (e.g., cloud storage).
Configure Focus and Do Not Disturb — Reduce Notification Distractions
Windows Focus and Do Not Disturb provide integrated tools to eliminate desktop interruptions, mute pop-up notifications, suppress flashing taskbar badges, and enforce dedicated distraction-free work blocks.
Access Method: Settings -> System -> Focus OR Settings -> System -> Notifications
Permission Level: Standard User
Target OS: Windows 11 (Enhanced Focus integration) & Windows 10 (Focus Assist)
What Is the Difference Between Focus and Do Not Disturb?
While both features manage workflow interruptions, they serve distinct roles within Windows commands and settings:
[Do Not Disturb]   ---> Passive Filter: Silence pop-ups, sounds, and alerts based on rules.
[Focus Sessions]   ---> Active Timer: Enforces dedicated work blocks, mutes taskbars, and triggers DND.
Code language: CSS (css)
Do Not Disturb (Notification Filtering)
Do Not Disturb silences incoming notification banners and routes them directly to the Notification Center.
Access & Setup:
Navigate to Settings → System → Notifications.
Automated Priority Rules:
You can set Do Not Disturb to activate automatically during specific operational states:
- Scheduled Hours: Set quiet periods (e.g., 9:00 AM – 12:00 PM).
- Display Duplication: Silences alerts during presentations or when connected to a projector.
- Full-Screen App Execution: Mutes notifications automatically while watching videos or running full-screen software.
- Gaming Mode: Prevents pop-ups from interrupting full-screen games.
Focus Sessions (Structured Productivity Blocks)
Launching a Focus session activates an integrated timer (powered by the native Clock app) while turning on system-wide anti-distraction measures.
Access & Setup:
Navigate to Settings → System → Focus (or click the date/time on your taskbar).
Active Focus Controls:
- Session Timer: Set work blocks (e.g., 25 or 45 minutes) with scheduled break intervals.
- Taskbar Badge Muting: Hides unread message counter badges on taskbar app icons.
- Taskbar Flashing Suppression: Stops minimized applications from flashing on the taskbar to grab attention.
- Auto-DND Integration: Automatically enforces Do Not Disturb for the duration of the timer.
Practical Use Case: Strategic Notification Priorities
Scenario: You are presenting a financial review or coding a complex module, but you cannot afford to miss urgent calls or calendar reminders.
Instead of turning off all system notifications globally:
- Go to
Settings→System→Notifications→Set priority notifications. - Add critical tools (e.g., Microsoft Teams calls, Outlook calendar alerts, or priority contacts) to the Priority List.
- Launch a 45-minute Focus Session from your taskbar clock.
- Windows will suppress all general app pop-ups and social alerts while allowing priority calls and calendar reminders to break through seamlessly.
Cognitive & Workflow Impact
⚠️ Avoid Total System Muting
Indiscriminately disabling notifications across the entire OS can lead to missed meetings, delayed security alerts, or overlooked system warnings. Use Priority Notifications to build a fine-tuned filter rather than muting Windows completely.
SkillDential Tip: Use the shortcut
Win+Nto open your Notification Center and Calendar flyout instantly. You can launch a timed Focus session directly from the bottom of this panel in two clicks without opening the main Settings app.
Configure Snap Windows and Multitasking — Make Better Use of Screen Space
Managing your Snap Windows and multitasking parameters allows you to fine-tune how application windows automatically resize, align, and organize across your displays. While Entry #5 introduced the Win + Z keyboard shortcut, these underlying settings control automatic window docking, drag-to-top overlays, and multi-window grouping behavior.
Access Method: Settings -> System -> Multitasking -> Snap windows
Permission Level: Standard User
Target OS: Windows 11 & Windows 10 (Enhanced in Win 11)
Key Configuration Switches under Snap Windows
Navigating to Settings → System → Multitasking → Snap windows exposes several granular toggles:
- Snap Window Dragging: Automatically snaps a window when dragged to the side or top edge of the screen.
- Maximize Button Hover: Shows available Snap Layout templates when hovering over an app window’s Maximize button (
□). - Top-Screen Drag Overlay: Shows the Snap Layout bar at the top of the display when dragging a window upward.
- Snap Suggestions (Assist): Automatically suggests open application windows to fill remaining empty screen space after snapping a primary window.
- Snap Groups: Keeps track of snapped window arrangements in the Taskbar and
Alt+Tabswitcher, allowing you to bring an entire multi-window layout back into focus in one click.
Core Multitasking Workflows: Laptop vs. Ultrawide Monitors
Optimizing your workspace depends heavily on your physical display size and aspect ratio:
| Hardware Environment | Recommended Grid Layout | Operational Strategy |
| Single Laptop Screen (13″–16″) | 50 / 50 Split (2 Columns) | Side-by-side arrangement (e.g., Browser on the left, Notes/Editor on the right). Avoid 4-quadrant grid snaps on small screens to preserve readability. |
| Dual Monitor Setup | Mixed Full & 50/50 | Primary display runs full-screen workspace; secondary display houses two snapped communications or reference apps (e.g., Teams + Email). |
| Ultrawide Monitor (21:9 or 32:9) | 3-Column / 4-Quadrant Grid | Utilize 3-column Snap Layouts (Center main app at 50% width, side reference panels at 25% width each) to eliminate unused horizontal space. |
Practical Use Case: Reinstating Workspaces via Snap Groups
Scenario: You are conducting research using a split layout (Edge browser on the left, Word document on the right). You briefly switch to a full-screen Slack call or Photoshop project.
Instead of manually resizing and re-aligning your browser and document windows afterward:
- Hover over the app icon in the Taskbar or press
Alt+Tab. - Select the Snap Group thumbnail (which visually merges the two application previews).
- Windows will instantly restore both applications to their exact side-by-side screen dimensions in a single action.
Tailoring Behavior to Your Workflow
⚠️ Customize, Don’t Disable:
Users who find pop-up layout suggestions intrusive often turn off Snap completely. Instead of disabling the entire feature, keep Snap enabled and simply uncheck “Show snap layouts when I drag a window to the top of my screen” or “Show my snapped apps when I hover over taskbar apps.”
SkillDential Tip: Combine Snap Layouts (
Win+Z) with Virtual Desktops (Win+Ctrl+D). Create one Virtual Desktop with snapped research windows and a second Virtual Desktop for full-screen communication tools, switching between them instantly usingWin+Ctrl+Left/Right Arrow.
Configure Nearby Sharing — Transfer Files Between Nearby Windows PCs
Nearby Sharing is a native peer-to-peer file transfer feature in Windows designed to send documents, photos, links, and local media between nearby Windows PCs without relying on third-party file transfer tools, USB drives, or cloud uploads.
Access Method: Settings -> System -> Nearby sharing OR Quick Settings (Win + A)
Permission Level: Standard User
Target OS: Windows 11 & Windows 10 (Build 1803+)
How Nearby Sharing Operates
Nearby Sharing relies on a hybrid discovery and transport protocol:
- Discovery Layer: Bluetooth (specifically Bluetooth 4.0+ with Low Energy support) is used to broadcast and detect nearby discoverable Windows devices.
- Transport Layer: While basic transfers use Bluetooth, modern Windows 11 configurations automatically route data over a shared private Wi-Fi network if both PCs are on the same local subnet. Transfers over local Wi-Fi deliver significantly faster transfer speeds than Bluetooth-only links.
Setup & Configuration Steps
To send or receive files, configure the feature on both sending and receiving devices:
- Open
Settings(Win+I) and navigate toSystem→Nearby sharing. - Select your discoverability permission level:
- Off: Disables device discovery completely.
- My devices only: Limits discovery strictly to PCs signed in with the same Microsoft Account. (Recommended for personal devices).
- Everyone nearby: Allows any nearby Windows PC within Bluetooth range to discover your machine and request file transfers.
- (Optional) Click Save files I receive to change the default download directory from your standard Downloads folder.
Step-by-Step Transfer Workflows
Sending a Local File via File Explorer
- Open File Explorer (
Win+E) and select the target file. - Click the Share icon on the top command bar (or right-click the file and select Share).
- Under the Nearby sharing section, select the target computer’s device name.
- On the receiving computer, click Save or Save & open when the toast notification appears.
Sending a Web Page via Microsoft Edge
- Open Microsoft Edge and navigate to the desired web page.
- Click Settings and more (
...) → Share (orCtrl+Shift+Y). - Select the target device name to send the active URL directly to the receiving PC’s browser.
Security, Privacy, and Technical Requirements
| Operational Parameter | Technical Requirement / Constraint |
| Network Profile Setting | Wi-Fi network profile must be set to Private. Nearby Sharing is blocked on Public network profiles for security. |
| Privacy Exposure | Selecting Everyone nearby broadcasts your PC’s hostname and Bluetooth MAC address to all surrounding devices. |
| Microsoft Account Dependency | My devices only mode requires active internet access to authenticate account tokens across devices. |
⚠️ Network Security Checklist:
If Nearby Sharing fails to discover a nearby PC connected to the same Wi-Fi router, navigate to
Settings→Network & internet→Wi-Fiand verify that your Network profile type is configured as Private network on both machines.
SkillDential Tip: Use Nearby Sharing for fast, ad-hoc local document transfers without signing into web email or cloud storage providers. However, for continuous folder synchronization or large dataset migration, rely on OneDrive or direct local network shares.
Review Windows Update Settings — Keep Windows Secure and Current
Windows Update serves as the primary servicing and distribution engine for operating system patches, critical security definitions, driver updates, and feature updates. Keeping Windows updated ensures your system stays protected against known vulnerabilities, resolves software defects, and maintains hardware compatibility.
Access Method: Settings -> Windows Update
Permission Level: Standard User (Viewing) / Administrator (Configuring global options)
Target OS: Windows 11 & Windows 10
Code language: PHP (php)
What You Can Configure in Windows Update
Navigating to Settings → Windows Update exposes several administrative controls:
- Check for Updates: Manually triggers a query against Microsoft servers for pending patches, quality updates, and optional software updates.
- Get the Latest Updates as Soon as They’re Available: Toggles early access to non-security feature updates, quality enhancements, and preview releases.
- Pause Updates: Pauses automatic update downloads and pending restarts for up to 35 days (using a calendar selector).
- Active Hours: Defines working hours to prevent automatic background restarts while you are using your PC.
- Update History: Provides a chronological audit log of all successfully installed security patches, driver updates, and cumulative updates—with direct access to uninstall problematic patches.
- Advanced Options → Optional Updates: Manages manual installations of hardware driver updates, cumulative preview builds, and non-essential software fixes.
Understanding the “Get the Latest Updates” Toggle
A common point of confusion involves the toggle labeled “Get the latest updates as soon as they’re available”:
[Toggle = ON]  ---> Prioritizes device for early feature rollouts & preview fixes (C/D releases).
[Toggle = OFF] ---> Keeps standard schedule for non-security updates. Critical security updates STILL install automatically.
Key Takeaway: Turning this toggle OFF does not stop monthly security patches (Patch Tuesday updates). It simply prevents your device from enrolling in gradual feature rollouts before broad general availability.
Troubleshooting Protocol: Investigating Update Issues
When a PC experiences crashes or driver bugs after a servicing update, use this step-by-step diagnostic workflow:
- Open
Settings→Windows Update→Update history. - Identify the specific Update KB Number (e.g.,
KB5101684) installed on the date the problem began. - Scroll to the bottom of the page and click Uninstall updates.
- Select the matching KB entry and click Uninstall to revert to the previous OS state.
- Use Pause updates to prevent the faulty patch from reinstalling while Microsoft prepares a hotfix.
Operational Caution: Do Not Disable Updates as an “Optimization Trick”
⚠️ The “Disable Windows Update” Myth
Viral PC tuning guides often recommend permanently disabling the Windows Update service via
services.mscor registry edits to eliminate background disk activity.This is a severe security risk. Disabling servicing leaves your PC completely exposed to zero-day exploits, unpatched malware entry points, and missing hardware security certificates. Instead of blocking updates, configure Active Hours and Restart Options so updates never disrupt your daily work.
SkillDential Tip: Security patches should be installed promptly. However, skip non-essential Optional Updates (located in Advanced Options) on primary production PCs unless you are resolving a specific hardware driver issue.
Quick Comparison: Windows Settings #16–#25
Before wrapping up the complete guide, here is a quick-reference summary of the graphical settings, security dashboards, and background automation utilities covered in Part 3.
| # | Windows Setting / Feature | Primary Operational Benefit | Ideal Target Persona / Use Case | Default State & User Control |
| 16 | Startup Apps | Eliminates background boot load and trims boot latency | Users seeking faster boot times and reduced idle RAM usage | Manual Toggle (Per-app control in Settings or Task Manager) |
| 17 | Storage Sense | Automates temporary file removal and cloud hydration rules | Low-storage PCs, drive cleanup, and automated maintenance | Off by Default (Can be scheduled or triggered on low disk space) |
| 18 | Windows Security | Centralized dashboard for Defender, firewall, and core security | Every Windows user auditing device security and OS health | Enabled (Runs continuously in background; silent passive mode if third-party AV present) |
| 19 | App Permissions | Restricts hardware access (camera, microphone, location) | Privacy-conscious users auditing Store/UWP software capabilities | Per-App Toggles (Limited authority over legacy Win32 desktop apps) |
| 20 | Find My Device | Remote position tracking and lock capabilities for lost PCs | Laptop users and mobile workers traveling with personal devices | Requires Setup (Must be enabled before loss; relies on personal Microsoft Account & location services) |
| 21 | Windows Backup | Syncs user folders, themes, Wi-Fi keys, and app indexes | Anyone with critical user data migrating to a new machine | Requires Account Setup (Relies on OneDrive cloud storage quotas) |
| 22 | Focus / Do Not Disturb | Suppresses pop-ups, flashes, badges, and notification audio | Professionals, developers, and students managing context switching | Configurable (Manual activation or automated rules based on screen state/gaming) |
| 23 | Snap Windows | Customizes window drag behaviors, layout grids, and groups | Multitaskers working on laptops, multi-monitor, or ultrawide screens | On by Default (Individual layout overlays can be selectively disabled) |
| 24 | Nearby Sharing | Direct P2P file transfers over Bluetooth and local Wi-Fi | Multi-PC users moving local files without USB drives or cloud uploads | Off by Default (Must be enabled on both devices; requires Private network profile) |
| 25 | Windows Update | Delivers security patches, OS servicing, and driver fixes | Every supported Windows PC maintaining security and system stability | Automatic Servicing (Security updates are mandatory; early preview toggles are optional) |
Which Windows Settings Should You Change First?
You do not need to adjust every option at once. To maximize system security, data integrity, and productivity, prioritize settings based on risk mitigation first, performance second, and workflow optimization third.
Recommended Configuration Sequence
[Phase 1: Security & Protection] ---> 1. Windows Update  --> 2. Windows Security
[Phase 2: Data Integrity]       ---> 3. Windows Backup  --> 4. Find My Device
[Phase 3: System Optimization]  ---> 5. Startup Apps    --> 6. Storage Sense
[Phase 4: Privacy & Focus]      ---> 7. App Permissions --> 8. Focus / Do Not Disturb
[Phase 5: Workflow Ergonomics]  ---> 9. Snap Windows    --> 10. Nearby Sharing
Code language: PHP (php)
Windows Update— Verify patch delivery to ensure your OS isn’t exposed to known security vulnerabilities.Windows Security— Audit your real-time protection dashboard and address any yellow or red warning indicators.Windows Backup— Protect irreplaceable files, system preferences, and cloud folders before a hardware failure occurs.Find My Device— Enable proactive location tracking and remote locking on portable laptops before traveling.Startup Apps— Disable non-essential autostart applications to trim boot latency and free up idle RAM.Storage Sense— Automate low-risk disk maintenance to keep temporary files from accumulating.App Permissions— Revoke unnecessary hardware access (camera, microphone, location) for non-essential applications.Focus / Do Not Disturb— Eliminate notification pop-ups and context-switching friction during deep work.Snap Windows— Tailor window-docking templates and snap groups to match your display setup.Nearby Sharing— Enable local P2P transfers when moving files across nearby Windows PCs.
Strategic takeaway: Security and Data Protection Outrank Ergonomics
Core Principle: Security safeguards and data backups always take precedence over cosmetic tweaks or multitasking adjustments. A perfectly arranged snap grid or a clean taskbar provides zero value if your single local drive fails without a backup strategy in place.
Which of the 25 Windows Commands and Settings Are Most Useful?
Rather than trying to memorize every terminal command or deep menu path, master the core utilities that solve specific operational problems.
This high-signal summary maps the most effective everyday tool from the entire guide directly to its primary troubleshooting or productivity scenario:
| Operational Objective / Symptom | Primary Tool / Command | Best Access Method | Key Functional Output |
| Launch system applets quickly | Run Dialog | Win + R | Direct execution of low-level system consoles (e.g., cmd, regedit, services.msc). |
| Manage multi-item clipboard history | Clipboard History | Win + V | Accesses historical text/image buffer and pins frequently pasted snippets. |
| Audit real-time hardware resource load | Task Manager | Ctrl + Shift + Esc | Identifies memory leaks, high CPU processes, and locked application threads. |
| Capture partial screen regions | Snipping Tool | Win + Shift + S | Instant area screen capture directly to clipboard without third-party tools. |
| Organize screen layout grids | Snap Layouts | Win + Z | Triggers pre-configured window docking templates for multi-app focus. |
| Audit detailed hardware & driver specs | msinfo32 | Win + R → msinfo32 | Comprehensive GUI tree of driver versions, hardware resources, and BIOS modes. |
| Inspect graphics, display, & sound specs.s | dxdiag | Win + R → dxdiag | Detailed DirectX diagnostic audit for GPU drivers, display features, and audio APIs. |
| Inspect local network adapters & IP data | ipconfig | Terminal → ipconfig | Displays IPv4/IPv6 addresses, subnet masks, and local router Default Gateways. |
| Test network reachability & latency | ping | Terminal → ping [target] | Measures round-trip ICMP packet latency and isolates DNS vs. connection drops. |
| Generate plain-text system audits | systeminfo | Terminal → systeminfo | Command-line manifest of OS build, installation date, hotfixes, and RAM profile. |
| Repair corrupted Windows binaries | sfc /scannow | Elevated Terminal | Scans and replaces damaged protected OS files using local cached copies. |
| Check & repair drive allocation tables | chkdsk | Elevated Terminal → chkdsk C: /f | Inspects volume metadata and repairs logical file-system structure errors. |
| Trim boot time & background startup load | Startup Apps | Task Manager → Startup | Disables non-essential applications from launching automatically at sign-in. |
| Automate temp file removal | Storage Sense | Settings → System → Storage | Schedules low-risk automatic disk cleanup and manages OneDrive hydration states. |
| Review real-time security dashboard | Windows Security | Start → Windows Security | Audits Microsoft Defender, real-time scanning status, firewalls, and TPM/Secure Boot. |
| Control hardware privacy access.s | App Permissions | Settings → Privacy & security | Toggles webcam, microphone, location, and file access for Store/UWP applications. |
| Sync critical personal data & settings | Windows Backup | Start → Windows Backup | Cloud-syncs user directories, system profiles, Wi-Fi keys, and app indexes via OneDrive. |
| Suppress notification distractions | Focus / Do Not Disturb | Settings → System → Focus | Enforces timed work sessions, mutes taskbar flashing, and filters non-priority pop-ups. |
| Transfer files P2P across nearby PCs | Nearby Sharing | Settings → System → Nearby sharing | Enables direct local Wi-Fi/Bluetooth transfers between Windows devices without cloud uploads. |
| Maintain OS patches & security fixes | Windows Update | Settings → Windows Update | Manages mandatory security patches, active working hours, and update rollbacks. |
Master Framework: The 3-Step Decision Model
When diagnosing an issue or optimizing your workstation, apply this three-step framework:
Step 1: Identify the Layer  ---> Is the problem UI/Workspace, Hardware/Network, OS Binary, or Data Protection?
Step 2: Match the Scope     ---> Use Read-Only Diagnostics first (ipconfig, ping, msinfo32, systeminfo).
Step 3: Execute Repair/Edit ---> Apply administrative changes (sfc, chkdsk /f, Startup Apps) with intent.
Code language: JavaScript (javascript)
Strategic Summary: A powerful command is not inherently a better command. The most effective Windows commands and settings are simply the ones that directly address the specific hardware, network, or operating system problem you are trying to solve.
Common Windows Commands and Settings Mistakes to Avoid
System instability, broken dependencies, and security vulnerabilities rarely stem from a lack of technical tools—they usually happen when commands are executed without understanding their actual scope or operating mechanics.
Avoid these ten high-risk operational pitfalls when configuring or troubleshooting Windows:
The 10 Most Critical Windows Configuration Errors
Running Blind “PC Speed-Up” Scripts from Social Media
- The Mistake: Copying and pasting complex PowerShell scripts or registry tweaks claiming to “boost gaming FPS” or “unlock hidden RAM.”
- The Impact: These scripts often break key background infrastructure—such as Windows Update, network stack components, or essential dependency services—forcing a full operating system reinstallation.
Disabling Background Services via msconfig or services.msc
- The Mistake: Disabling unfamiliar services to minimize background process counts.
- The Impact:
msconfigis designed for diagnostic clean-boot isolation, not permanent startup management. Disabling core services can lock you out of Windows authentication, break print spooling, or cripple network adapters.
Terminating Unfamiliar Processes in Task Manager
- The Mistake: Using
End taskon unrecognized executables (svchost.exe,lsass.exe,dwm.exe) to free up CPU or memory. - The Impact: Terminating core system processes causes instant System Blue Screens (BSODs), force-reboots, or severe graphical shell crashes.
Treating sfc /scannow as a Universal Speed Hack
- The Mistake: Running System File Checker repeatedly because the computer “feels sluggish.”
- The Impact:
sfcVerifies binary integrity against corruption; it does not clear memory, adjust startup programs, or reduce CPU overhead. Using it as a general performance tool wastes time without addressing the real bottleneck.
Assuming chkdsk Can Fix Physically Failing Hardware
- The Mistake: Continuously running
chkdsk /f /ron a drive exhibiting SMART errors, bad sectors, or mechanical noises. - The Impact: Software cannot fix physical hardware degradation. Running aggressive surface scans (
/r) subjects a failing drive to intense read/write stress, potentially triggering total drive failure before critical data can be backed up.
Disabling Windows Defender or Firewalls for Performance
- The Mistake: Disabling real-time virus scanning, network firewalls, or Memory Integrity (HVCI) for negligible performance gains.
- The Impact: Opens direct attack vectors for fileless malware, drive-by downloads, and ransomware, creating a massive security trade-off for zero practical benefit.
Permanently Disabling Windows Update
- The Mistake: Using registry hacks or disabling the update service to avoid background restarts.
- The Impact: Deprives your system of zero-day security patches, driver updates, and critical system fixes. Manage Active Hours instead of blocking updates entirely.
Granting Unrestricted App Permissions
- The Mistake: Clicking “Allow” on every permission request (Camera, Microphone, Location, File System) during app installation.
- The Impact: Exposes private data and physical hardware access to background processes that do not require those capabilities to function.
Setting Storage Sense to Auto-Delete the Downloads Folder
- The Mistake: Enabling aggressive automatic cleanup rules without checking targeted directories.
- The Impact: If your
Downloadsdirectory serves as temporary or long-term storage for installer packages, invoices, or personal media, Storage Sense will silently purge those files once they reach the age threshold.
Posting Complete System Reports Publicly
- The Mistake: Pasting unredacted outputs from
systeminfooripconfig /allon open tech forums or social media. - The Impact: System dumps expose local network IP addresses, MAC addresses, domain configurations, OS build levels, and missing patch details—providing malicious actors with a detailed blueprint for targeted exploitation.
The Fundamental Rule of System Administration
First Principles Principle: Always diagnose the exact bottleneck or error code before executing a command or changing a system toggle. Match the tool strictly to the isolated problem—never apply broad, high-authority repair tools blindly.
A Beginner’s Windows Troubleshooting Checklist
When your PC or laptop experiences erratic behavior, running random terminal scripts or tweaking deep settings without a strategy often introduces new software conflicts.
Follow this structured, symptom-based decision framework to systematically isolate issues, protect user data, and apply targeted Windows commands and settings.
The 5-Scenario Diagnostic Decision Model
[Observed Symptom] ───► Isolate Root Cause ───► Verify Resource / Config ───► Execute Targeted Tool
System Performance Is Slow or Unresponsive
- Primary Diagnostic Order:
- Open Task Manager (
Ctrl+Shift+Esc) to inspect CPU, Memory, and Disk usage columns for runaway processes or memory leaks. - Check Task Manager → Startup apps to disable unnecessary third-party applications launching at boot.
- Navigate to
Settings→System→Storageto ensure your primary drive (C:) has at least 10–15% free headroom.
- Open Task Manager (
- Avoid: Running
sfc /scannoworchkdskexpecting performance gains—they address binary and metadata integrity, not process load.
Network or Internet Connection Is Failing
- Primary Diagnostic Order:
- Open Terminal and run
ipconfigto confirm your local network adapter has a valid IPv4 address and Default Gateway assignment. - Run
ping 8.8.8.8to test raw ICMP connectivity to an external IP address (isolates physical network vs. local connection). - Run
ping google.comto verify DNS resolution. If IP ping works but domain ping fails, executeipconfig /flushdns.
- Open Terminal and run
- Avoid: Resetting entire network stacks or editing firewall rules before verifying basic physical reachability.
Windows OS Components, Settings, or System Files Malfunction
- Primary Diagnostic Order:
- Check
Settings→Windows Updateto verify if a pending update or incomplete patch requires a system restart. - Open an Elevated Terminal (Run as administrator) and execute
sfc /scannowto scan and repair protected system binaries (System32). - If
sfcflags errors it cannot fix, runDISM.exe /Online /Cleanup-Image /RestoreHealth, followed bysfc /scannowonce more.
- Check
- Avoid: Editing registry keys or deleting system DLLs manually based on unverified online advice.
Drive Errors, Unreadable Files, or Storage Volume Corruption
- Primary Diagnostic Order:
- Immediate Step: Back up critical personal files and irreplaceable data to cloud or external media first.
- Inspect volume health by running
chkdsk C:in read-only mode to scan file-system allocation metadata. - If logical corruption is detected, execute
chkdsk C: /f(requires a system restart if targeting the active OS drive).
- Avoid: Relying on repeated software disk repair commands (
chkdsk /r) when storage hardware exhibits SMART warnings or mechanical clicking noises.
Storage Space Is Critically Low
- Primary Diagnostic Order:
- Navigate to
Settings→System→Storageto inspect the breakdown of temporary files, applications, and system reserves. - Enable and configure Storage Sense (
Settings→System→Storage→Storage Sense) to automate routine temporary file removal. - Review Cleanup recommendations to locate large unused files, old Windows update backups (
Windows.old), or unneeded applications.
- Navigate to
- Avoid: Manually deleting unknown folders inside
C:\Windowsor system root directories to free up space.
Core Principles of Reliable Troubleshooting
Rule 1: Read-Only Queries First
Always execute diagnostic tools (
ipconfig,ping,systeminfo,msinfo32,Task Manager) before executing administrative repair commands (sfc,chkdsk, registry updates).
Rule 2: Protect Irreplaceable Data First
If an issue involves storage drives, unusual disk activity, or OS instability, prioritize backing up your data before applying low-level repairs.
Rule 3: Match the Tool to the Specific Symptom
Windows troubleshooting becomes effortless when you stop asking “Which command makes my PC faster?” and start asking “What exact symptom am I trying to isolate?”
The Most Important Lesson: Commands Are Tools, Not Hacks
The viral internet frequently frames Windows commands and diagnostic tools as “secret performance hacks” or “hidden speed tricks.”
That framing is fundamentally misleading.
Utilities like ipconfig, ping, sfc /scannow, chkdsk, msinfo32, Task Manager, Windows Security, and Storage Sense are not hidden tricks—they are standardized, purpose-built operating system interfaces engineered for specific diagnostic, administrative, security, and maintenance tasks.
Understanding Tool Boundaries: What Commands CANNOT Do
True technical competence is not just knowing how to type a command—it is knowing when not to use it.
❌ Misconception                              --> ✔️ Technical Reality
------------------------------------------------------------------------------------------------------
"ping measures your full internet speed."    --> ping tests ICMP latency & reachability, NOT bandwidth.
"sfc /scannow optimizes RAM & CPU."          --> sfc checks binary hash integrity in System32, NOT performance.
"chkdsk fixes physically damaged SSDs."     --> chkdsk repairs software allocation tables, NOT failing flash memory.
"msconfig is a secret performance menu."    --> msconfig is for diagnostic clean boots, NOT routine tuning.
"Disabling Security boosts gaming FPS."       --> Disabling Defender introduces severe malware risks for zero gain.
Code language: JavaScript (javascript)
The Paradigm Shift: Building Genuine Digital Skills
Transitioning from a passive user to an analytical technician requires shifting your troubleshooting mindset:
[Level 1: Novice]    "What secret command can I run to make my PC faster right now?"
[Level 2: Expert]    "What specific hardware, network, or OS symptom am I attempting to isolate?"
Code language: JSON / JSON with Comments (json)- Diagnose Before Modifying: Always gather read-only diagnostic metrics (
ipconfig,ping,systeminfo,msinfo32,Task Manager) before executing low-level administrative changes. - Match the Tool to the Scope: Executing a high-authority command without a clear operational goal adds unnecessary system complexity and risk without delivering performance benefits.
- Prioritize Data & Security Over Convenience: Never compromise baseline security protections or unbacked-up data in pursuit of theoretical optimization gains.
Mastering these distinctions transforms a scattered collection of terminal shortcuts into a structured, high-leverage technical skill set for managing Windows OS infrastructure.
Windows Commands vs. Settings: Which Should You Learn First?
For most users, learning everyday keyboard shortcuts and graphical settings yields immediate productivity benefits. As your technical troubleshooting needs evolve, adding command-line diagnostic tools allows you to inspect and resolve deeper operating system issues.
Recommended Learning Roadmap
[Level 1: Everyday Productivity]  ---> Master Keyboard Shortcuts (Win + R, Win + V, Ctrl + Shift + Esc)
[Level 2: System Health & Safety] ---> Audit GUI Settings (Windows Security, Backup, Update, Storage Sense)
[Level 3: Technical Diagnostics]  ---> Deploy Command-Line Tools (ipconfig, ping, sfc /scannow, chkdsk)
| Priority Tier | Tool / Shortcut | Functional Purpose & Value |
| 1 | Win + R | Instantly launches built-in Windows utilities, administrative consoles, and applets. |
| 2 | Win + V | Unlocks multi-item Clipboard History to pin and reuse copied text and images. |
| 3 | Ctrl + Shift + Esc | Opens Task Manager directly to audit process resource usage and memory loads. |
| 4 | Win + Shift + S | Triggers Snipping Tool for fast, precise partial screenshot captures. |
| 5 | Startup Apps | Audits background autostart programs to reduce boot latency and free idle memory. |
| 6 | Storage Sense | Automates background temp file cleanup and manages OneDrive storage hydration. |
| 7 | Windows Security | Serves as the central dashboard for real-time protection, firewalls, and TPM health. |
| 8 | Windows Backup | Protects user directories, system preferences, and saved Wi-Fi credentials to OneDrive. |
| 9 | Windows Update | Ensures security patches, feature releases, and driver updates remain current. |
| 10 | ipconfig & ping | Provides foundational read-only diagnostics for network connectivity and latency. |
Strategic Progression
Progress to elevated terminal repair utilities like sfc /scannow or chkdsk only when specific diagnostic evidence points to corrupted system files or drive allocation errors.
Core Rule: Mastering Windows isn’t about memorizing the most complex terminal syntax—it is about selecting the simplest, safest tool that directly resolves your current operational goal.
Which Windows Commands Require the Most Caution?
While read-only diagnostic tools (ipconfig, ping, systeminfo, msinfo32) present zero operational risk, administrative tools that alter system files, disk allocation structures, boot parameters, or real-time security layers carry significant system risk if executed improperly.
Pay strict attention to these four administrative areas before taking action:
High-Caution Administrative Tools & Settings
[System File Maintenance]  ---> sfc /scannow       ---> Modifies System32 OS Binaries
[Disk Structure Repairs]   ---> chkdsk /f /r       ---> Alters File System Allocation Metadata
[Boot Configuration]       ---> msconfig           ---> Alters OS Startup Services & Boot Logic
[System Safeguards]        ---> Windows Security   ---> Disables Real-Time Defense Policies
sfc /scannow (System File Checker)
- Risk Profile: Requires elevated administrator privileges. It scans, modifies, and replaces protected Windows system binaries in
C:\Windows\System32using local cached copies. - Caution Protocol: Run
sfc /scannowstrictly when OS corruption is indicated by blue-screen stop codes (BSODs), missing system DLL errors, or broken native apps. Never execute it as routine “daily maintenance.”
chkdsk /f and chkdsk /r (Check Disk Repair Variants)
- Risk Profile: Unlike standard read-only
chkdsk(which simply audits volume status), the/fparameter repairs file-system table errors, while/rlocates bad sectors and attempts to recover readable information. - Caution Protocol: Running repair parameters forces a disk dismount or schedules an offline scan at reboot. Never run
/ron a physically failing hard drive or SSD—the intensive read/write stress can trigger complete drive failure before data can be backed up.
msconfig (System Configuration Console)
- Risk Profile:
msconfigAlters boot parameters, safe mode flags, and background service initialization states. - Caution Protocol: Avoid online tutorials that recommend disabling non-Microsoft background services or forcing “all CPU cores” in the boot tab. Misconfiguring
msconfigcan lead to boot loops, lock you out of PIN/password authentication, or break critical hardware drivers.
Disabling Windows Security Controls
- Risk Profile: Turning off Microsoft Defender Antivirus, disabling real-time network firewalls, or deactivating Memory Integrity (HVCI).
- Caution Protocol: Microsoft Defender automatically steps into passive mode when a compatible third-party antivirus is installed. Disabling built-in security manually to chase minor FPS gains in games creates a massive vulnerability to zero-day exploits and ransomware.
The Administrative Golden Rule
Command Authority Principle: If a tool requires elevated Administrator rights, never run it without a clear, verified diagnostic goal. Understand the specific parameter, verify your backups first, and treat system repair tools as targeted interventions rather than general optimization tricks.
Do You Still Need Command-Line Tools If You Use Windows 11 Settings?
Yes. While the modern Windows 11 Settings application brings graphical convenience to everyday system management, terminal commands remain essential for advanced diagnostics, rapid troubleshooting, and administrative automation.
Rather than competing with each other, graphical settings and command-line utilities serve complementary roles within the Windows operating system:
[GUI Settings App]   ---> Visual Configuration: Intuitive toggles, interactive menus, and simplified layout.
[Terminal Commands]  ---> Deep Diagnostics: Direct API queries, scriptable text logs, and low-level repairs.
Code language: CSS (css)
Graphical Settings vs. Terminal Commands: Strategic Comparison
| Operational Area | Modern Settings Approach | Terminal Command Alternative | Technical Advantage of Command-Line |
| System Specifications | Settings → System → About | systeminfo or msinfo32 | systeminfo outputs a complete, plain-text audit (OS build, hotfixes, network cards, RAM profile) that can be piped directly to a file (systeminfo > specs.txt). |
| Network Configuration | Settings → Network & internet → Properties | ipconfig /all | Instantly displays MAC addresses, DHCP lease times, DNS server priorities, and active adapter statuses in a single unified view. |
| Network Connectivity | Settings → System → Troubleshoot | ping [destination] | Delivers real-time, quantitative data on round-trip packet latency, ICMP timeouts, and packet loss metrics. |
| Storage & Drive Integrity | Settings → System → Storage | chkdsk C: | Performs direct, low-level verification of file-system allocation tables and volume metadata structure. |
| System File Integrity | Settings → System → Recovery | sfc /scannow | Audits cryptographic hashes of protected System32 binaries and replaces damaged files automatically. |
When to Use Which Interface
Use the Graphical Settings App When:
- Configuring user environment preferences (Themes, Focus/Do Not Disturb, Display scaling).
- Managing per-app permissions (Camera, Microphone, Location).
- Automating periodic storage maintenance (Storage Sense).
- Running basic, interactive troubleshooting wizards.
Use Terminal Commands When:
- Gathering Exportable Diagnostics: Redirecting output to plain-text files for remote analysis or documentation.
- Troubleshooting Headless/Remote Systems: Working over SSH, Windows Terminal, or remote management tools.
- Executing Batch Repair Procedures: Running automated diagnostic scripts across multiple machines.
- Bypassing UI Overhead: Accessing low-level system details faster than navigating multi-tiered GUI menus.
Strategic Takeaway
Core Principle: Graphical settings democratize everyday system configuration, while command-line utilities provide the raw diagnostic depth needed for precise troubleshooting. Mastering both interfaces creates a versatile, expert-level technical workflow.
Should Windows 10 Users Follow This Guide?
Yes, with important caveats. The vast majority of keyboard shortcuts, terminal commands, and core system diagnostics covered in this guide function identically across both operating systems because they access the shared underlying Windows NT kernel and architecture.
However, because Microsoft officially ended standard support for Windows 10 on October 14, 2025, Windows 11 serves as the primary technical reference point for this guide.
Shared vs. Divergent Capabilities
[Universal Architecture]  ---> Keyboard Shortcuts, Run Commands, Terminal Tools (ipconfig, ping, sfc, chkdsk)
[UI & Feature Variance]   ---> Settings GUI Paths, Snap Layout Overlays, Nearby Sharing Protocols, OS Servicing
Code language: CSS (css)
What Remains Identical (100% Compatible)
- Keyboard Shortcuts:
Win+R,Win+V,Ctrl+Shift+Esc, andWin+Shift+Soperate identically on both Windows 10 and 11. - Terminal Diagnostics: Command-line utilities (
ipconfig,ping,systeminfo,sfc /scannow,chkdsk) share the same parameters, output syntax, and administrative requirements. - Legacy Diagnostic Consoles:
msinfo32,dxdiag, andmsconfigfeature unchanged interfaces across both OS versions.
Where Windows 10 Users Will Notice Differences
- GUI Navigation Paths: Windows 11 redesigned the
Settingsapp layout. For example, App Permissions and Security controls are categorized underPrivacy & securityin Windows 11, whereas Windows 10 separates them into distinctPrivacyandUpdate & Securitymenus. - Multitasking & Snap: Windows 10 supports basic side-by-side window snapping, but lacks the hover-activated Snap Layouts menu (
Win+Z) and integrated Snap Groups introduced in Windows 11. - Nearby Sharing Telemetry: While Nearby Sharing exists on Windows 10 (Build 1803+), modern high-speed Wi-Fi peer-to-peer transport options are heavily optimized for Windows 11 hardware configurations.
- Security & Device Isolation: Advanced hardware safeguards like mandatory TPM 2.0, default Virtualization-Based Security (VBS), and Memory Integrity (HVCI) enforcement are native requirements in Windows 11, whereas they vary widely on older Windows 10 hardware.
The Post-EOS (End of Support) Security Context
⚠️ Important Security Context for Windows 10 Systems:
Because standard security updates for Windows 10 ended on October 14, 2025, running Windows 10 without enrolling in Microsoft’s Extended Security Updates (ESU) program presents an escalating security risk.
Unpatched operating systems become increasingly vulnerable to zero-day exploits over time. If you are operating Windows 10, prioritizing Phase 1 Security Controls (Windows Security, Defender, and network firewalls) and implementing a rigid Windows Backup strategy is critical while planning a transition to supported hardware.
Final Checklist: 25 Windows Commands & Settings Worth Knowing
Keep this master checklist as a quick-reference audit for your workstation. Use it to quickly locate the right shortcut, system utility, terminal command, or GUI setting for any administrative or diagnostic task.
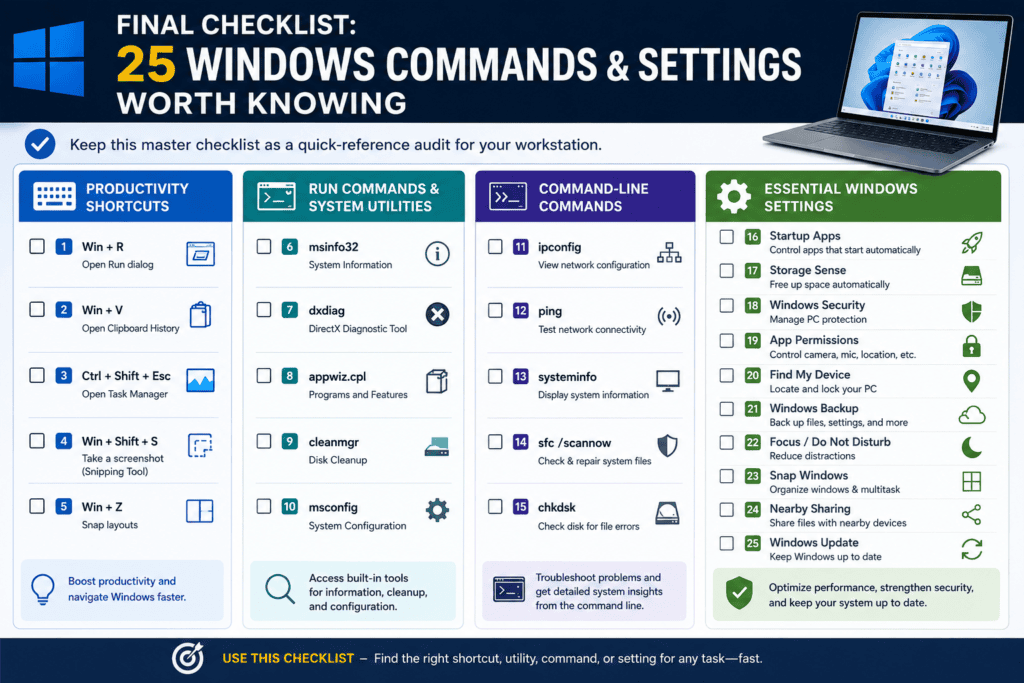
Master Reference Matrix (#1–#25)
| Category | # | Item | Primary Command / Shortcut / Path | Core Operational Purpose |
| Productivity & Quick Access | 1 | Run Dialog | Win + R | Instantly launch built-in Windows applets and tools. |
| 2 | Clipboard History | Win + V | Access historical copy buffer and pin reusable snippets. | |
| 3 | Task Manager | Ctrl + Shift + Esc | Monitor real-time CPU/RAM usage and end frozen tasks. | |
| 4 | Snipping Tool | Win + Shift + S | Capture precise partial or full-screen region screenshots. | |
| 5 | Snap Layouts | Win + Z | Trigger multi-window docking templates for screen organization. | |
| System Utilities & Applets | 6 | System Information | msinfo32 | Inspect detailed hardware specs, BIOS mode, and driver trees. |
| 7 | DirectX Diagnostics | dxdiag | Audit GPU drivers, display features, and audio APIs. | |
| 8 | Programs & Features | appwiz.cpl | Open the classic Control Panel legacy app uninstaller. | |
| 9 | Disk Cleanup | cleanmgr | Purge legacy system temp files, logs, and Windows.old. | |
| 10 | System Configuration | msconfig | Perform diagnostic clean boots and inspect boot parameters. | |
| Command-Line Diagnostics | 11 | Network Configuration | ipconfig | Display IPv4/IPv6 addresses, subnet masks, and Gateways. |
| 12 | Network Connectivity | ping | Test round-trip latency and isolate connection drops. | |
| 13 | System Audit | systeminfo | Generate plain-text OS build details, hotfixes, and RAM profiles. | |
| 14 | System File Checker | sfc /scannow | Scan and repair corrupted protected System32 binaries. | |
| 15 | Check Disk | chkdsk | Audit volume metadata and repair logical file-system errors. | |
| Essential Windows Settings | 16 | Startup Apps | Task Manager → Startup | Disable non-essential startup programs to trim boot latency. |
| 17 | Storage Sense | Settings → System → Storage | Automate temporary file cleanup and cloud hydration. | |
| 18 | Windows Security | Start → Windows Security | Central dashboard for Defender, Firewall, and TPM health. | |
| 19 | App Permissions | Settings → Privacy & security | Revoke camera, microphone, and location access for apps. | |
| 20 | Find My Device | Settings → Privacy & security | Enable remote location tracking and lock on portable laptops. | |
| 21 | Windows Backup | Start → Windows Backup | Sync user directories, preferences, and Wi-Fi profiles to the cloud. | |
| 22 | Focus / Do Not Disturb | Settings → System → Focus | Enforce timed work blocks and silence notification banners. | |
| 23 | Snap Windows | Settings → System → Multitasking | Tailor underlying window snapping rules and Snap Groups. | |
| 24 | Nearby Sharing | Settings → System → Nearby sharing | Transfer files peer-to-peer via local Wi-Fi and Bluetooth. | |
| 25 | Windows Update | Settings → Windows Update | Manage OS security patches, active hours, and driver fixes. |
The Executive Summary: System Administration Mindset
Bookmark, Don’t Memorize: You do not need to memorize every terminal syntax string or menu hierarchy. Memorize the diagnostic framework: identify the layer, choose a read-only query first, and apply targeted administrative changes only when the problem is understood.
What are the most useful Windows commands for beginners?
For beginners, the most high-leverage terminal tools are read-only diagnostic utilities:
ipconfig — Displays active IP assignments and router default gateway addresses.ping — Tests network reachability, packet loss, and latency.systeminfo — Generates a comprehensive plain-text audit of OS build details and hardware specs.sfc /scannow — Checks and repairs corrupted protected Windows system files when errors occur.
Additionally, essential productivity shortcuts include Win + R (Run Dialog), Win + V (Clipboard History), Ctrl + Shift + Esc (Task Manager), and Win + Shift + S (Snipping Tool).
Do Windows commands work on both desktop PCs and laptops?
Yes. Standard Windows terminal commands and core system settings behave identically across desktops, laptops, and all-in-one PCs because they are native functions of the Windows operating system software layer.
Note: Certain hardware-dependent features—such as Find My Device (requires location services/Wi-Fi telemetry), battery report tools (powercfg /batteryreport), or mobile display toggles—primarily apply to portable laptops.
Do I need administrator privileges to run Windows commands?
Not for every command.
Standard User Rights: Safe, read-only diagnostic commands like ipconfig, ping, systeminfo, dxdiag, and msinfo32 execute without elevated permissions.
Administrator Rights Required: Commands that inspect or modify core system binaries, volume structures, network adapters, or security policies—such as sfc /scannow, chkdsk /f, netsh, or DISM—require launching Terminal or Command Prompt as an Administrator.
Can Windows commands make a slow PC faster?
There is no single “magic” command that instantly speeds up a computer.
System slowdowns stem from diverse root causes: heavy startup programs, low storage headroom, insufficient RAM, runaway background tasks, thermal throttling, or failing storage hardware.
Diagnostic tools like Task Manager and Startup Apps help identify performance bottlenecks so you can resolve them intentionally. Executing low-level repair tools like sfc or chkdsk on a healthy system will not increase performance.
Are these Windows commands safe to use?
Read-only diagnostic queries are completely safe, but low-level repair scripts require purpose and care.
Low-Risk: Running ipconfig, ping, systeminfo, msinfo32, or reviewing Windows Security has zero negative impact on your machine.
Moderate to High-Risk: Executing repair options (chkdsk /f, editing registry keys, stopping system services, or executing batch scripts) modifies OS structures. Never paste unverified code into an elevated terminal prompt without understanding its underlying function.
In Conclusion
Windows includes significantly more built-in productivity, security, and troubleshooting functionality than most users ever tap into. Mastering this operating system isn’t about memorizing complex syntax—it is about knowing which tool to leverage for a specific operational outcome.
Core Takeaways from the Guide
[Everyday Shortcuts]   ---> Immediate execution, zero system risk, high productivity returns.
[Read-Only Queries]    ---> Accurate diagnostic telemetry without modifying OS configuration.
[Administrative Tools] ---> High-authority repairs reserved strictly for isolated, verified errors.
[GUI Settings]         ---> Proactive security, background maintenance, and workflow optimization.
Code language: CSS (css)- Daily Productivity Relies on Simple Shortcuts: Everyday tools like
Win+V(Clipboard History),Ctrl+Shift+Esc(Task Manager), andWin+Shift+S(Snipping Tool) yield continuous, high-leverage efficiency gains with zero operational risk. - Diagnostics Precede Action: Utilities like
ipconfig,ping,msinfo32, andsysteminfodeliver precise diagnostic visibility into hardware, network status, and OS build states without altering system configuration. - Administrative Tools Are Targeted Interventions: Commands like
sfc /scannow,chkdsk, andmsconfigare purpose-built repair utilities. They should never be treated as generic “performance hacks” or routine optimization scripts. - Proactive Maintenance Prevents Critical Failure: Settings like Windows Security, Windows Update, Startup Apps, Storage Sense, and Windows Backup form your primary defense against malware, drive failures, performance decay, and unauthorized hardware access.
- Ergonomics & Focus Drive Deep Work: Windows features such as Focus Sessions, Do Not Disturb, and Snap Layouts give you direct authority over your workspace environment, minimizing notification noise and context-switching friction.
The Practical Rule of Master-Level Windows Usage
Summary: Learn low-risk productivity shortcuts and read-only diagnostic tools first. Deploy high-authority administrative commands only when you clearly understand the root problem and the exact scope of what the command will alter.
This structured approach gives you complete control over your Windows PC while keeping your system fast, secure, and stable.