11 Best Screen Recording Tools for Work and Tutorials
Selecting the right screen recording tool isn’t about finding the single “best” software on the market. Instead, it’s about identifying which tool best aligns with your specific creative goals. Your ideal solution depends entirely on whether you’re creating a quick workplace explainer, a polished software tutorial, an online lesson, or a professional-grade training video.
For most users, the choice for a primary screen recording tool comes down to three standout options: Loom is unparalleled for fast sharing, OBS Studio is the definitive choice for free yet advanced recording, and Camtasia sets the standard for creating polished tutorials with built-in, robust editing capabilities.
To help you make an informed decision, this guide provides an in-depth, comparative analysis of 11 different screen recording tool options. We designed this resource to be valuable for a wide spectrum of users, including students, educators, content creators, remote workers, freelancers, business teams, and software trainers.
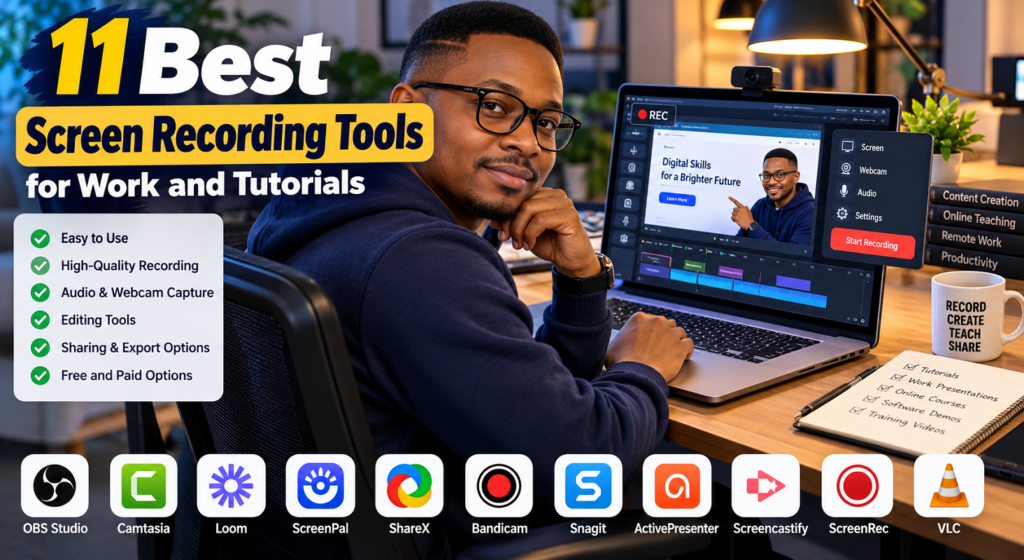
Our evaluation of each screen recording tool focuses on several critical performance factors:
- Ease of Use
- Recording Quality
- Audio and Webcam Capture Capabilities
- Editing Features
- Sharing and Export Options
- Compatibility (Across Devices and Operating Systems)
- Overall Cost
Key Criteria for Selecting the Best Screen Recording Tool
A high-performing screen recording tool should integrate smoothly with your existing workflow rather than simply overwhelming you with features. Selecting the right software requires balancing ease of use with the exact technical specifications your project demands.
Evaluate these essential factors before deciding on a screen recording tool:
- Platform Compatibility: Verify that the screen recording tool fully supports your operating system (Windows, macOS, Linux), preferred web browsers, or mobile devices.
- Recording Quality & Resolution: Select a screen recording tool that captures at least 1080p resolution (and 60fps where relevant) to ensure crisp clarity on desktop screens, mobile devices, or classroom projectors.
- Audio Capture Flexibility: Ensure your chosen screen recording tool supports dual-channel or multi-track audio capture for both system sound and microphone input.
- Webcam Overlay Options: Check for picture-in-picture capabilities if your workflow includes instructional videos, asynchronous team updates, or personal video presentations.
- Built-in Editing Features: Determine whether you need basic trimming or advanced editing features like AI transcription, automatic zooms, custom branding, multi-track audio control, and screen annotations.
- Sharing and Cloud Storage: Decide if you require instant cloud-share link generation, password protection, team workspace access, or direct local MP4 exports.
- Privacy & Data Security: Confirm that your screen recording tool includes features like region selection, automatic blur, or sensitive data redaction to avoid capturing confidential client data, passwords, or personal credentials.
- Accessibility Features: Look for a screen recording tool that generates automated closed captions, AI summaries, or transcripts to make content accessible to all viewers.
Key Takeaway
A common pitfall is over-engineering your setup by picking a complex screen recording tool like OBS Studio when a lightweight, browser-based screen recording tool would save hours. Conversely, selecting an entry-level screen recording tool for a multi-module training course can significantly complicate post-production later. Choose the tool that best balances your technical needs with production efficiency.
Quick Comparison Matrix: Top Screen Recording Tool Options
Below is a brief section description designed to introduce the comparison matrix. It provides high-signal context for readers and explicitly incorporates the focus keyword screen recording tool.
To help you evaluate your options at a glance, this high-level comparison matrix breaks down the key specifications of each screen recording tool. Use this side-by-side breakdown to compare core use cases, platform availability, pricing tiers, editing power, and standout features before selecting the ideal screen recording tool for your specific workflow.
| Screen Recording Tool | Best For | Supported Platforms | Free Option Available? | Editing Capabilities | Standout Strength |
| OBS Studio | Advanced recording and live streaming | Windows, macOS, Linux | Yes (Open Source) | No built-in video editor | Highly configurable recording & scene control |
| Loom | Quick workplace updates & async communication | macOS, Windows, iOS, Android, Browser | Yes (Freemium) | Basic to intermediate (Trimming, AI summary, stitching) | Instant cloud sharing links |
| Camtasia | Professional tutorials & structured training | Windows, macOS | Free trial (includes watermark) | Advanced multi-track video editing | Built-in recorder and full-featured editor in one app |
| ScreenPal | Educational content & accessible video creation | Windows, macOS, iOS, Android, Chromebook | Yes | Yes (Annotations, captions, timeline tools) | Built-in captions, interactive quizzes, and AI tools |
| Snagit | Screenshots, visual docs, & quick walkthroughs | Windows, macOS | Free trial available | Basic image & video trimming tools | Step-by-step visual documentation & screen capture |
| ScreenFlow | High-production Mac tutorial production | macOS | Free trial (includes watermark) | Advanced timeline video editor | Powerful Mac-native editing & multi-track workflow |
| ShareX | Free Windows power captures & animated GIFs | Windows | Yes (Open Source) | Image editing & light annotation tools | Extensive automation & workflow customization |
| CleanShot X | Polished Mac product demos & video captures | macOS | No (Paid software) | Yes (Trimming, annotations, highlighting) | Native Mac UI with slick auto-highlighting & overlay tools |
| Vimeo Record | Simple browser-based recording & team sharing | Browser (Chrome extension) | Yes | Basic browser-based trimming | Frictionless sharing via the Vimeo video host ecosystem |
| Xbox Game Bar | Instant, zero-setup Windows screen recording | Windows | Yes (Built into Windows) | No built-in video editor | Native OS utility requiring no extra installation |
| QuickTime Player | Basic, lightweight Mac screen capture | macOS | Yes (Built into macOS) | Basic video trimming | Simple, lightweight, and pre-installed on Mac |
OBS Studio: Best Free Screen Recording Tool for Power Users
When evaluated as a free screen recording tool, OBS Studio stands out as the most capable and customizable solution available. Built as free, open-source software, it provides complete control over scene layout, video encoding, hardware acceleration, and audio source routing. Because it carries no license fees, subscription tiers, or video watermarks, OBS Studio serves as an industry-standard screen recording tool for streamers, software developers, technical trainers, and content creators across Windows, macOS, and Linux.
Core Features & Strengths of OBS Studio
- 100% Free & Open-Source: Full access to every feature without hidden paywalls, export limits, or watermarks.
- Multi-Platform Compatibility: Native support across Windows 10/11, macOS (11.0+), and Linux environments.
- Unlimited Scenes & Custom Canvas Routing: Combine multiple display captures, individual window captures, browser inputs, webcams, and capture cards into seamless custom layouts.
- Advanced Audio Mixing & Filters: Per-source audio management with built-in processing filters like noise suppression, noise gates, compressor limits, and gain adjustments.
- Extensible Architecture: Robust plugin ecosystem supporting custom transitions, hotkey automation, Stream Deck integration, and advanced scene switching.
Primary Limitations of This Screen Recording Tool
- Steep Learning Curve: The dense, modular user interface can feel overwhelming to beginners compared to simple browser extensions.
- No Native Video Editor: OBS Studio functions purely as a capture utility; post-production trimming, annotations, or cutting require third-party video editing software.
- Technical Setup Required: Optimal performance requires manual configuration of encoders (NVENC, AMF, or x264), bitrates, frame rates, and canvas resolutions.
Ideal Use Case
Choose OBS Studio if you need an advanced, cost-free screen recording tool and are comfortable configuring technical settings to achieve maximum control over your recording setup.
Loom: Best Screen Recording Tool for Asynchronous Communication
Loom is widely considered the top screen recording tool for fast-paced work environments where quick, clear explanation is preferred over extra meetings. Designed around a cloud-first, link-driven workflow, this screen recording tool allows users to simultaneously record their desktop, webcam, and microphone, generating a shareable video link the second recording stops.
Core Features & Strengths of Loom
- Frictionless Shareability: Generates an instantly shareable web link upon recording completion, eliminating the need to render, export, or manually upload video files.
- Webcam Bubble & Layout Controls: Overlay a customizable circular webcam bubble onto screen captures to add personal engagement to asynchronous updates.
- Cloud Infrastructure & Engagement: Includes viewer analytics, time-stamped emoji reactions, video comments, and automated AI closed captions/transcripts.
- Deep Ecosystem Integrations: Embeds directly into popular productivity platforms including Slack, Jira, GitHub, Gmail, Notion, and Zendesk.
- Cross-Platform Availability: Functions seamlessly across macOS, Windows, iOS, Android, and via a lightweight Chrome browser extension.
Primary Limitations of This Screen Recording Tool
- Free Plan Restrictions: The free Starter plan caps video length at 5 minutes, limits storage to 25 videos per user, restricts resolution to 720p, and prevents direct MP4 downloads.
- Lightweight Editing Tools: Post-production is primarily limited to basic trimming, stitching, and transcript-based editing—making it less suitable for complex multi-track instructional video courses.
- Cloud & Data Residency Constraints: Reliance on external cloud hosting may violate strict compliance, offline-only, or high-security enterprise policies.
Ideal Use Case
Choose Loom if: You need an efficient, asynchronous screen recording tool to send brief video walk-throughs, answer client inquiries, or eliminate unnecessary status meetings.
Camtasia: Best Screen Recording Tool for Polished Tutorials and Training
Camtasia is an industry-leading screen recording tool designed for creators who need an all-in-one suite combining high-resolution screen capture with an advanced post-production editor. Rather than forcing users to export recordings to secondary editing software, this screen recording tool captures the display, webcam, microphone, and system audio as separate timeline tracks for precise post-recording adjustments.
Core Features & Strengths of Camtasia
- Multi-Track Layered Recording: Records video display, camera input, microphone audio, and system sounds on independent tracks for granular audio balancing and scene editing.
- AI Text-Based Editing & Audiate Integration: Transcribes recorded audio into text automatically, allowing you to edit video content by deleting text, removing filler words, or generating automatic captions.
- Built-in Instructional Design Assets: Offers customizable callouts, smooth pan-and-zoom animations, cursor tracking effects, dynamic transitions, and built-in royalty-free motion backgrounds.
- Cross-Platform Workflows: Supports both Windows and macOS with shared project files across environments.
- Free Trial Access: Features a fully functional free trial with full access to editing features, outputting videos with a watermark until upgraded.
Primary Limitations of This Screen Recording Tool
- Higher Cost Tier: Represents a significant financial investment compared to basic browser plugins or free open-source screen recording tools.
- Demanding System Specs: Requires relatively robust computing power to handle multi-track rendering (minimum 8GB RAM, with 16GB+ recommended for smooth 4K editing).
- Overpowered for Simple Use Cases: Offers more complex timeline management than needed for simple, single-take video memos or fast async link-sharing.
Ideal Use Case
Choose Camtasia if: You regularly produce structured video courses, onboarding documentation, software walkthroughs, or training modules and want a comprehensive screen recording tool that handles capture and professional editing in a single platform.
ScreenPal: Best Screen Recording Tool for Educators and Interactive Lessons
ScreenPal (formerly Screencast-O-Matic) is widely recognized as the premier screen recording tool for K-12 schools, higher education, and interactive learning environments. Designed with built-in accessibility compliance, multi-device support, and classroom engagement features, this screen recording tool allows educators, students, and instructional design teams to handle screen capture, editing, hosting, and formative assessment in a single platform.
Core Features & Strengths of ScreenPal
- Universal Cross-Platform Accessibility: Runs natively on Windows, macOS, iOS, Android, and Chromebooks, making it an ideal screen recording tool for BYOD (Bring Your Own Device) and 1:1 school environments.
- AI-Powered Transcripts & Auto-Captioning: Meets digital accessibility guidelines (including WCAG standards) by automatically generating speech-to-text captions, searchable transcripts, chapters, summaries, and multilingual translations.
- Interactive Learning & Formative Assessment: Embed interactive video quizzes, polls, ratings, and call-to-action buttons directly into hosted video timelines to measure student comprehension.
- LMS Integration & Student Video Projects: Integrates smoothly into modern Learning Management Systems (LMS) and Google Classroom, enabling students to submit video assignments and reflections without software downloads.
- Cloud Hosting & Shared Video Libraries: Provides ad-free cloud hosting, searchable team video channels, and embed codes for secure campus-wide content management.
Primary Limitations of This Screen Recording Tool
- Free Plan Constraints: The free tier imposes a 15-minute recording cap per video and lacks full-suite timeline editing features.
- Simpler Timeline Controls: While effective for educational annotation and trimming, it lacks the multi-track depth and advanced canvas controls found in high-end tools like Camtasia or ScreenFlow.
- Compliance & Data Governance: Cloud-based hosting and AI video generation require attention to district privacy guidelines, FERPA/COPPA compliance, and institutional data policies.
Ideal Use Case
Choose ScreenPal if: You need an accessible, budget-conscious screen recording tool tailored for flipped classrooms, student video assignments, and interactive video-based instruction.
Snagit: Best Screen Recording Tool for Visual Documentation and Walkthroughs
When your primary goal is creating clear, step-by-step documentation rather than long-form video courses, Snagit serves as the industry-standard screen recording tool and image capture suite. Developed by TechSmith, Snagit is optimized for turning complex screen interactions into clean, visual how-to guides, technical support materials, and internal knowledge base articles.
Core Features & Strengths of Snagit
- Automated Step Capture: Automatically records user interface clicks and interactions sequentially, turning screen actions into a structured, visual step-by-step guide.
- Scrolling Screen Capture: Easily captures full web pages, long documents, and wide spreadsheets that extend beyond the visible display area.
- Smart Redaction & Blur Tools: Quickly detects and obscures sensitive personal data—such as passwords, credit card details, and email addresses—prior to sharing.
- Lightweight Screen & Webcam Recording: Includes a streamlined screen recording tool module that captures display activity, webcam overlays, microphone input, and system audio for short video walkthroughs.
- TechSmith Ecosystem Integration: Seamlessly transfers captures directly to Camtasia for scenarios that require full timeline video production.
Primary Limitations of This Screen Recording Tool
- Limited Video Editing Suite: Lacks the multi-track video timeline editor, transition effects, and audio mixing capabilities found in dedicated video editing software.
- Secondary Focus on Long-Form Video: Not optimized as a primary screen recording tool for producing hour-long video lectures or detailed video courses.
- Paid Commercial License: Requires a paid software purchase or recurring maintenance fee, which may be unnecessary if your workflow only requires basic OS-level screenshot shortcuts.
Ideal Use Case
Choose Snagit if: You regularly build internal SOPs, customer support documentation, IT walkthroughs, or onboarding guides and need a screen recording tool that excels at fast, clear visual instructions.
ScreenFlow: Best Mac-Native Screen Recording Tool for High-End Tutorials
For macOS users seeking a powerful, professional-grade production workflow without switching to heavy PC editing suites, ScreenFlow stands out as the premier Mac-native screen recording tool. Developed specifically for Apple hardware, it combines high-performance screen capture with a robust multi-track video and audio editor.
Core Features & Strengths of ScreenFlow
- Mac-Optimized Performance: Built natively for macOS, leveraging Apple silicon and Metal rendering for ultra-smooth screen capture and timeline scrubbing.
- iOS Device Integration: Directly records connected iPhones or iPads via USB, making it the ideal screen recording tool for iOS app developers and mobile UI reviewers.
- Simultaneous Multi-Source Capture: Records display screens, multiple cameras, iOS devices, system audio, and microphone inputs all at once.
- Professional Post-Production Suite: Features dynamic text animations, video filters, custom callouts, professional transitions, closed captioning, and multi-track audio control.
- Flexible Export & Publishing: Renders in professional formats like ProRes and MP4, or exports directly to animated GIFs, APNGs, and popular cloud platforms.
Primary Limitations of This Screen Recording Tool
- macOS Lock-In: Completely unavailable for Windows or Linux users, making it a non-starter for cross-platform teams.
- Premium Price Point: With a professional software license, it represents a significant financial investment compared to basic browser extensions or open-source utilities.
- Watermarked Trial: The free trial provides full functional access to features, but exports include a watermark until a license is purchased.
Ideal Use Case
Choose ScreenFlow if: You work in a macOS ecosystem and need a high-end, reliable screen recording tool that handles everything from iOS app demos to polished YouTube video tutorials in one application.
ShareX: Best Free Windows Screen Recording Tool for Captures and GIFs
For Windows users who need absolute control over still captures, automated workflows, and lightweight recordings, ShareX is the definitive open-source screen recording tool. Rather than focusing on heavy video course production, this utility excels at lightning-fast screen captures, region recordings, GIF generation, and automated post-processing tasks.
Core Features & Strengths of ShareX
- 100% Free & Open-Source: Zero ads, zero watermarks, and completely open-source code with active community maintenance.
- Versatile Capture Modes: Supports full-screen, active window, precise region selection, scrolling web pages, and multi-monitor captures.
- Dual Video & GIF Recording: Functions as both a standard screen recording tool and an instant GIF generator for quick software bug reports or UI demonstrations.
- Robust Annotation Suite: Includes built-in image editing tools for adding arrows, step numbers, pixelation, blur effects, text callouts, and data redaction.
- Powerful Automation Engine: Automatically executes custom “after-capture” and “after-upload” tasks, such as copying images to the clipboard, applying watermarks, shortening URLs, or uploading files directly to cloud destinations like Imgur, AWS, or Google Drive.
Primary Limitations of This Screen Recording Tool
- Windows Ecosystem Only: Strictly available for Windows operating systems; Mac and Linux users cannot run the software.
- Steep, Technical UI: The deep menu structure and abundance of configuration options can overwhelm casual users looking for a simple “one-click” recorder.
- No Advanced Video Editing: Lacks a timeline-based video editor, making it unsuitable for multi-track tutorial production or long-form video courses.
Ideal Use Case
Choose ShareX if: You use Windows and want a lightweight, highly automated screen recording tool that specializes in quick captures, custom workflows, and instant GIF creation without any software costs.
CleanShot X: Best Mac-Native Screen Recording Tool for Polished Product Demos
For macOS users who demand a sleek, modern, and lightning-fast capture experience, CleanShot X is the premier screen recording tool for professional product demonstrations. Built from the ground up for Apple hardware, it replaces clunky native capture shortcuts with a floating overlay workflow designed for high-end visual communication.
Core Features & Strengths of CleanShot X
- Sleek Mac-Native Interface: Operates via a minimalist floating overlay workflow that instantly captures screens, records video, or generates GIFs without cluttering your desktop.
- Professional Presentation Enhancements: Automatically highlights mouse clicks, displays keyboard keystrokes in real time, and supports customizable webcam bubbles for engaging software demos.
- Built-In Video Editing & Smart Zooms: Includes streamlined tools to trim video files, apply smooth pan-and-zoom motion effects, and export instantly to high-quality MP4 or animated GIF formats.
- Advanced Annotation & Redaction: Features robust image markup tools, including pixelation, blur filters, and text callouts to obscure sensitive data before sharing.
- CleanShot Cloud Integration: Generates instant shareable web links with custom branding, team domains, password protection, and visitor analytics.
Primary Limitations of This Screen Recording Tool
- macOS Exclusive: Completely unavailable for Windows or Linux users, restricting its use to Apple ecosystems.
- Paid Software Model: Operates on a paid license/subscription model with no free tier available for casual users.
- Overkill for Basic Needs: May offer more advanced interface features than necessary if you only require occasional, simple video captures.
Ideal Use Case
Choose CleanShot X if: You work on a Mac and frequently produce polished product demos, user interface walkthroughs, or client feedback videos that require a sleek, professional aesthetic.
Vimeo Record: Best Browser-Based Screen Recording Tool for Video Hosting
Vimeo Record is an accessible, browser-based screen recording tool designed for users who want to capture display content and webcam video without installing complex desktop applications. Delivered primarily as a Chrome browser extension and online Record Studio, this screen recording tool connects screen capture directly into the Vimeo video-hosting ecosystem, enabling instant cloud upload, custom privacy controls, and ad-free player embedding.
Core Features & Strengths of Vimeo Record
- Frictionless Browser Workflow: Runs directly within Google Chrome or other web browsers without requiring heavy local software installation.
- Vimeo Hosting Ecosystem: Automatically saves recordings to your secure Vimeo video library for ad-free hosting, password protection, and custom player embedding.
- Built-In AI Scripting & Teleprompter: Includes an integrated AI script generator and customizable on-screen teleprompter to keep speakers on message during capture.
- Asynchronous Feedback Tools: Supports time-stamped comments, viewer analytics, and team folder access for asynchronous team reviews.
- Text-Based Editing & AI Trimming: Allows quick post-capture edits via transcript manipulation and basic video trimming directly in the browser.
Primary Limitations of This Screen Recording Tool
- Free Tier Caps: Free and Basic plans limit single-recording durations to 30 minutes (compared to 120 minutes on paid tiers) and may restrict advanced AI translation or form lead captures.
- Browser & Connectivity Dependent: Requires an active internet connection and web browser environment to leverage the full cloud recording workflow.
- Limited Timeline Controls: Lacks the multi-track layers, heavy audio filters, and timeline controls needed for complex tutorial editing.
Ideal Use Case
Choose Vimeo Record if: Your team already relies on Vimeo for video hosting and you need a fast, browser-based screen recording tool to capture async status updates, client walk-throughs, or simple video tutorials.
Xbox Game Bar: Best Built-In Screen Recording Tool for Windows
When you need an immediate, zero-install screen recording tool on Windows 10 or 11, Xbox Game Bar provides native, OS-level screen capture. Designed originally for gaming highlights, this pre-installed utility functions as a fast, convenient screen recording tool for recording individual application windows, software bug reports, and quick app walkthroughs.
Core Features & Strengths of Xbox Game Bar
- Pre-Installed Utility: Comes built directly into Windows 10 and 11, requiring no extra downloads, license fees, or third-party account sign-ups.
- Instant Keyboard Activation: Triggers instantly using system-wide shortcuts (
Win + Gto open overlay;Win + Alt + Rto start/stop recording). - Retroactive Recording (“Record That”): Captures past screen activity (e.g., the last 30 seconds to 5 minutes) on demand, ensuring you don’t miss unexpected software bugs or events.
- System & Microphone Audio Controls: Toggles microphone audio independently alongside native system sound capture.
- Standardized Local Output: Saves files automatically as standard MP4 format in your local
Videos/Capturesdirectory for easy playback or external editing.
Primary Limitations of This Screen Recording Tool
- Single-Window Capture Only: Cannot capture the Windows Desktop, File Explorer windows, or switch dynamically between multiple application windows during a single capture session.
- No Integrated Video Editor: Lacks basic post-production tools for trimming, annotating, panning, zooming, or adding callouts.
- Lack of Webcam Overlay & Annotations: Does not support picture-in-picture webcam bubbles or live screen drawing tools out of the box.
Ideal Use Case
Choose Xbox Game Bar if: You need a completely free, instant screen recording tool to record a single application window on Windows without installing additional software.
QuickTime Player: Best Built-In Screen Recording Tool for Mac
For macOS users needing a simple, zero-cost screen recording tool without third-party downloads, QuickTime Player provides native, system-level capture. Included on every Mac, this built-in application allows you to record your entire screen or a selected area, capture microphone audio, and make basic video edits.
Core Features & Strengths of QuickTime Player
- Pre-Installed Utility: Comes built directly into macOS, requiring no software purchases, subscriptions, or account setup.
- Flexible Selection: Offers simple controls to record the full display screen or drag a box over a specific region or window.
- Voiceover & Microphone Input: Supports internal or external USB microphone capture to record voiceover commentary alongside visual recordings.
- Basic Timeline Trimming: Includes built-in clip editing tools to quickly trim unwanted video footage from the start or end of your file.
- High-Quality MOV Output: Saves video captures locally in Apple-native MOV format for direct viewing or further editing in software like iMovie.
Primary Limitations of This Screen Recording Tool
- No Direct System Audio Capture: Captures microphone voiceover by default, but requires virtual audio routing tools (such as BlackHole) to record internal system audio.
- Minimal Editing Capabilities: Lacks advanced editing features like multi-track audio control, mouse click highlights, annotations, or dynamic zoom effects.
- No Webcam Overlay: Does not support floating webcam bubbles or picture-in-picture modes out of the box during screen recording.
Ideal Use Case
Choose QuickTime Player if: You use a Mac and need an immediate, lightweight screen recording tool to send a quick walkthrough or make a basic recording without learning complex software.
Strategic Decision Framework: Selecting the Right Screen Recording Tool
Navigating software choices depends heavily on your specific output requirements, hardware environment, and workflow complexity. Use this decision framework to quickly identify the precise screen recording tool that matches your production goals:
Primary Decision Matrix
- For Free, Advanced Control: Choose OBS Studio if you require granular scene mixing, custom audio routing, high frame rates, and unlimited multi-source setups without software licensing costs.
- For Asynchronous Work & Quick Shares: Choose Loom if your primary goal is sending rapid video updates, explaining code/documents, or replacing status meetings via instant shareable cloud links.
- For Polished Software Tutorials & Training: Choose Camtasia (Windows/Mac) or ScreenFlow (Mac) if you produce multi-track instructional courses, onboarding modules, or product demos requiring heavy timeline editing, zoom effects, and callouts.
- For Interactive Education & Captions: Choose ScreenPal if you need an accessible screen recording tool featuring automated captions, interactive quizzes, LMS integration, and Chromebook/mobile compatibility.
- For Visual SOPs & Step-by-step Documentation: Choose Snagit when you need click-by-click screenshots, annotated walkthroughs, scrolling window captures, and automated process guides rather than full-length videos.
- For Free Windows Captures & Automation: Choose ShareX if you operate on Windows and require a lightweight, open-source screen recording tool for fast screenshots, custom image annotations, automated cloud uploads, and quick GIF creation.
- For High-End Mac Product Demos: Choose CleanShot X if you work on macOS and need a sleek, floating-overlay workflow with live keystroke overlays, cursor tracking, smart pan-and-zoom, and instantaneous cloud link sharing.
- For Frictionless Browser & Vimeo Hosting: Choose Vimeo Record if you prefer a browser extension that records instantly to an existing Vimeo library with custom privacy settings, player embedding, and time-stamped video comments.
- For Zero-Install OS Utilities: Choose Xbox Game Bar (Windows) or QuickTime Player (Mac) when you need an immediate, zero-cost screen recording tool to capture a basic screen task without downloading third-party applications.
Recommended Progression Path for Creators
  [ Beginners / First-Time Creators ]
                 │
                 ├──► Quick Asynchronous Updates ──► Loom / ScreenPal
                 │
                 └──► Simple Single-Window Capture ──► Xbox Game Bar / QuickTime
                               │
                               ▼
  [ Recurring Courses & Advanced Production ]
                 │
                 ├──► All-in-One Timeline Editing ──► Camtasia / ScreenFlow
                 │
                 └──► Advanced Hardware & Scene Control ──► OBS Studio (+ External Editor)
- Phase 1 (Getting Started): For beginners producing a first software walkthrough or short lesson, start with a low-friction screen recording tool like Loom or ScreenPal. These platforms minimize technical setup and handle rendering automatically.
- Phase 2 (Scaling Content Quality): If your tutorials expand into a multi-module course or require complex post-production editing (such as cutting out mistakes, adding zooms, or layering graphics), transition to a comprehensive screen recording tool like Camtasia or ScreenFlow.
- Phase 3 (Maximum Control & Cost Efficiency): If budget is your primary constraint but you demand complete control over bitrates, multi-cam setups, display capture bounds, and per-source audio filters, build your stack around OBS Studio combined with a free or low-cost non-linear video editor (such as DaVinci Resolve or CapCut).
Practical 8-Step Screen Recording Workflow
Producing a professional video requires more than just hitting record. Use this step-by-step workflow to streamline your production process from preparation to final sharing:
- Define the Outcome: Write a single, clear sentence describing exactly what the viewer should understand or be able to do immediately after watching your video.
- Prepare the Screen: Declutter your workspace. Close unrelated browser tabs, turn off desktop notifications, log into a clean demo account, and ensure no confidential information, passwords, or personal data are visible.
- Plan Your Steps: Create a concise outline or bulleted agenda rather than reading from a rigid, word-for-word script to keep your delivery natural.
- Test Your Audio First: Record a quick 10-second test clip, listen back through headphones, and adjust your microphone gain or eliminate background noise before capturing the full session.
- Record in Manageable Sections: Break your tutorial or demonstration into logical segments. Recording in short sections makes stumbling over words easier to fix than re-recording one long continuous take.
- Edit for Clarity & Accessibility: Trim out mistakes, dead air, and filler words. Apply zooms, callouts, or annotations only where they highlight key points, and ensure automated captions are enabled for accessibility.
- Export Appropriately: Export your final video as an MP4 file for universal playback compatibility. Reserve animated GIFs exclusively for very short, silent visual loops.
- Share Securely: Double-check your distribution settings. Verify link permissions, review viewer access restrictions, set passwords if necessary, and decide whether viewers should be allowed to download the file.
Critical Pitfalls to Avoid When Using a Screen Recording Tool
Even experienced creators can compromise video quality, viewer engagement, and data security by overlooking essential production details. Avoid these common mistakes when using any screen recording tool:
- Exposing Confidential Data: Capturing passwords, API keys, customer PII, internal URLs, or personal notifications during recording creates severe security risks. Always use clean demo environments or apply solid redaction/blur tools prior to publishing.
- Overusing Webcam Overlays: Including a talking-head webcam bubble in every video can distract from screen action. Only enable your webcam when personal rapport, direct interaction, or visual presence explicitly enhances comprehension.
- Recording at Excessive Resolutions Without Planning: Capturing full 4K footage without evaluating export settings leads to massive file sizes, slow upload times, and playback buffering issues for viewers on limited bandwidth.
- Neglecting Captions and Transcripts: Skipping automated captions reduces video accessibility for hearing-impaired viewers and prevents search engines and internal tools from indexing video content.
- Choosing Software Based Solely on Price: Selecting a screen recording tool purely because it is free can backfire if it lacks required export formats (like MP4), imposes restrictive watermarks, or lacks basic timeline editing features.
- Outgrowing Free Tiers Without a Scaling Plan: Relying indefinitely on a free software plan often leads to sudden workflow bottlenecks—such as hard video duration caps, cloud storage limits, or restricted team sharing capabilities—as your content library grows.
In Conclusion
Ultimately, the best screen recording tool is the one that directly aligns with your specific production goals, operating platform, editing requirements, and distribution workflow.
- For Instant Communication: Loom excels at rapid, link-driven asynchronous updates.
- For Advanced Free Control: OBS Studio remains the undisputed open-source powerhouse for complete multi-source configuration.
- For Polished Instructional Content: Camtasia (Windows/Mac) and ScreenFlow (Mac) deliver comprehensive, all-in-one recording and multi-track editing suites.
- For Educational Workflows: ScreenPal provides accessible, interactive learning features and automated captioning.
- For Visual Documentation: Snagit leads the industry in step-by-step guides, scrolling screenshots, and visual SOPs.
Next Steps: Test and Validate Your Setup
Before committing to a paid plan or locking into a single production ecosystem, follow this practical evaluation method:
- Identify Your Primary Use Case: Determine whether your main output consists of quick async links, structured courses, visual SOPs, or raw display captures.
- Shortlist Two Tools: Select two top options from the comparison framework that support your operating system and budget.
- Run a Side-by-Side Test: Record the same two-minute demonstration in both applications.
- Evaluate Output Quality: Compare microphone audio clarity, timeline editing responsiveness, export format options (such as MP4 rendering times), and cloud sharing ease.
Testing both setups firsthand ensures you select a screen recording tool that integrates seamlessly into your everyday workflow and scales effectively alongside your visual content strategy.